By connecting a webpage, your agent can directly reference and learn from the content of online resources like documentation, blogs, FAQs, or changelogs — ensuring answers stay accurate and updated. This guide walks through how to add a webpage as a data source, configure Auto-Sync schedules, and monitor updates with Sync History.
Step-by-Step Guide
Open a Datastore and navigate to Data Sources
Select the Datastore where you want to add external knowledge.
Inside, go to the Data Sources tab. Here you’ll see all linked sources that feed information into your Datastore.Click Add new data source to start adding content.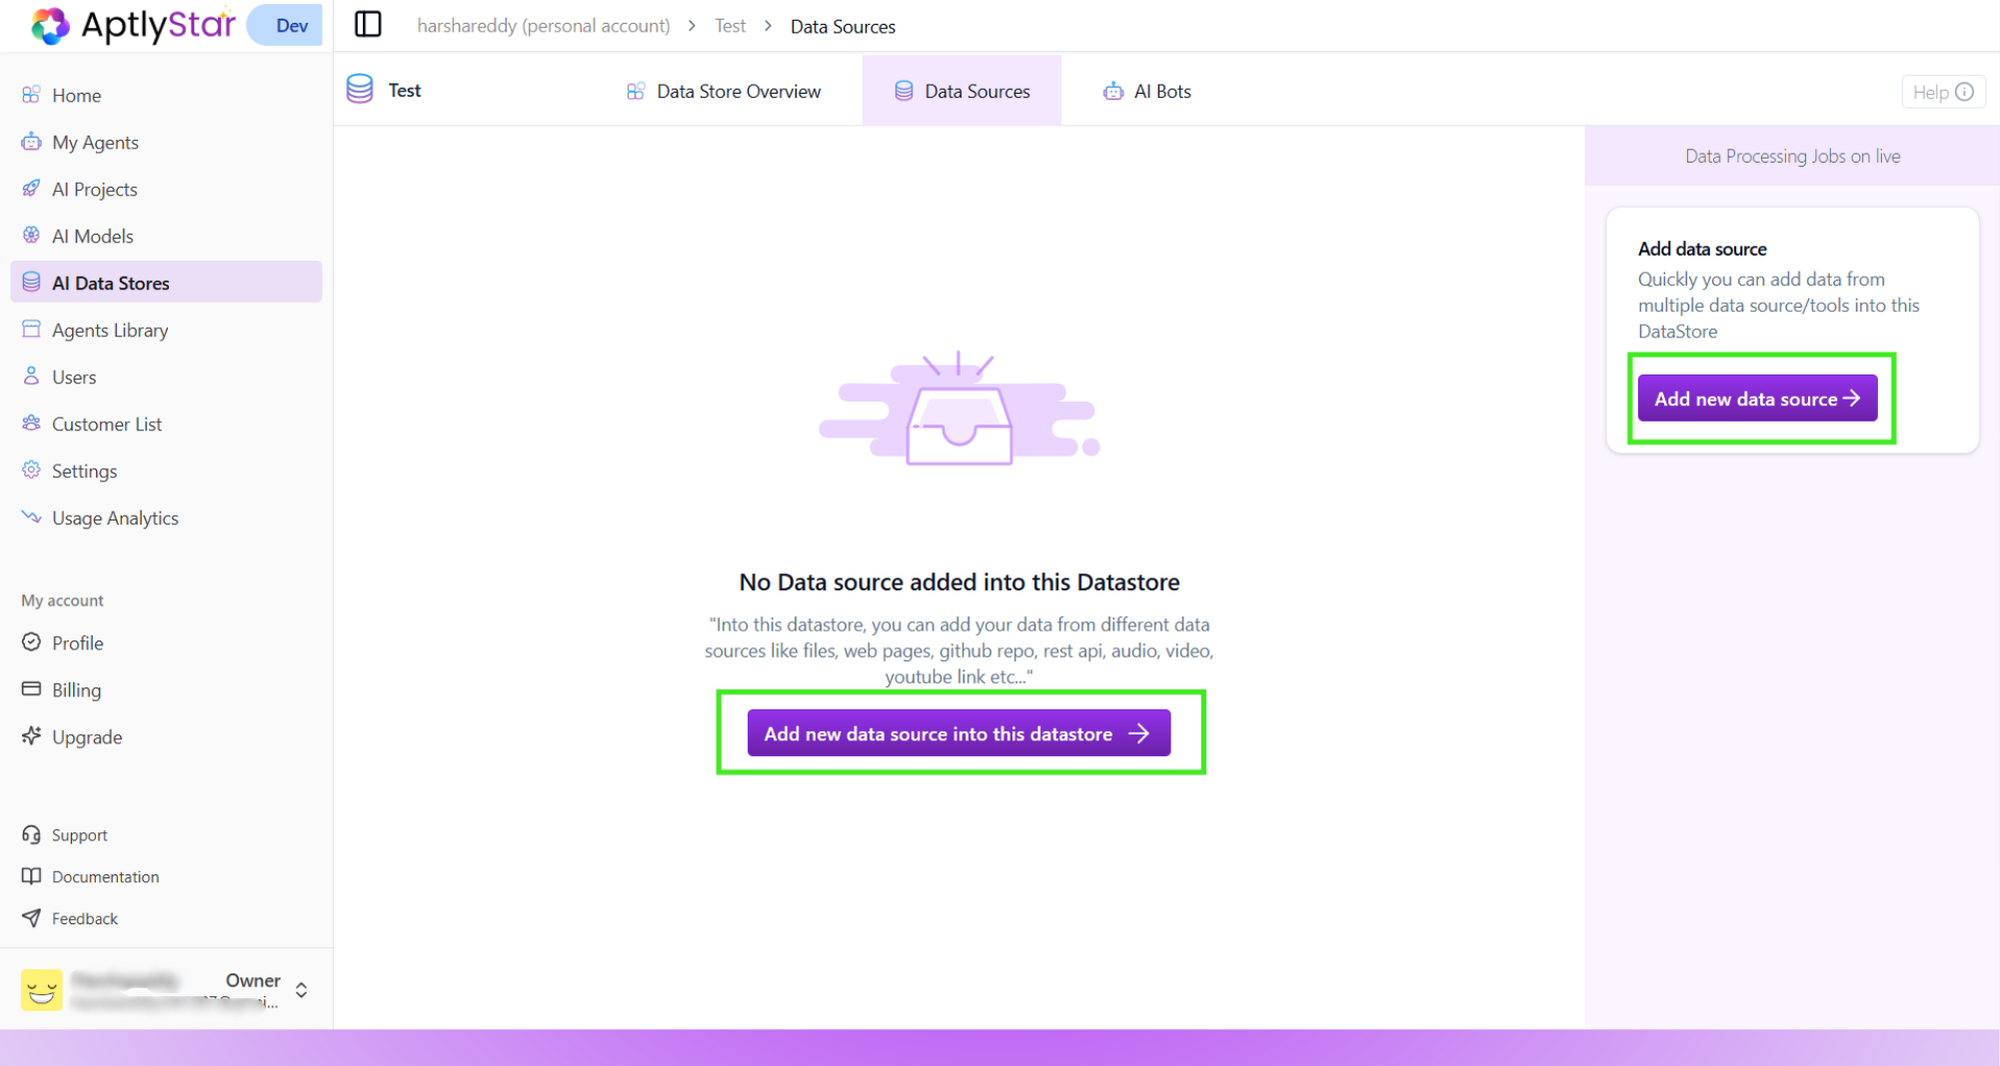
Inside, go to the Data Sources tab. Here you’ll see all linked sources that feed information into your Datastore.Click Add new data source to start adding content.
Choose Webpage as the data source type
The system supports multiple types of sources (Files, Text, GitHub, REST API, etc.).Select Webpage, paste the target URL, and click Create.
This will crawl the page content and add it into the Datastore.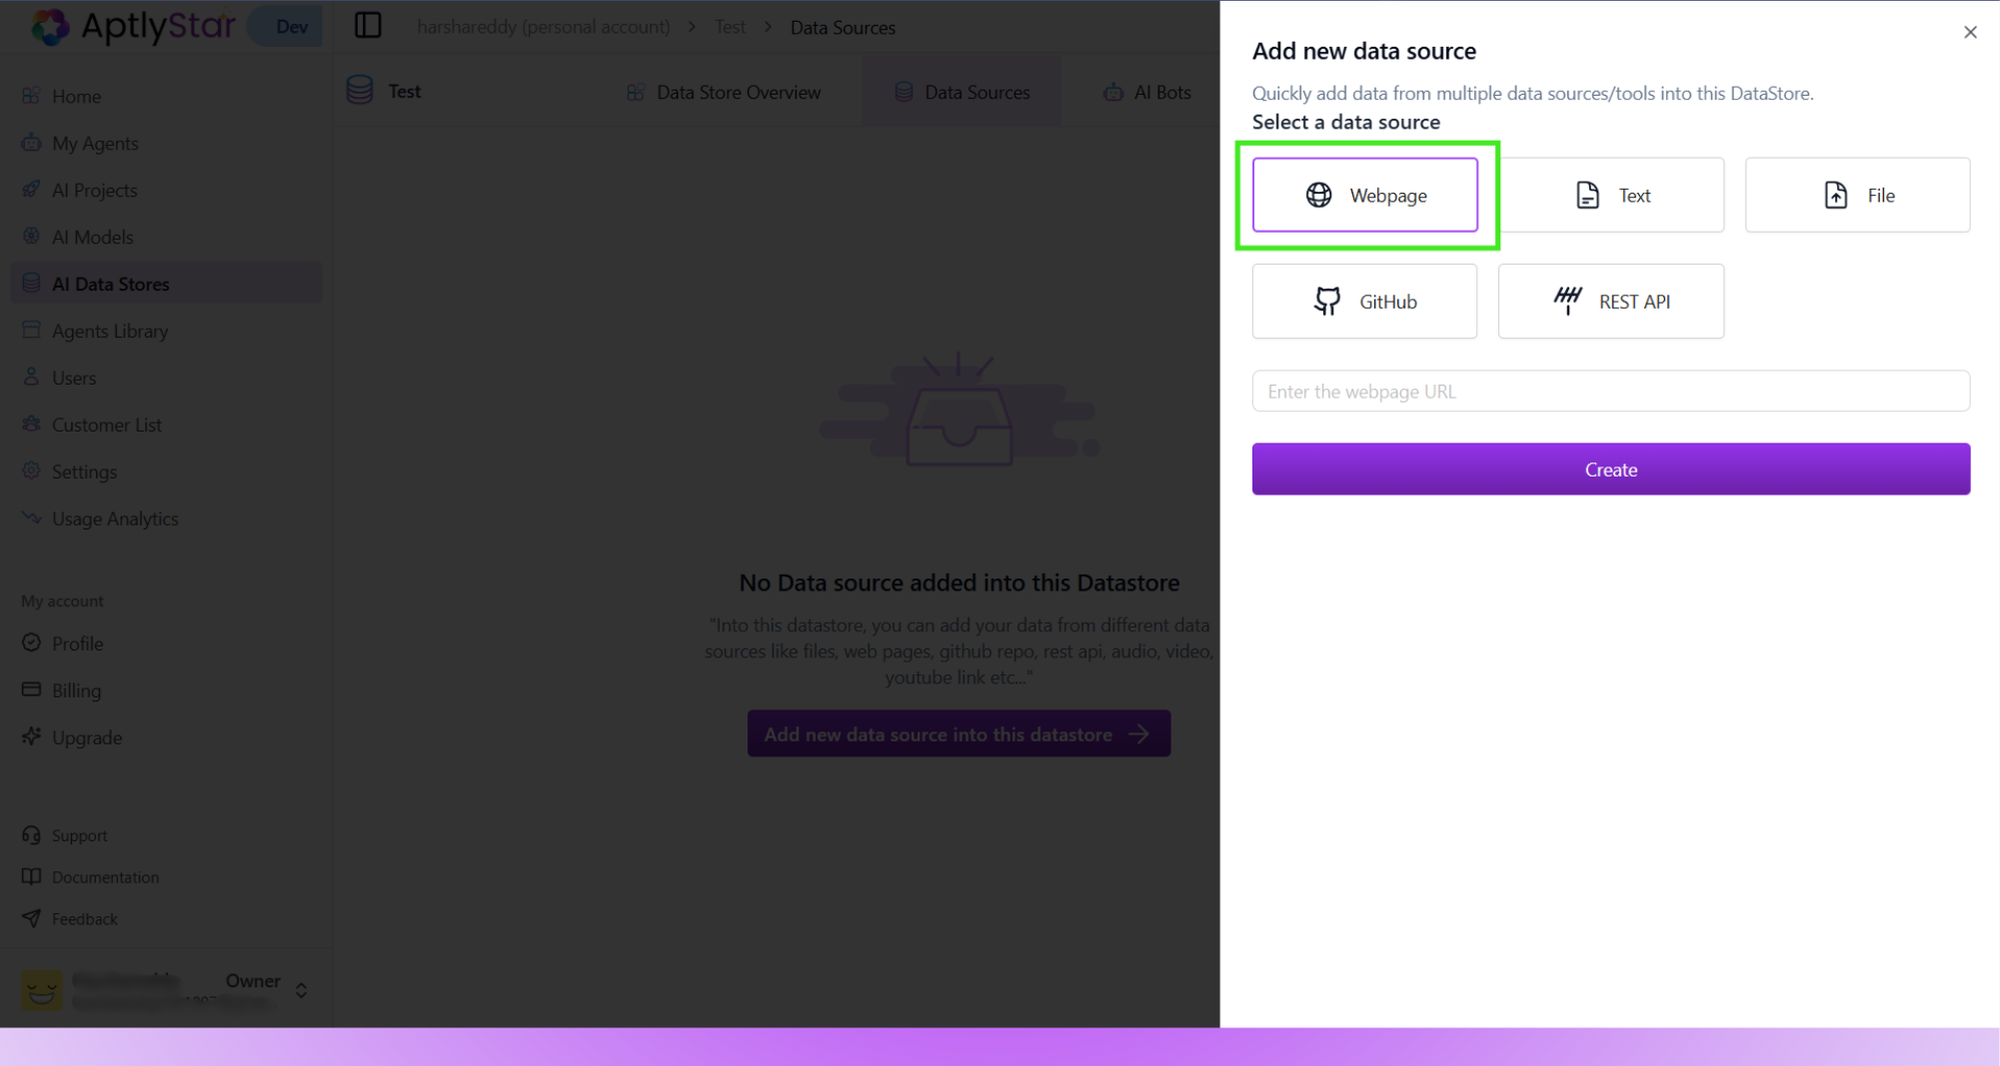
This will crawl the page content and add it into the Datastore.
Confirm the Webpage is added successfully
Once processed, the webpage source will appear in the list of sources.Each entry shows: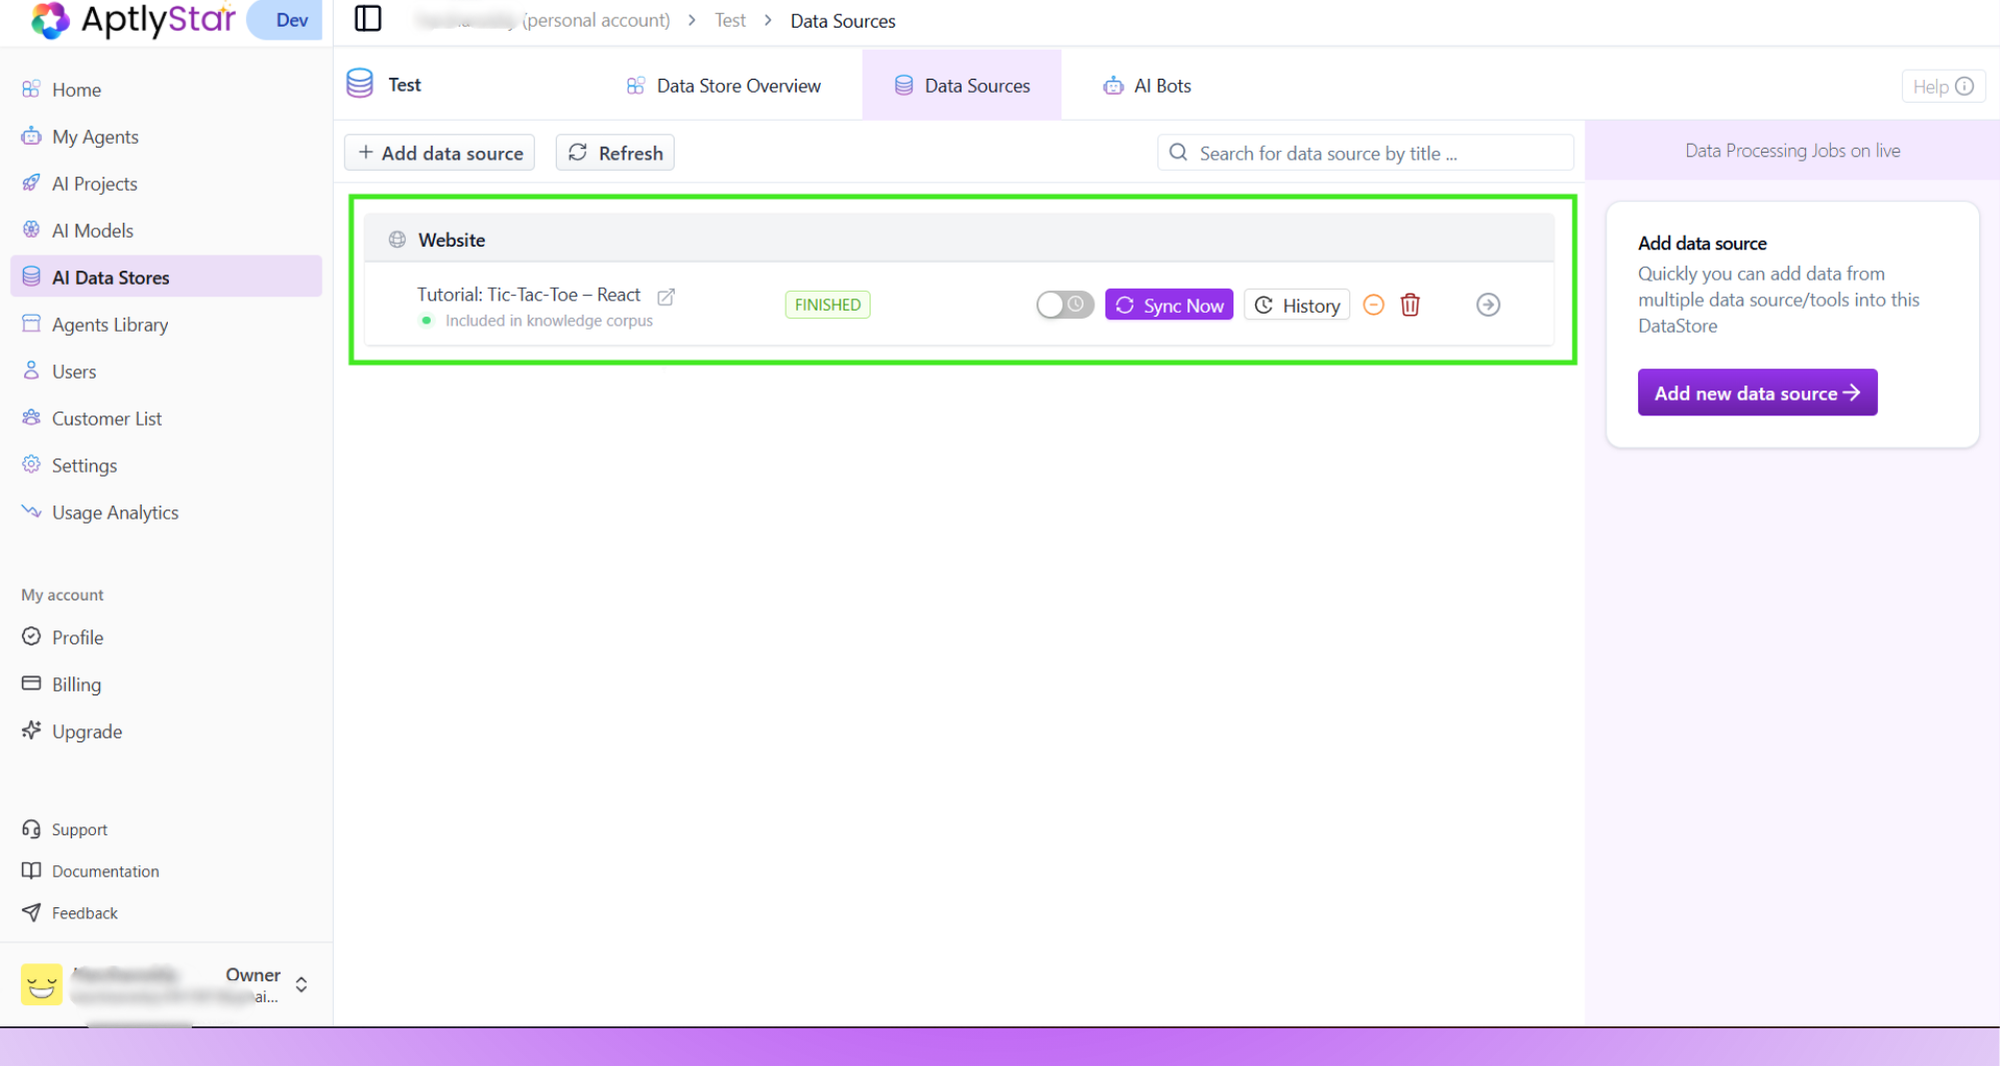
- Source Type (Webpage, File, etc.)
- Title of the page
- Inclusion Status (e.g., Included in knowledge corpus)
- Processing State (FINISHED, PENDING, etc.)
Enable Auto-Sync to keep data fresh
Webpages often change — new docs, updated FAQs, or product details.
To avoid outdated answers, toggle Auto-Resync on the source card.This ensures the system automatically re-crawls the page at set intervals.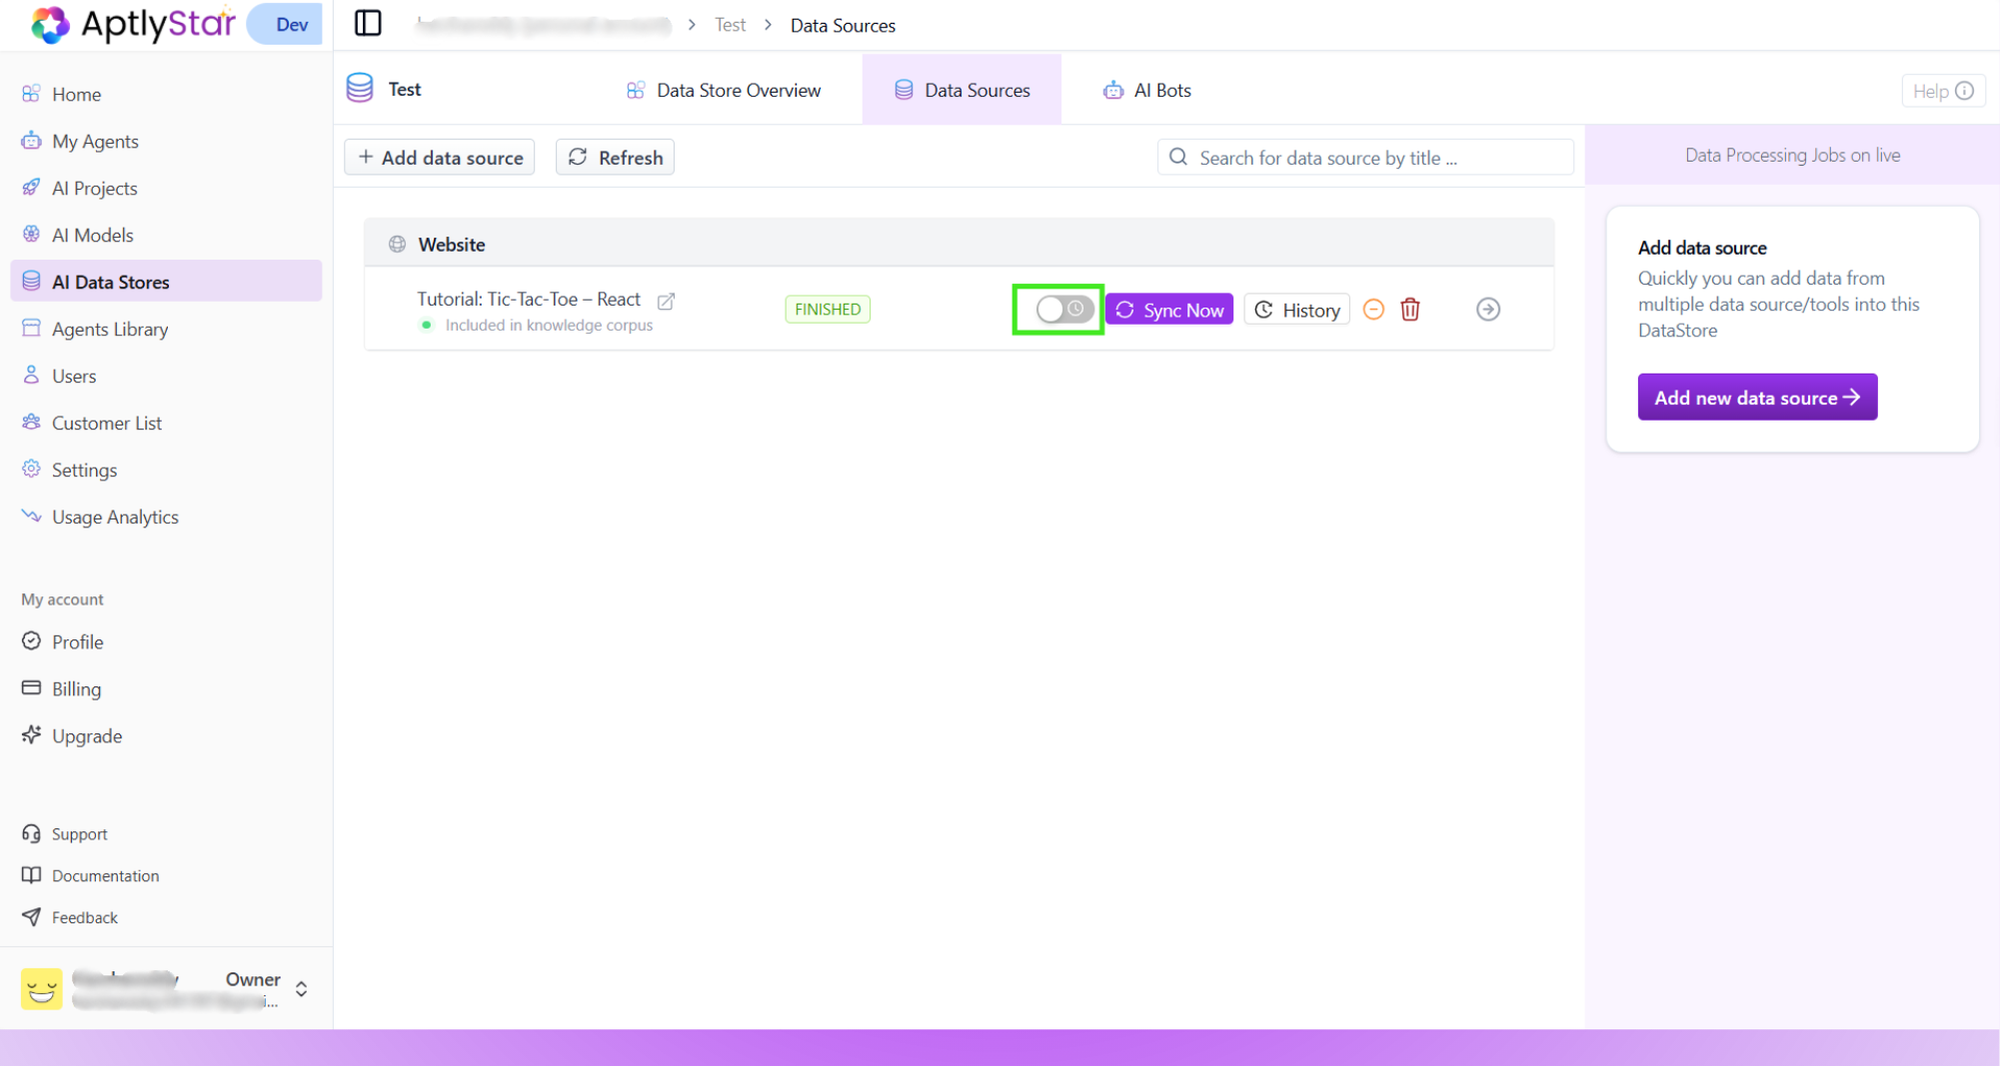
To avoid outdated answers, toggle Auto-Resync on the source card.This ensures the system automatically re-crawls the page at set intervals.
Choose a sync frequency
When Auto-Sync is enabled, you can define how frequently the page should be re-processed.Options include: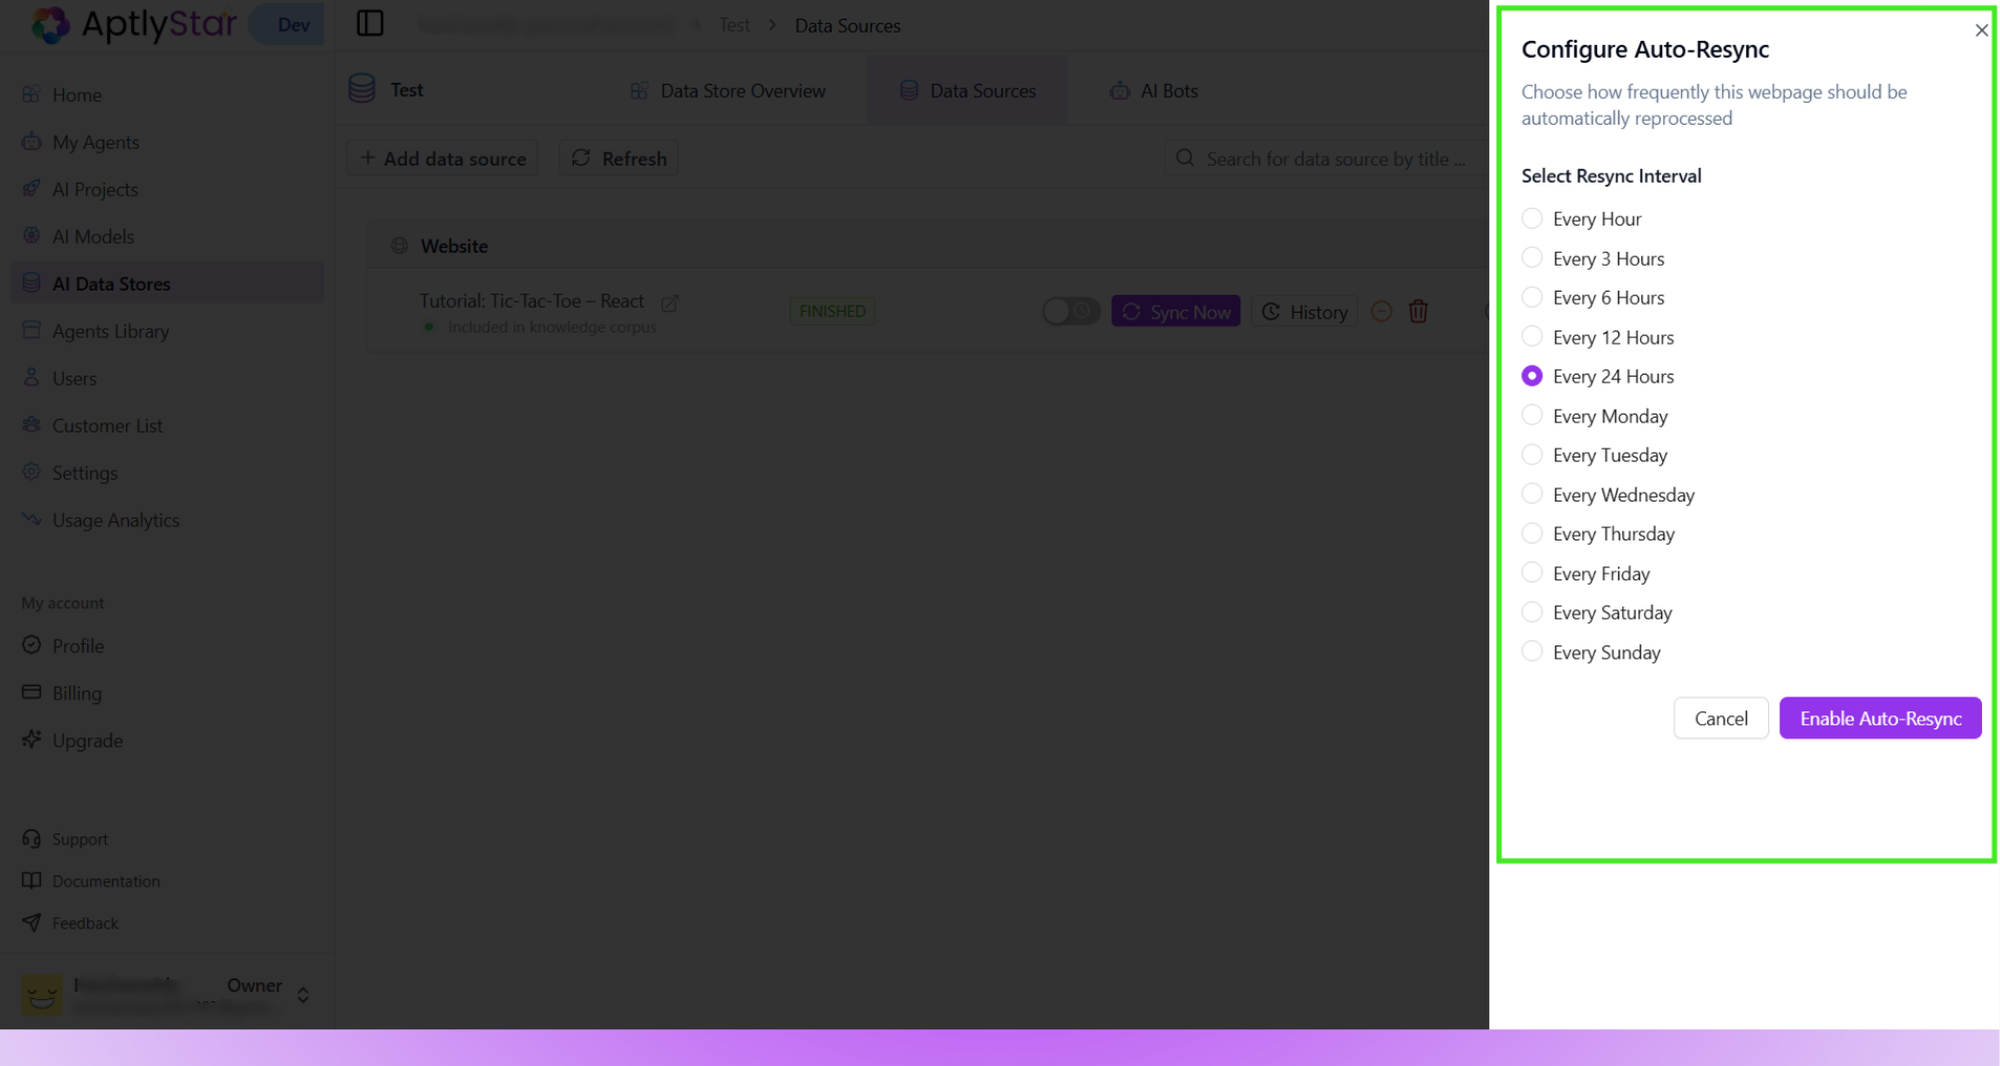
- Every hour / 3h / 6h / 12h / 24h
- Specific weekdays (e.g., every Monday, every Friday)
Use Sync Now for instant updates
If urgent changes happen on the webpage and you don’t want to wait for the next scheduled sync, click Sync Now.This immediately reprocesses the page and refreshes the Datastore with the latest version.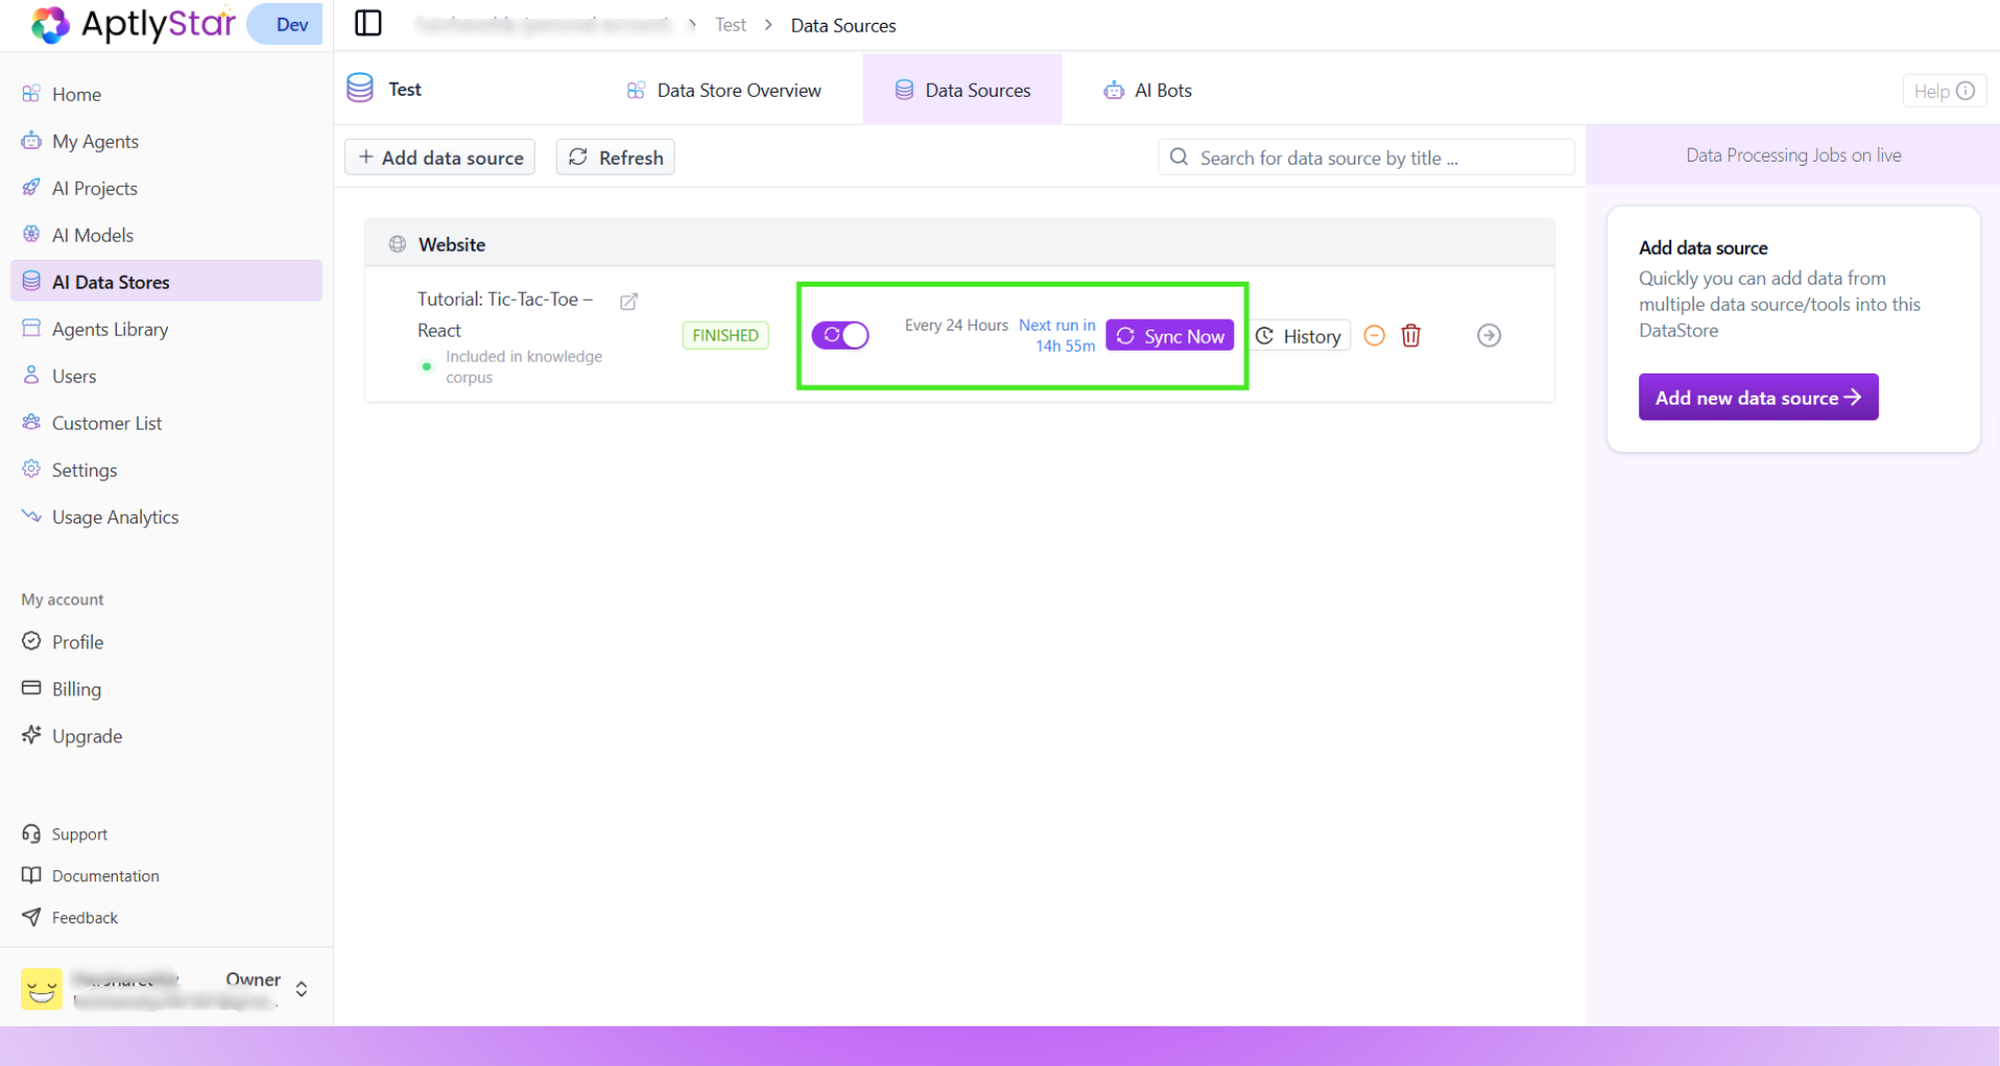
✅ Key Takeaways
- Webpages are a simple way to continuously feed dynamic, public content into your Datastore.
- Use Auto-Sync for hands-free updates, and Sync Now for urgent refreshes.
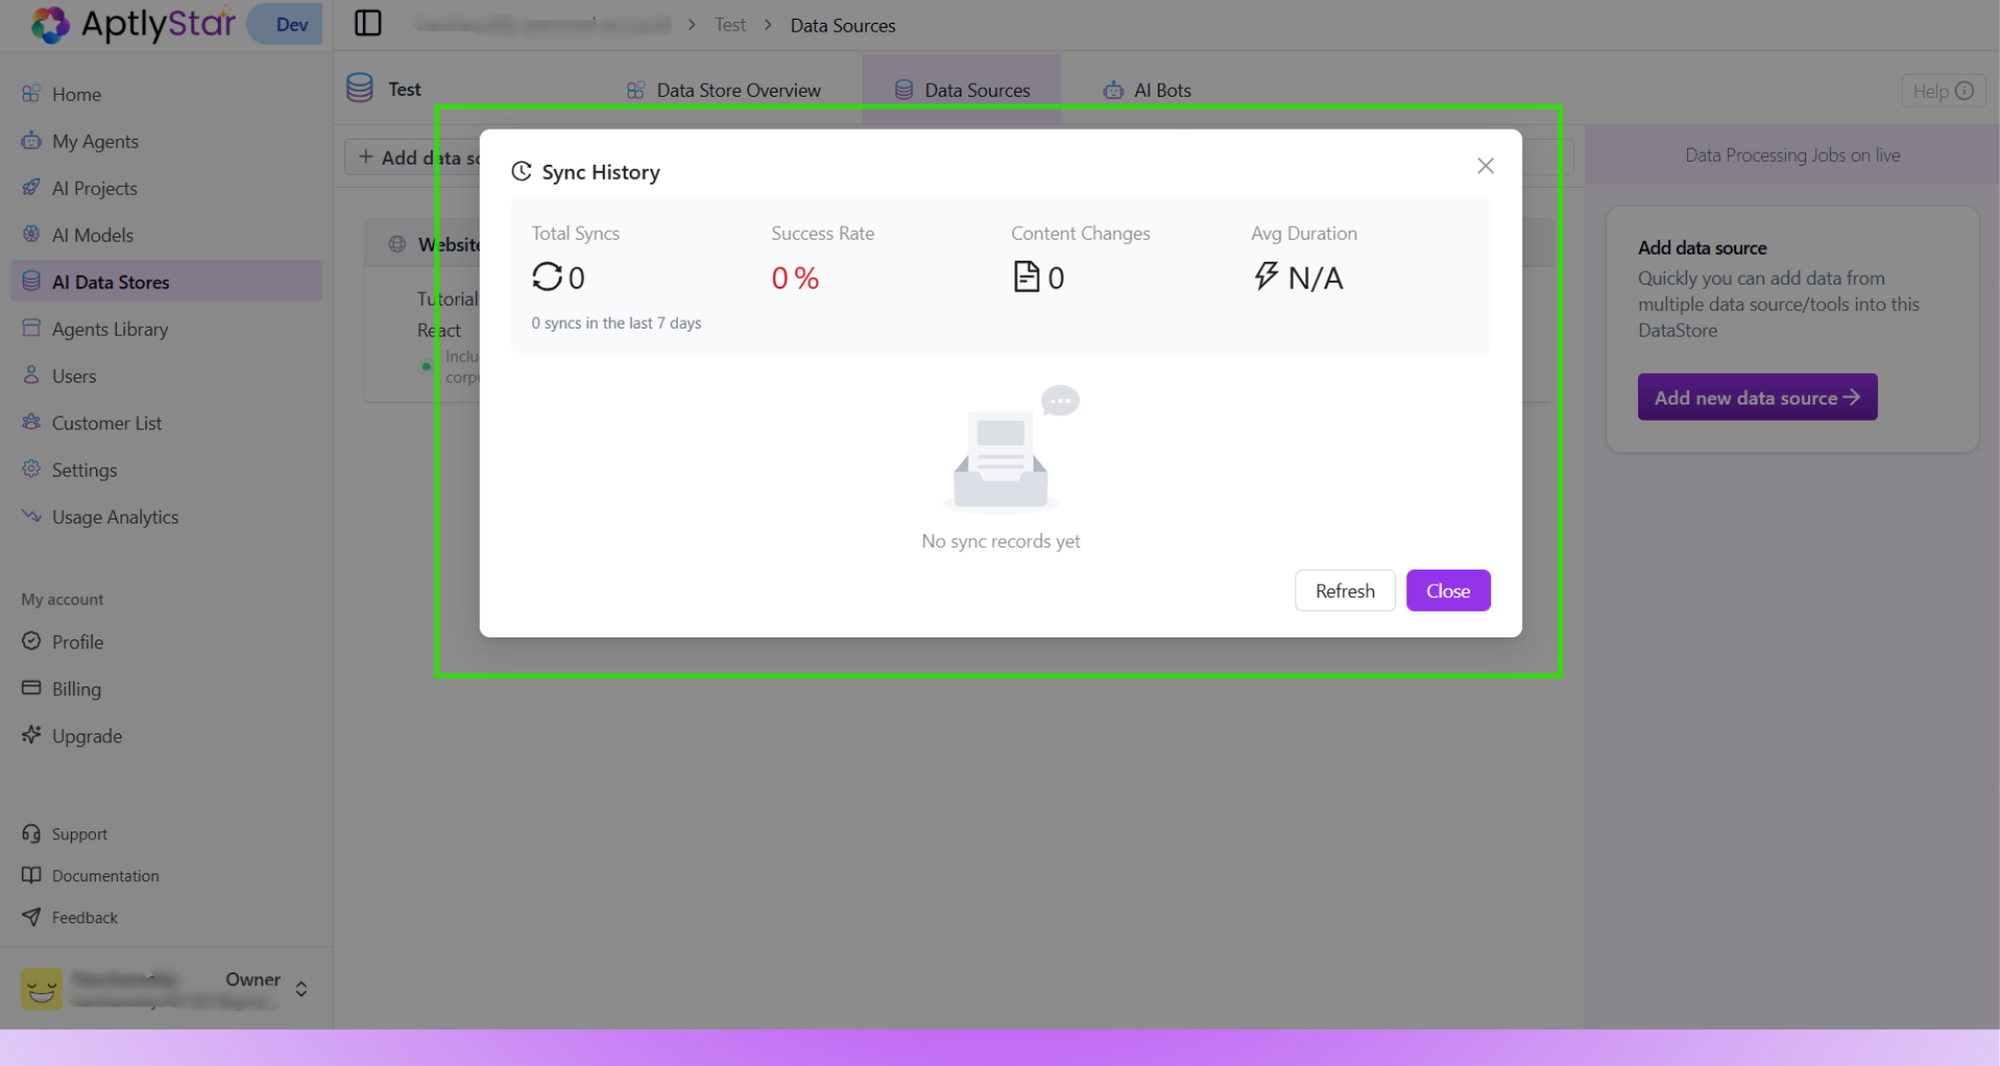
- Track updates with Sync History to ensure your agent always has the most accurate knowledge.
Keeping your web data sources updated ensures your AI agents always provide relevant, reliable, and up-to-date answers.