This enables users to dynamically switch between experts within the same chat interface, based on context. With Agent Grouping, users can:
- Switch between agents dynamically inside the chat widget
- Interact with each agent’s unique knowledge base
- Optimize token usage by isolating prompts per sub-agent
- Organize agents for specialized tasks (e.g., Interviewer, Excel helper, Pronunciation coach)
What is a Main Agent?
The Main Agent acts as the anchor. Other agents (called Linked Agents) will be accessed through the main agent’s widget. Each Linked Agent:- Is independently configured
- Has its own datastore and knowledge
- Can be selected in the frontend chat widget for specialized responses
Requirements
Before setting up grouping:- All agents (main and sub-agents) must be set to live
- Each agent should have at least one valid datastore
- Grouping must be explicitly enabled in the Main Agent’s channel config
How to Group Agents
1
Create and activate your agents
Go to My Agents and ensure all agents you want to group are created and active.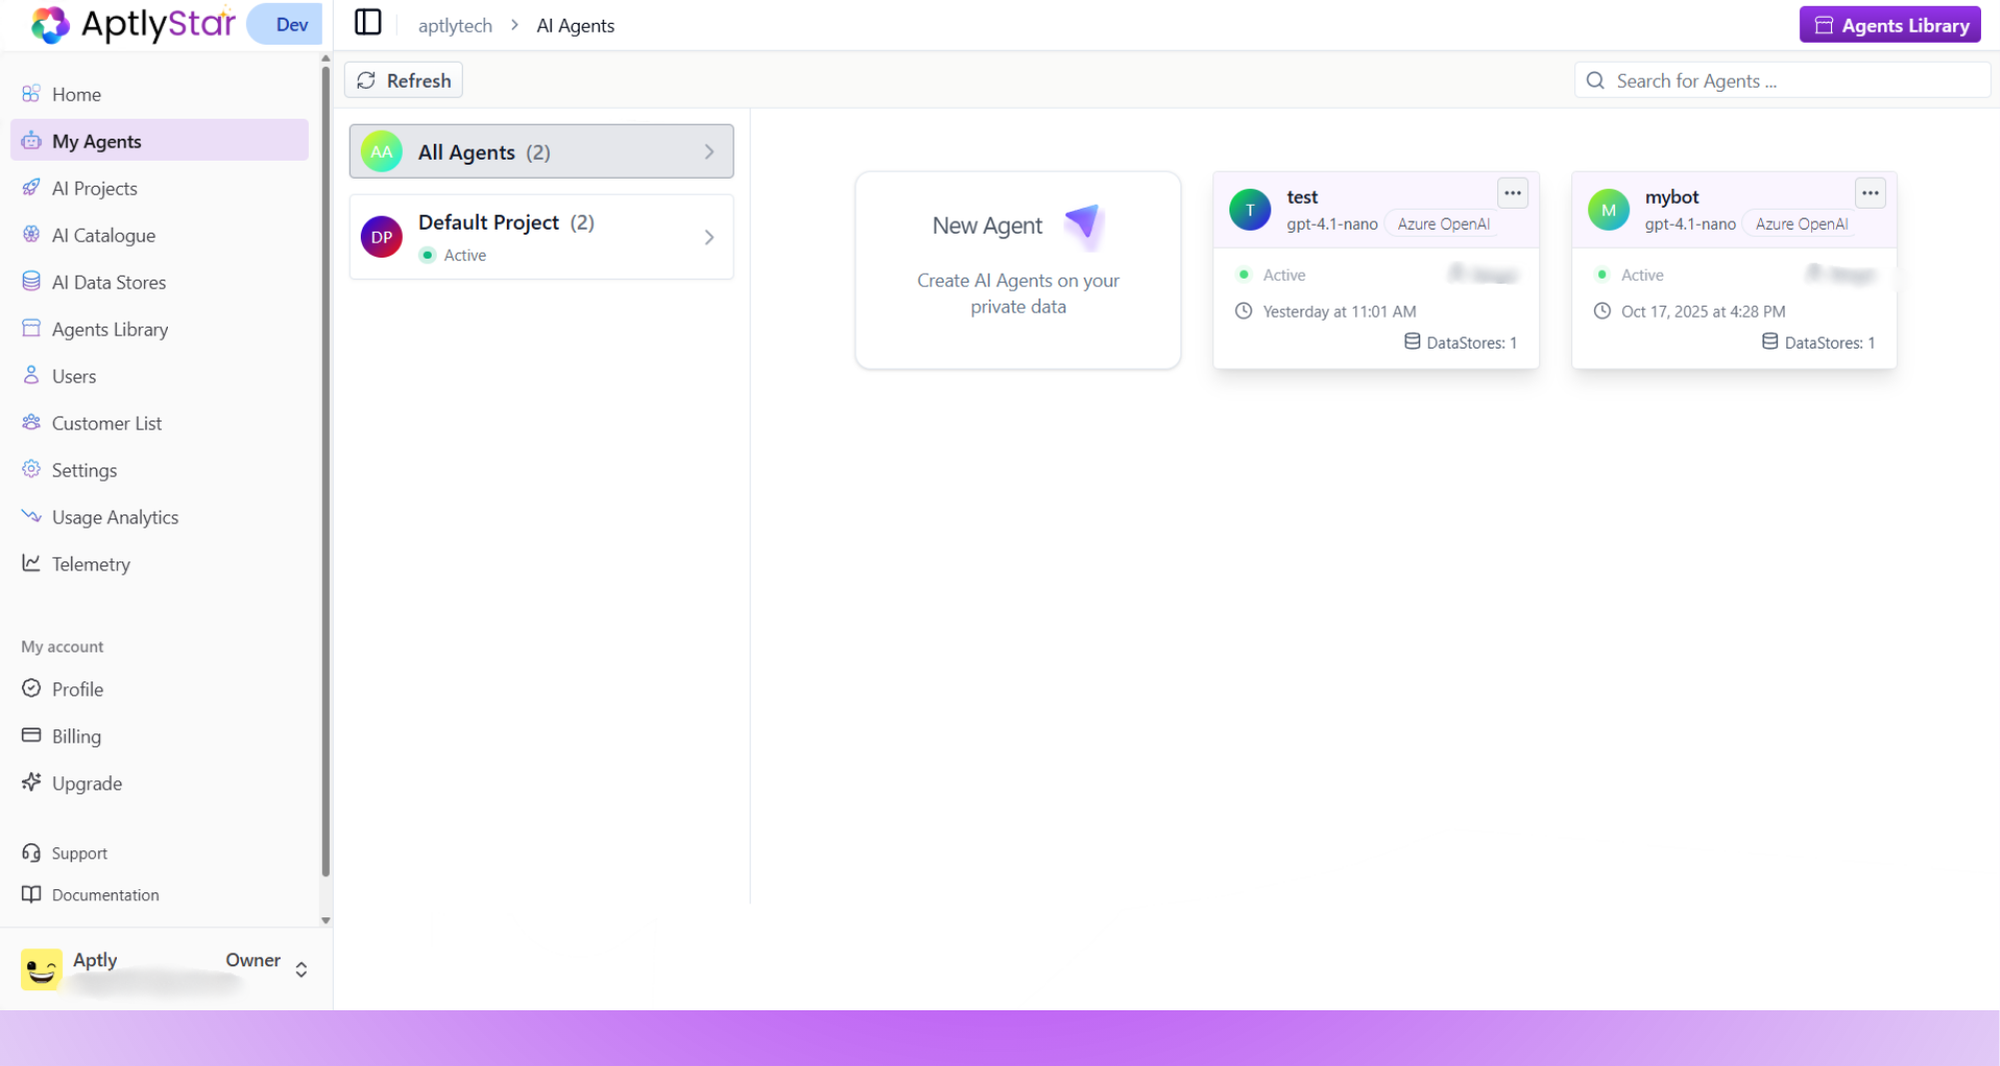

My Agents: All agents live and ready for grouping
2
Open the main agent playground
Select the agent that will act as the Main Agent and navigate to the Channels tab.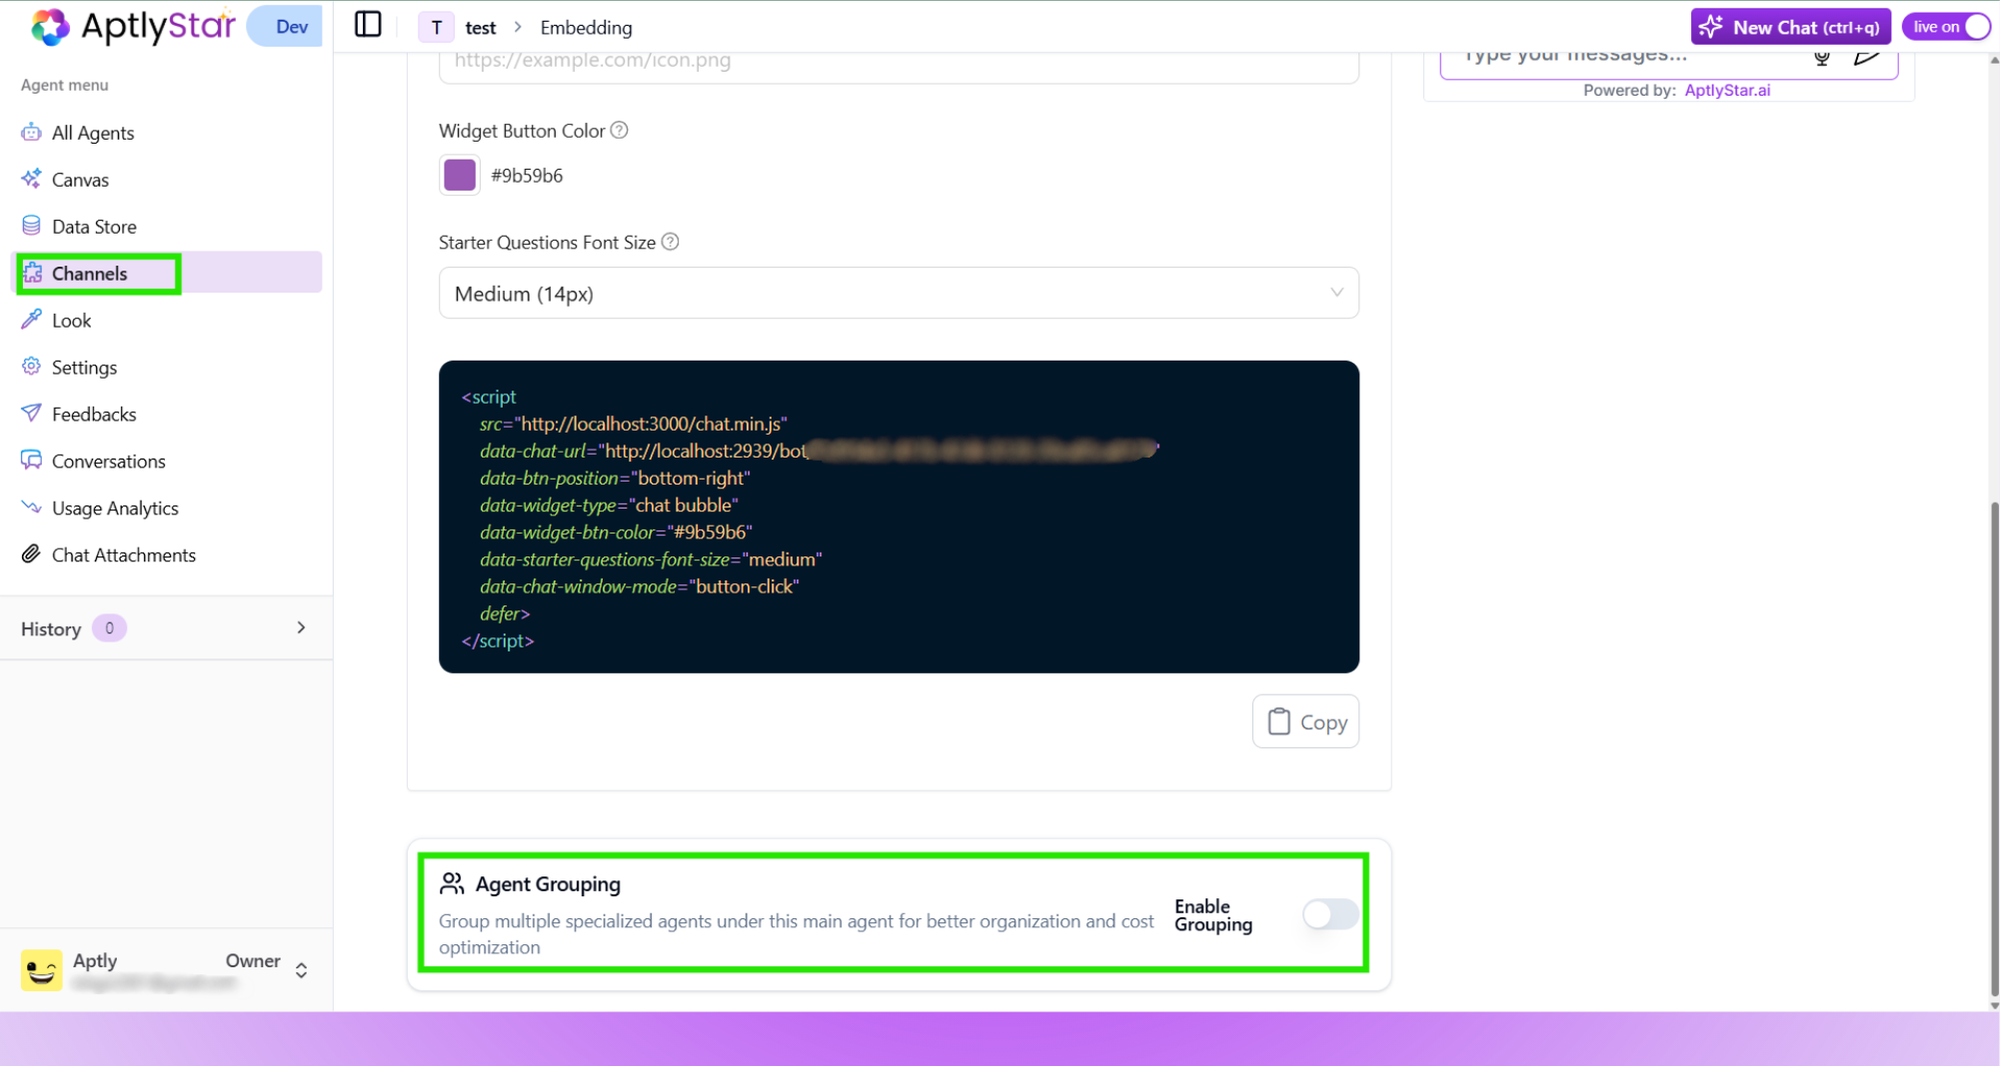

Channels: Navigate to Main Agent’s playground
3
Enable Agent Grouping
Scroll to the Agent Grouping section and toggle “Enable Grouping”.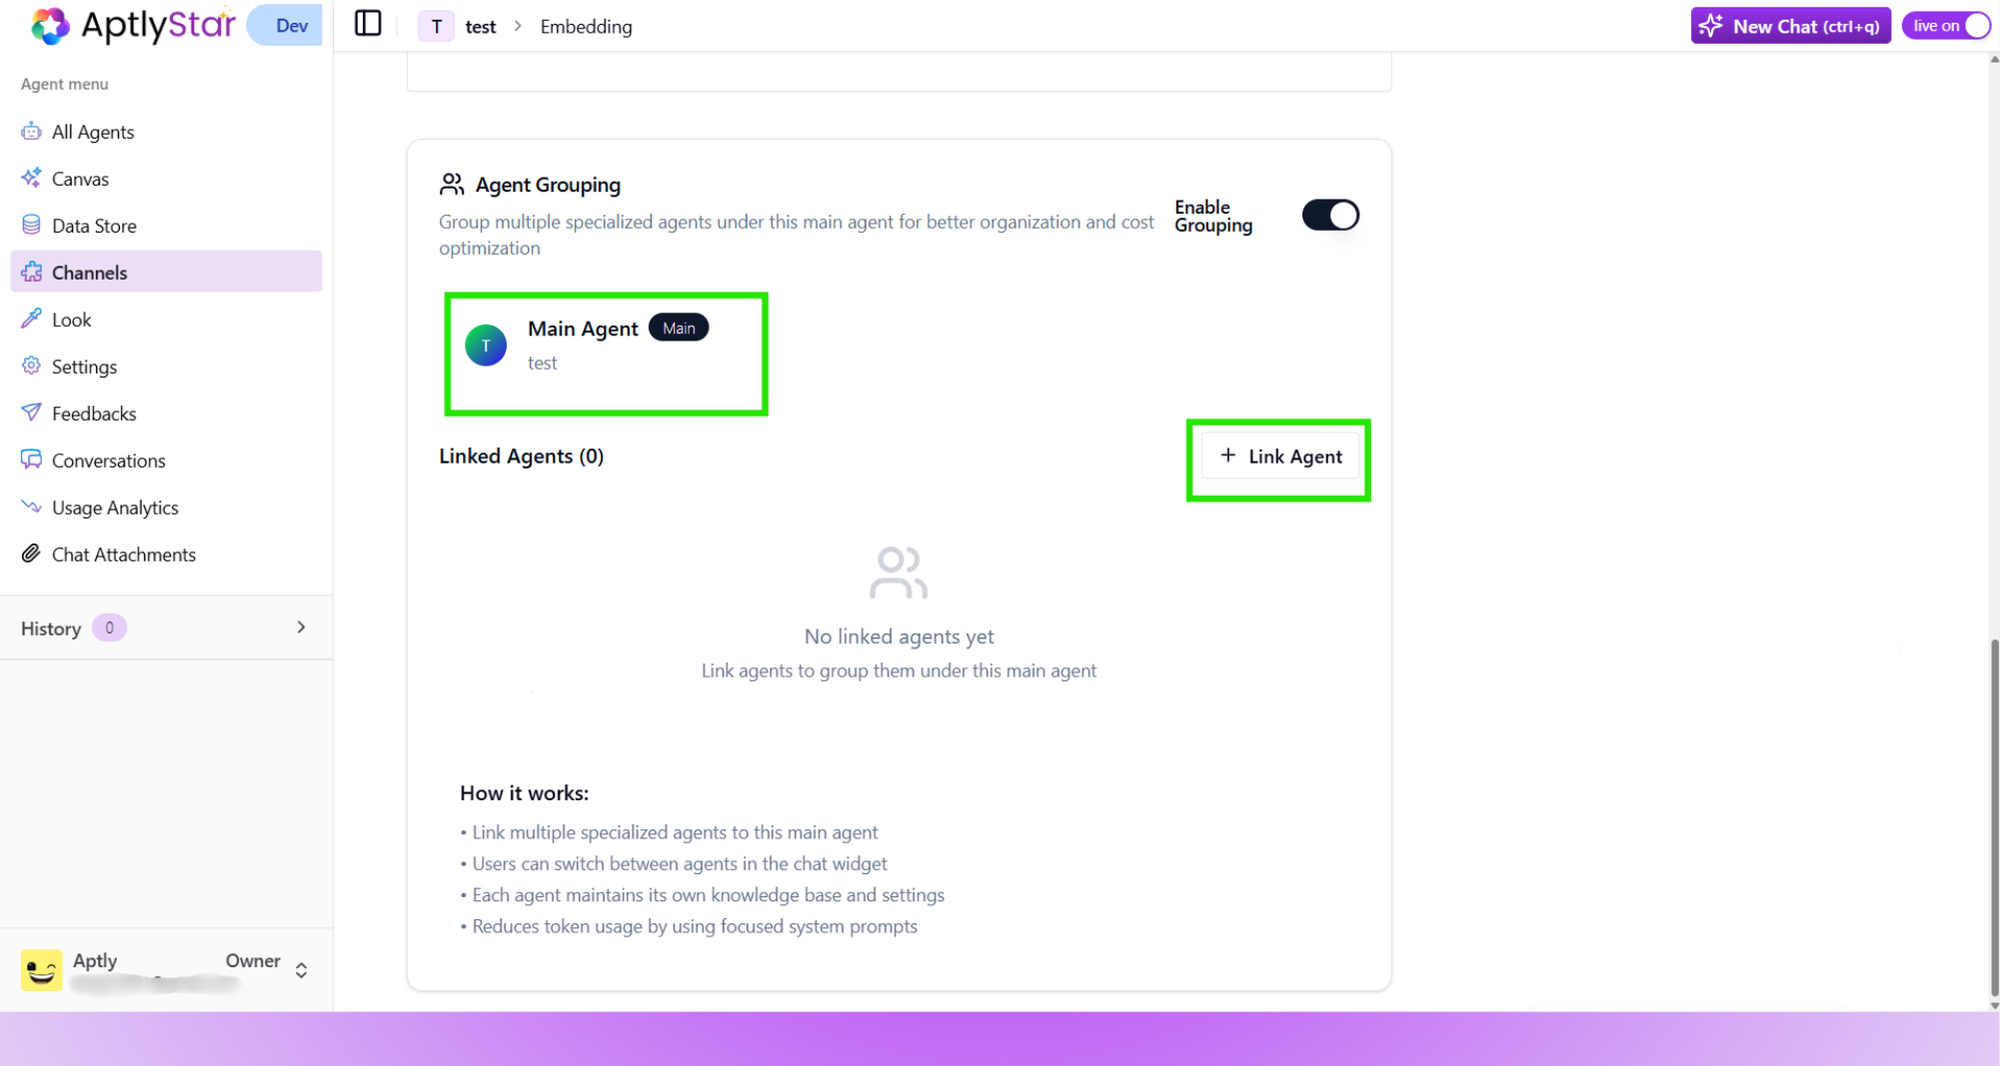

Enable Grouping: Toggle to activate agent grouping mode
4
Set the Main Agent
Once grouping is enabled, the selected agent is tagged as the Main Agent.
Click Link Agent to start selecting sub-agents.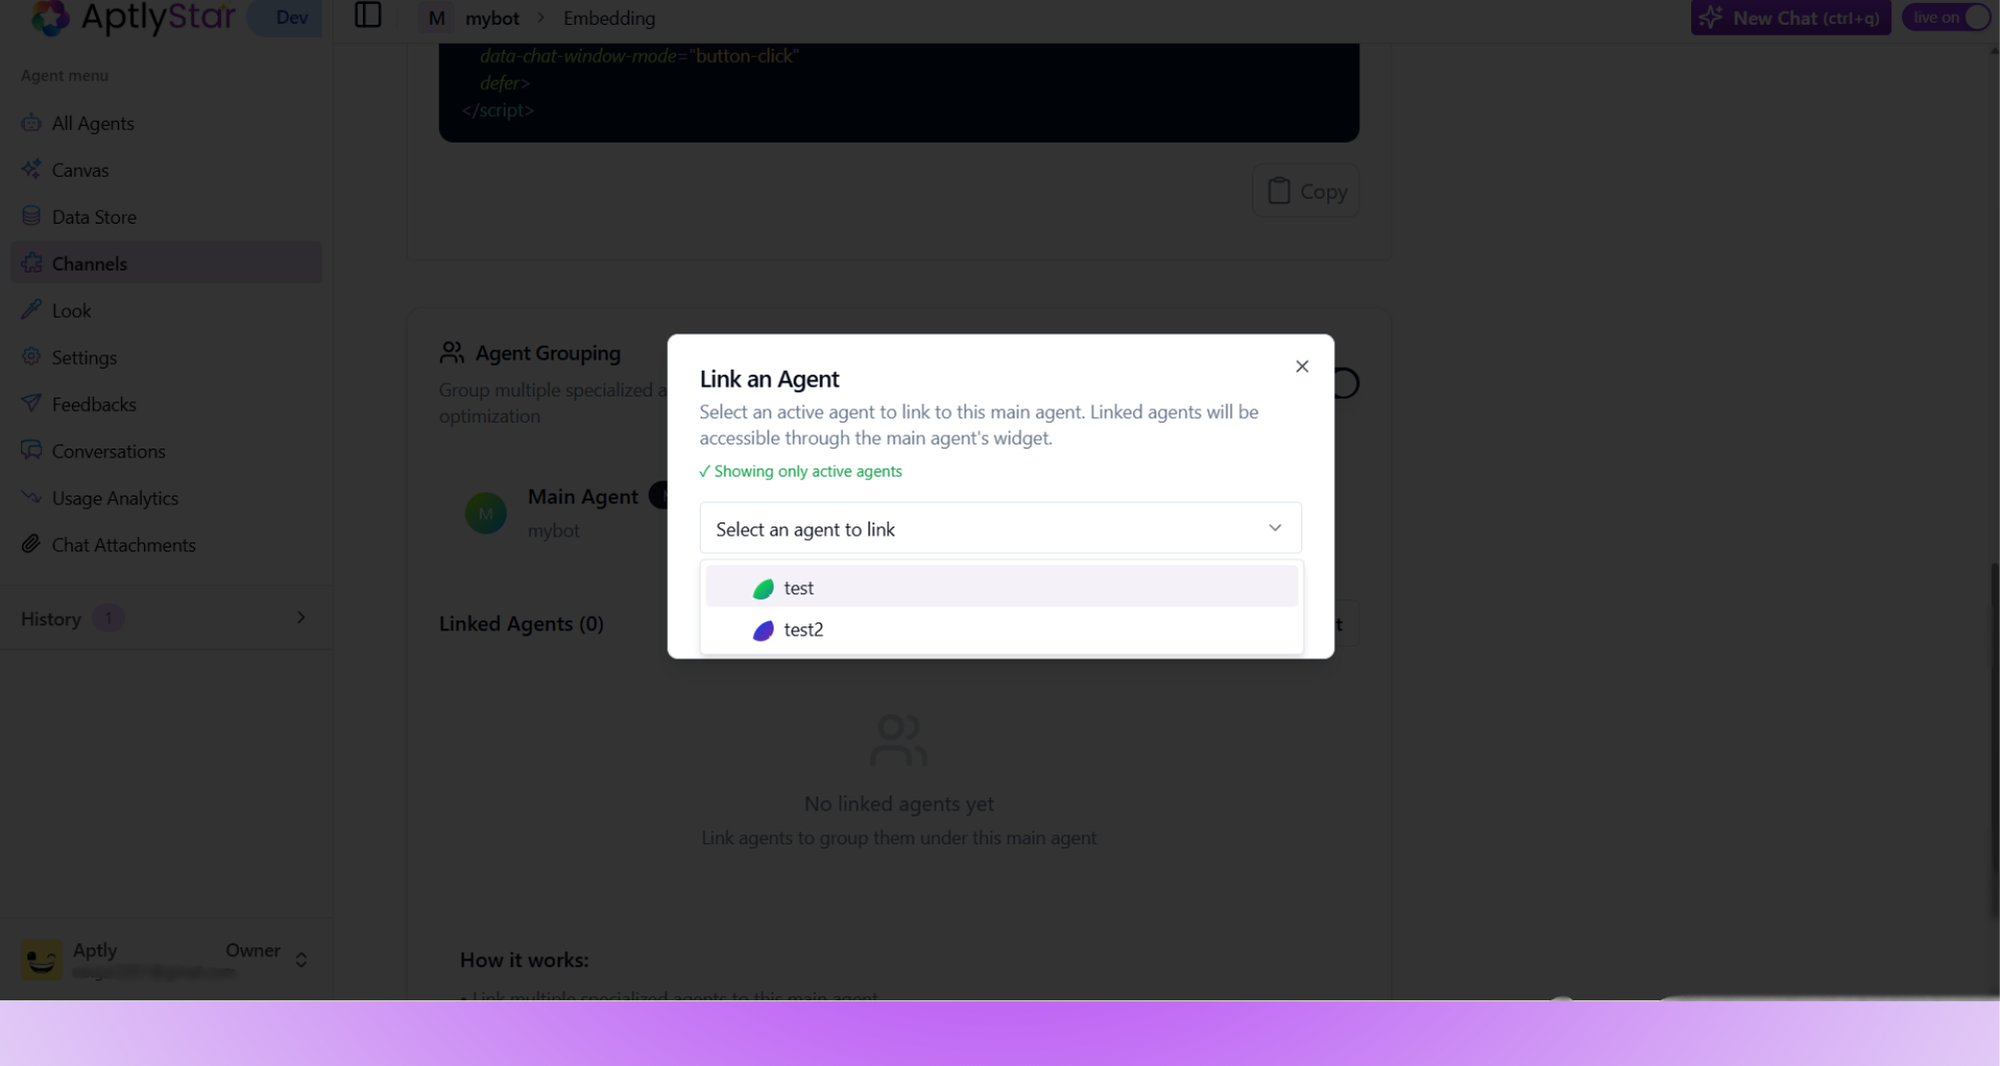
Click Link Agent to start selecting sub-agents.

Link Agents: Assign specialized sub-agents to the main agent
5
Select Linked Agents
Only active agents are shown in the dropdown. Select the agents you want to group and click Link Agent.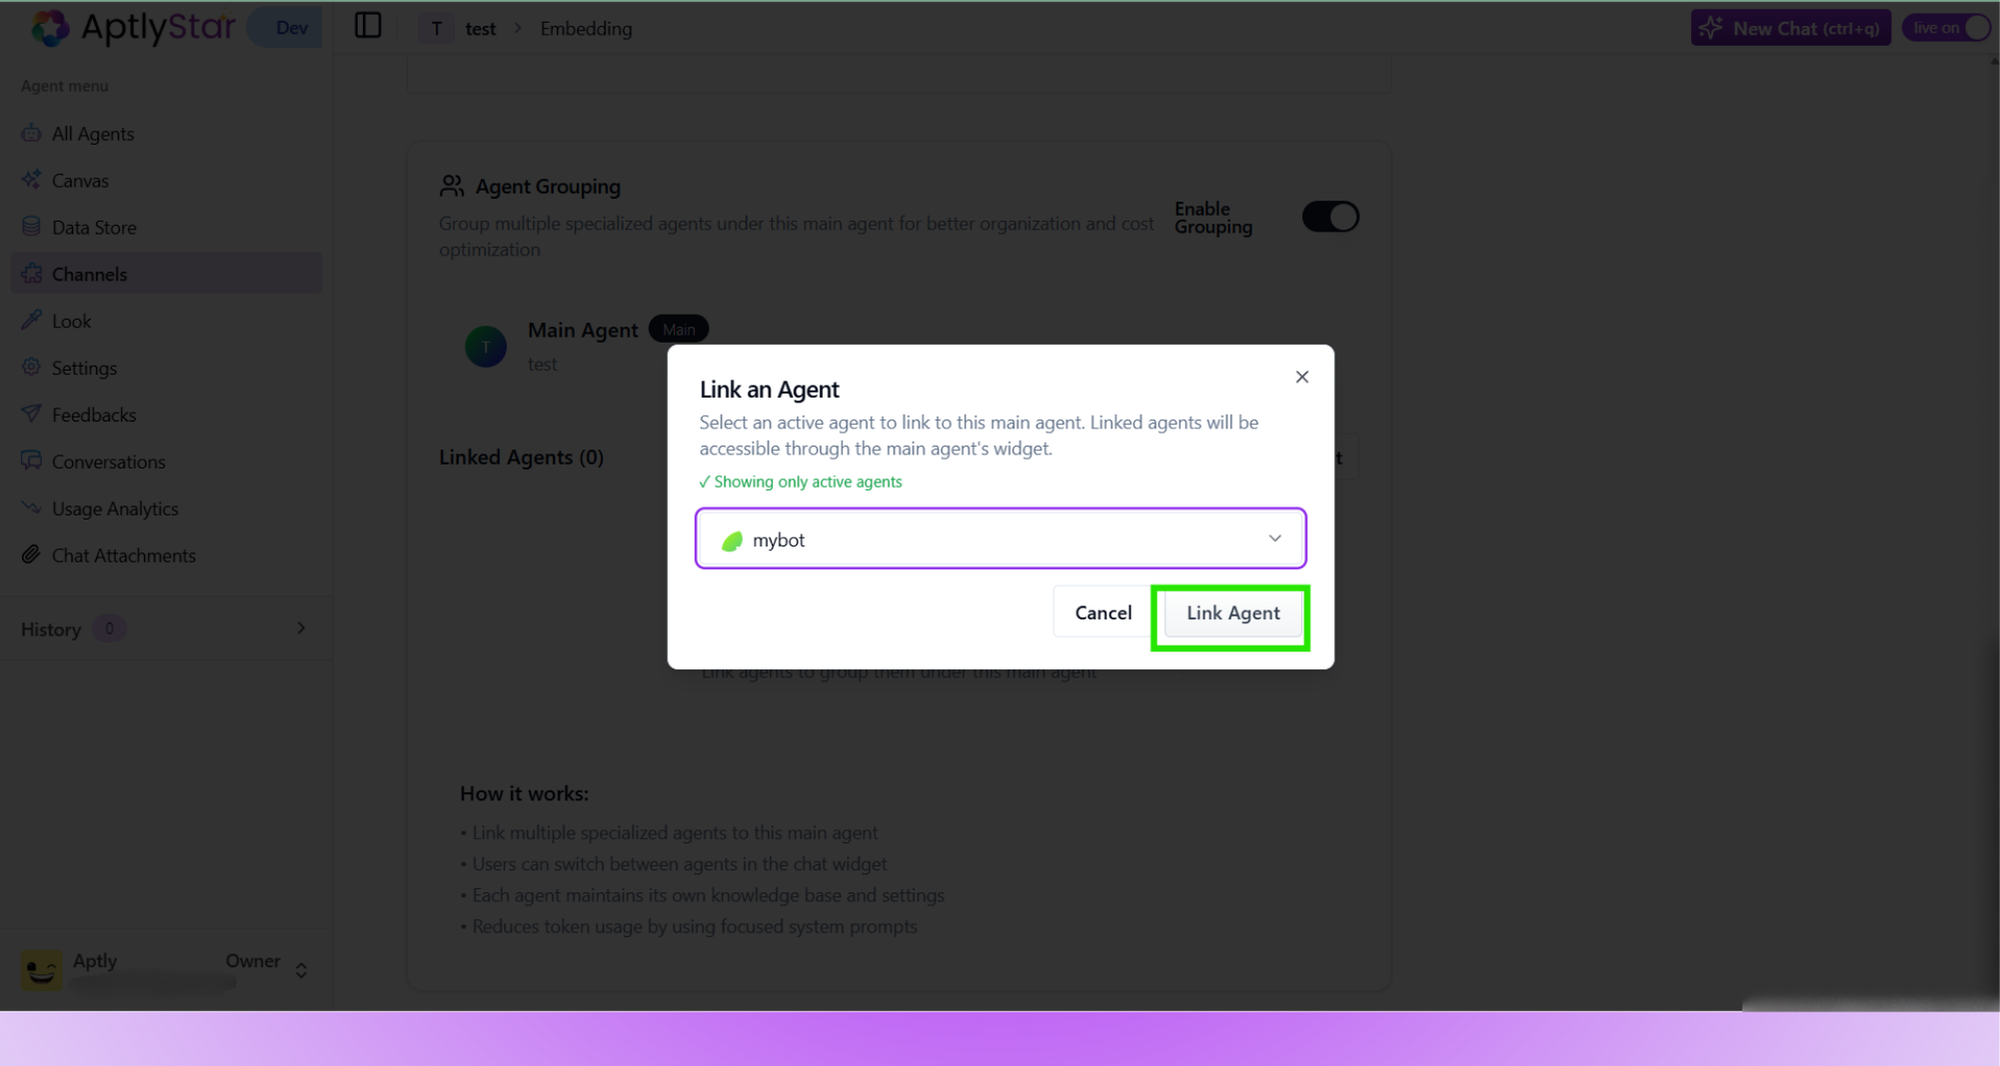
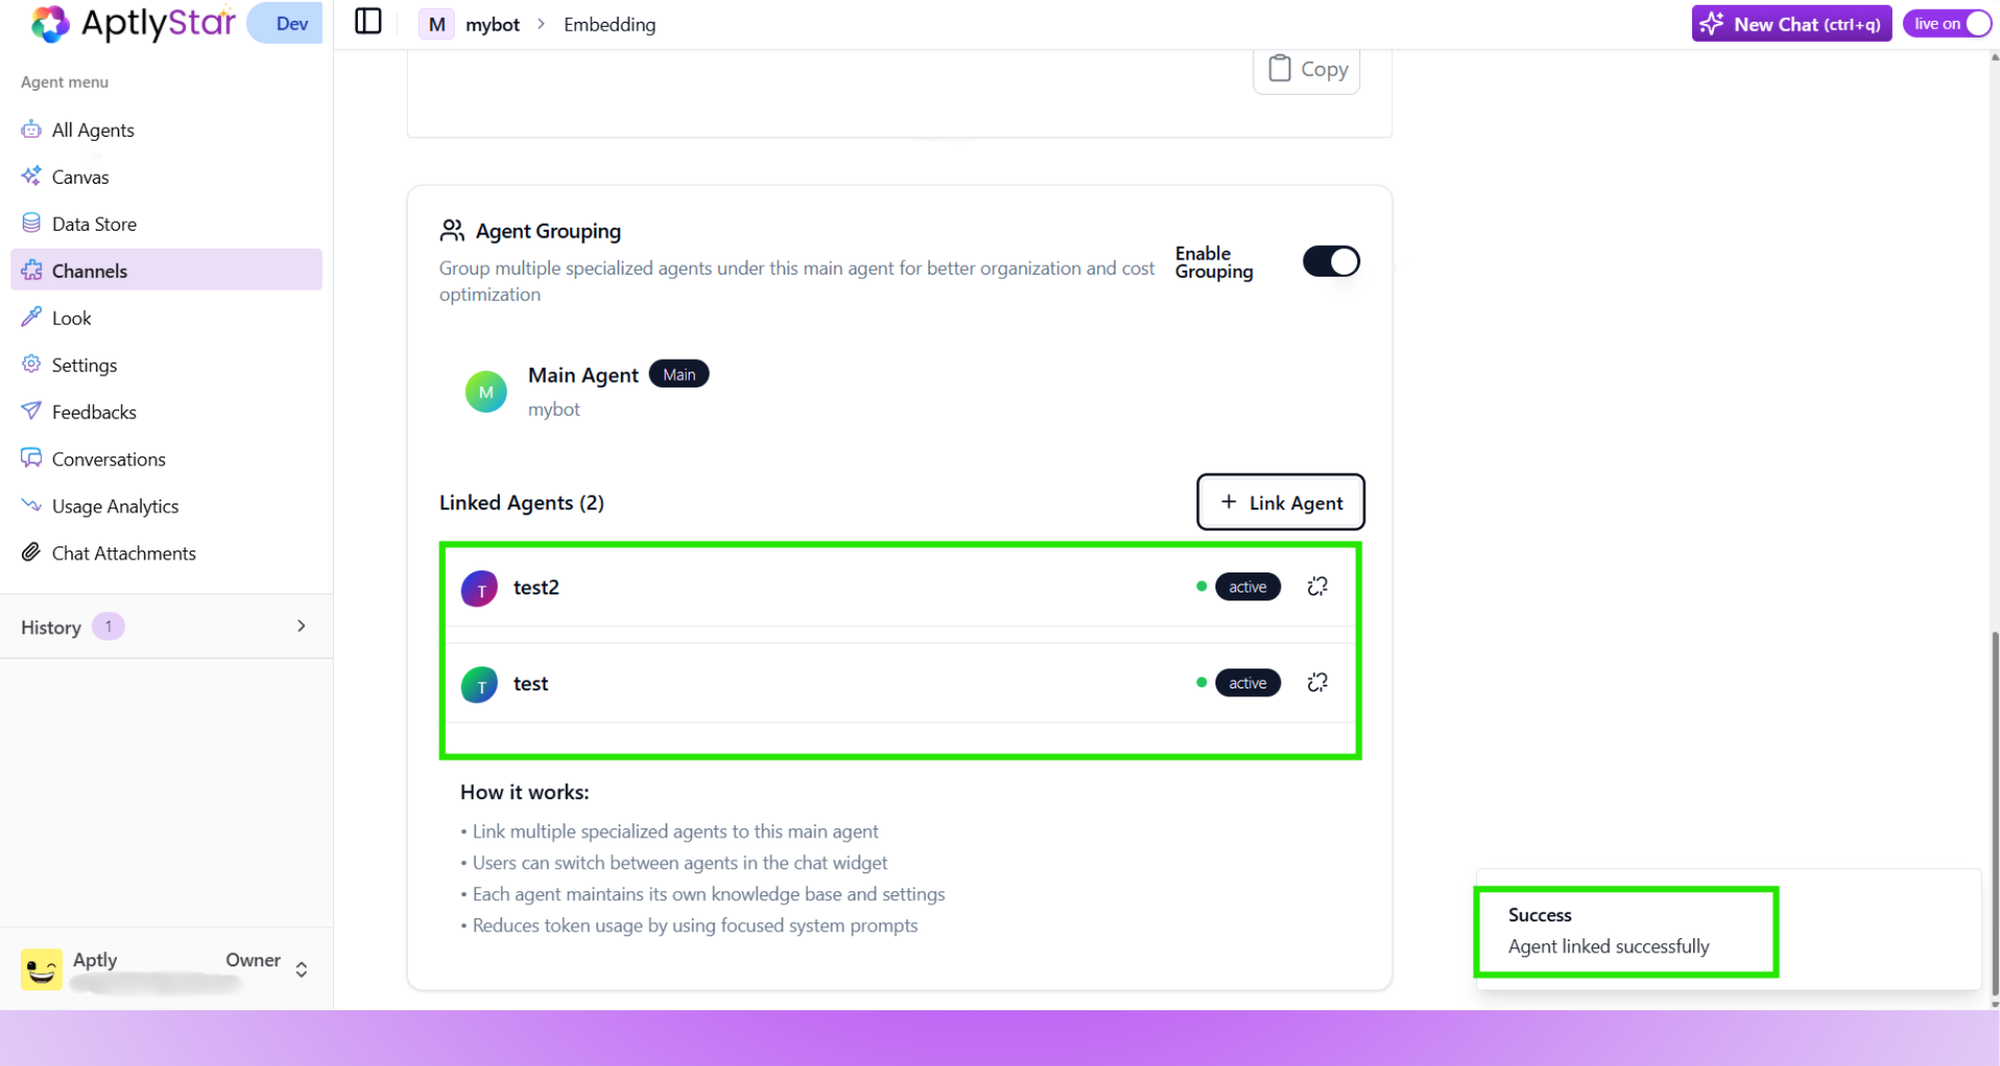

Dropdown: Select which agents to group under the Main Agent

Success: Agents added to the group successfully
6
Chat Widget Experience
When the widget is loaded for the main agent, users can switch between all linked agents in real-time based on context.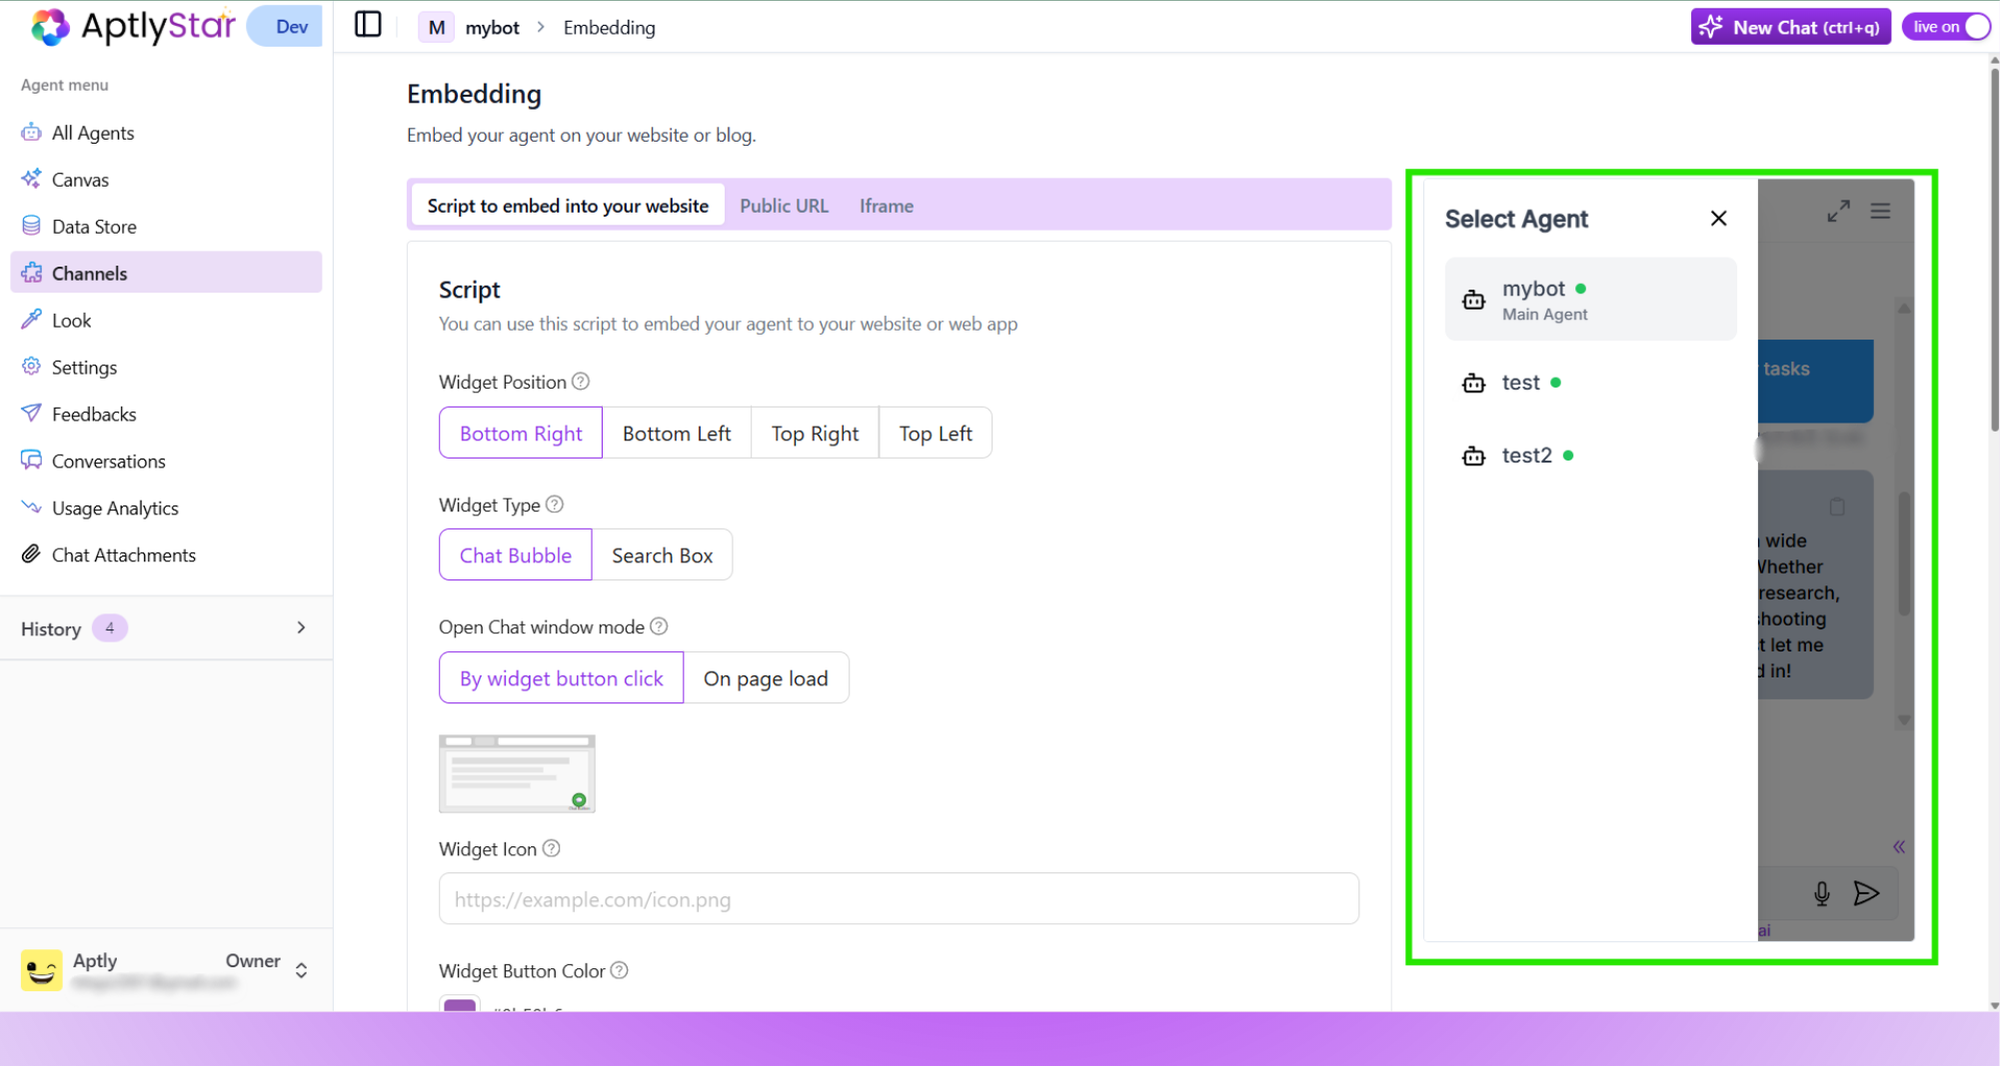

Widget View: Switch between grouped agents at runtime
Tips & Notes
- Sub-agents do not share knowledge across the group.
- Switching agents does not reset the conversation unless designed to.
- Each sub-agent retains its independent model and prompt style.
✅ Example Use Cases
🧑💼 HR Assistant Suite
- Main Agent: Job Application Guide
- Linked Agents:
- 📄 Resume Reviewer – Analyzes uploaded resumes and offers formatting or content improvements.
- 🧪 Interview Simulator – Conducts mock interviews tailored to job roles.
- 📬 Offer Negotiator – Helps craft polite counteroffers and answers negotiation-related queries.
Candidates receive end-to-end job search support within a single chat interface — from resume polishing and interview practice to final-stage negotiation help.
🧑🎓 AI Student Mentor
- Main Agent: Academic Coach
- Linked Agents:
- 📚 Math Problem Solver – Provides step-by-step solutions for algebra, calculus, and statistics problems.
- 🧪 Science Explainer – Simplifies complex physics, chemistry, or biology concepts into digestible chunks.
- 📝 Essay Feedback Agent – Reviews written submissions and suggests grammar and clarity improvements.
Students can switch between topic-specific AI mentors to support homework, exam prep, and writing — without breaking flow or opening separate tools.

