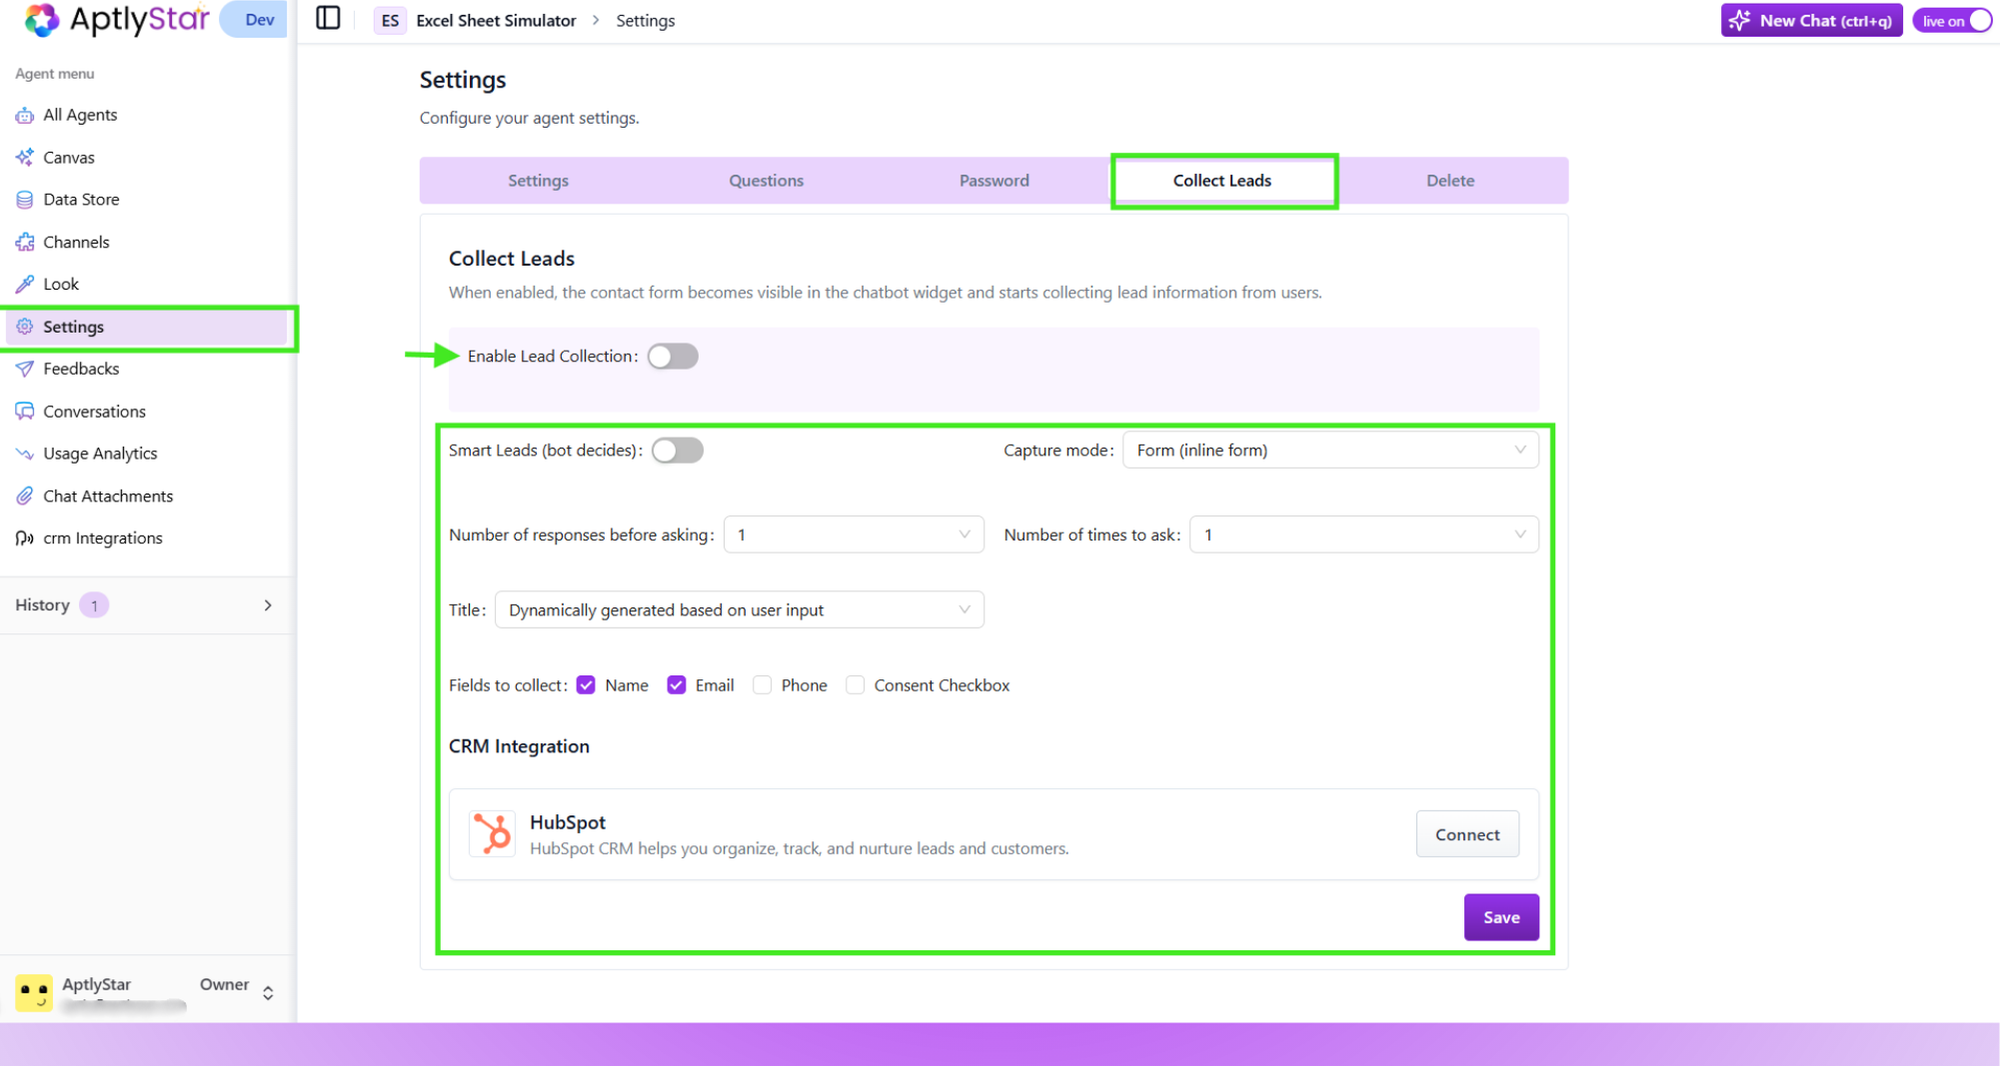
Lead Collection
Lead Collection lets your agent capture user details such as name, email, and phone directly during a chat session. This turns every meaningful conversation into a potential customer touchpoint and helps your team follow up efficiently. Organizations often use this feature to:- Identify high intent users
- Collect contact details before the conversation goes too far
- Enrich CRM records with real conversational context
- Reduce manual effort and automate lead qualification
Customizing Lead Capture
Once you enable the Lead Collection toggle, you can fine tune how and when the agent requests this information.Smart Leads
Smart Leads let the bot decide the best moment to ask for user details based on the flow of the conversation. You can control the behavior by adjusting: Number of responses before askingChoose whether the bot should ask immediately or wait for one, two, or three user responses before prompting for details. Number of times to ask
Set how persistent the agent should be. For example, you may choose to ask only once, or try again a second or third time if the user skips the form. Lead form title
You can let the bot generate the title dynamically based on context, or specify a fixed static title for consistency.
Capture Mode
You can choose how the lead information is collected:-
Inline Form
The user sees a small form directly embedded inside the chat interface, appearing as a single compact block. -
Conversational Mode
The bot asks each detail step by step in a natural question and answer format. This creates a smoother experience and keeps the conversation flowing.
Fields to Collect
You can select which fields the form should request:- Name
- Phone
- Consent checkbox
Lead Form in the Chat Widget
Once lead collection is enabled, users will see the form automatically during the chat. This may appear at the start of the conversation or after a few messages, depending on your Smart Leads configuration.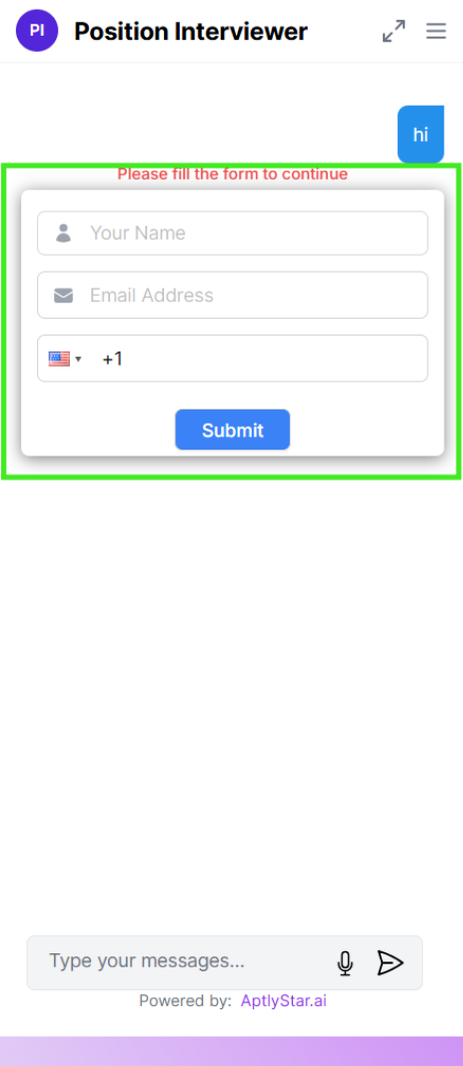
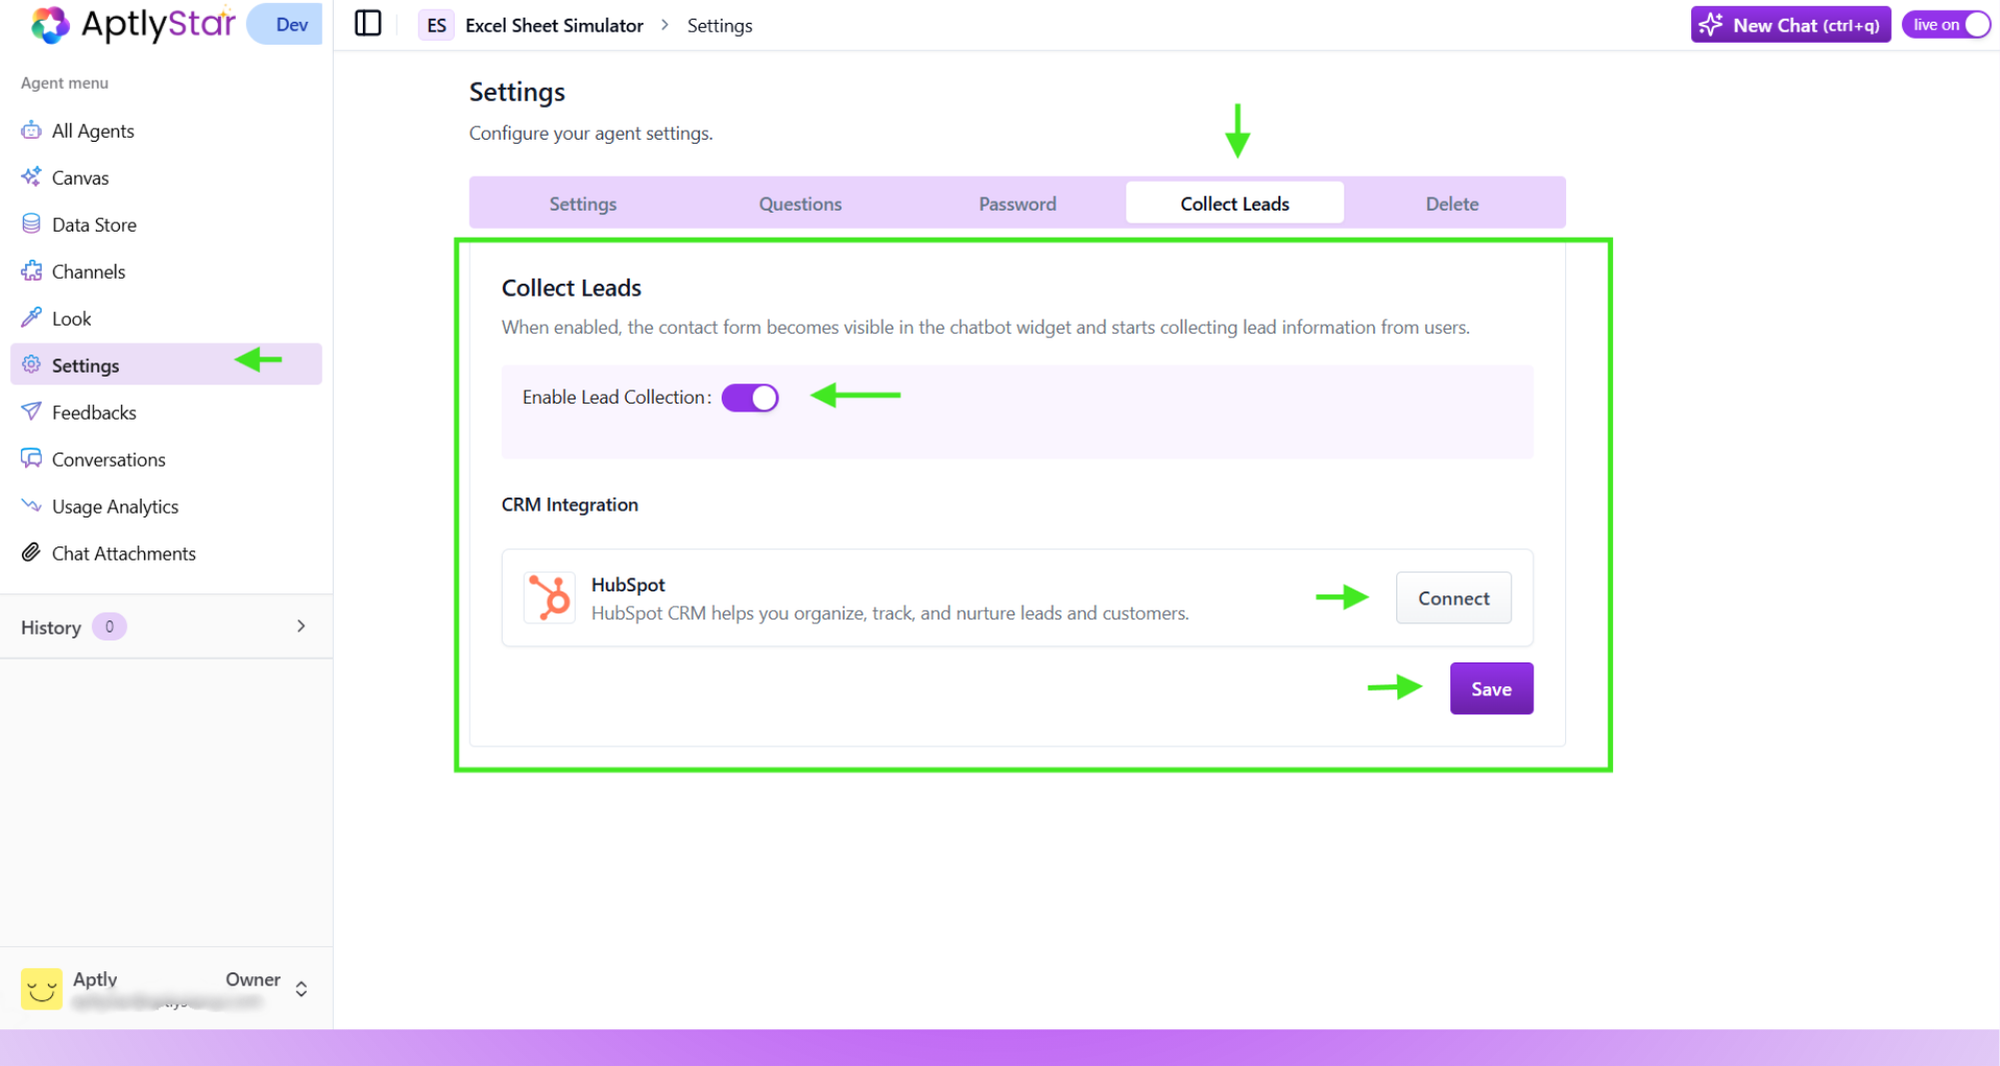
HubSpot Integration
AptlyStar supports direct integration with HubSpot to automatically sync leads collected from your bot. To connect HubSpot:- Navigate to Agent Settings → Collect Leads
- Toggle Enable Lead Collection
- Under CRM Integration, click Connect next to HubSpot
- Authenticate your HubSpot account
- Save your settings
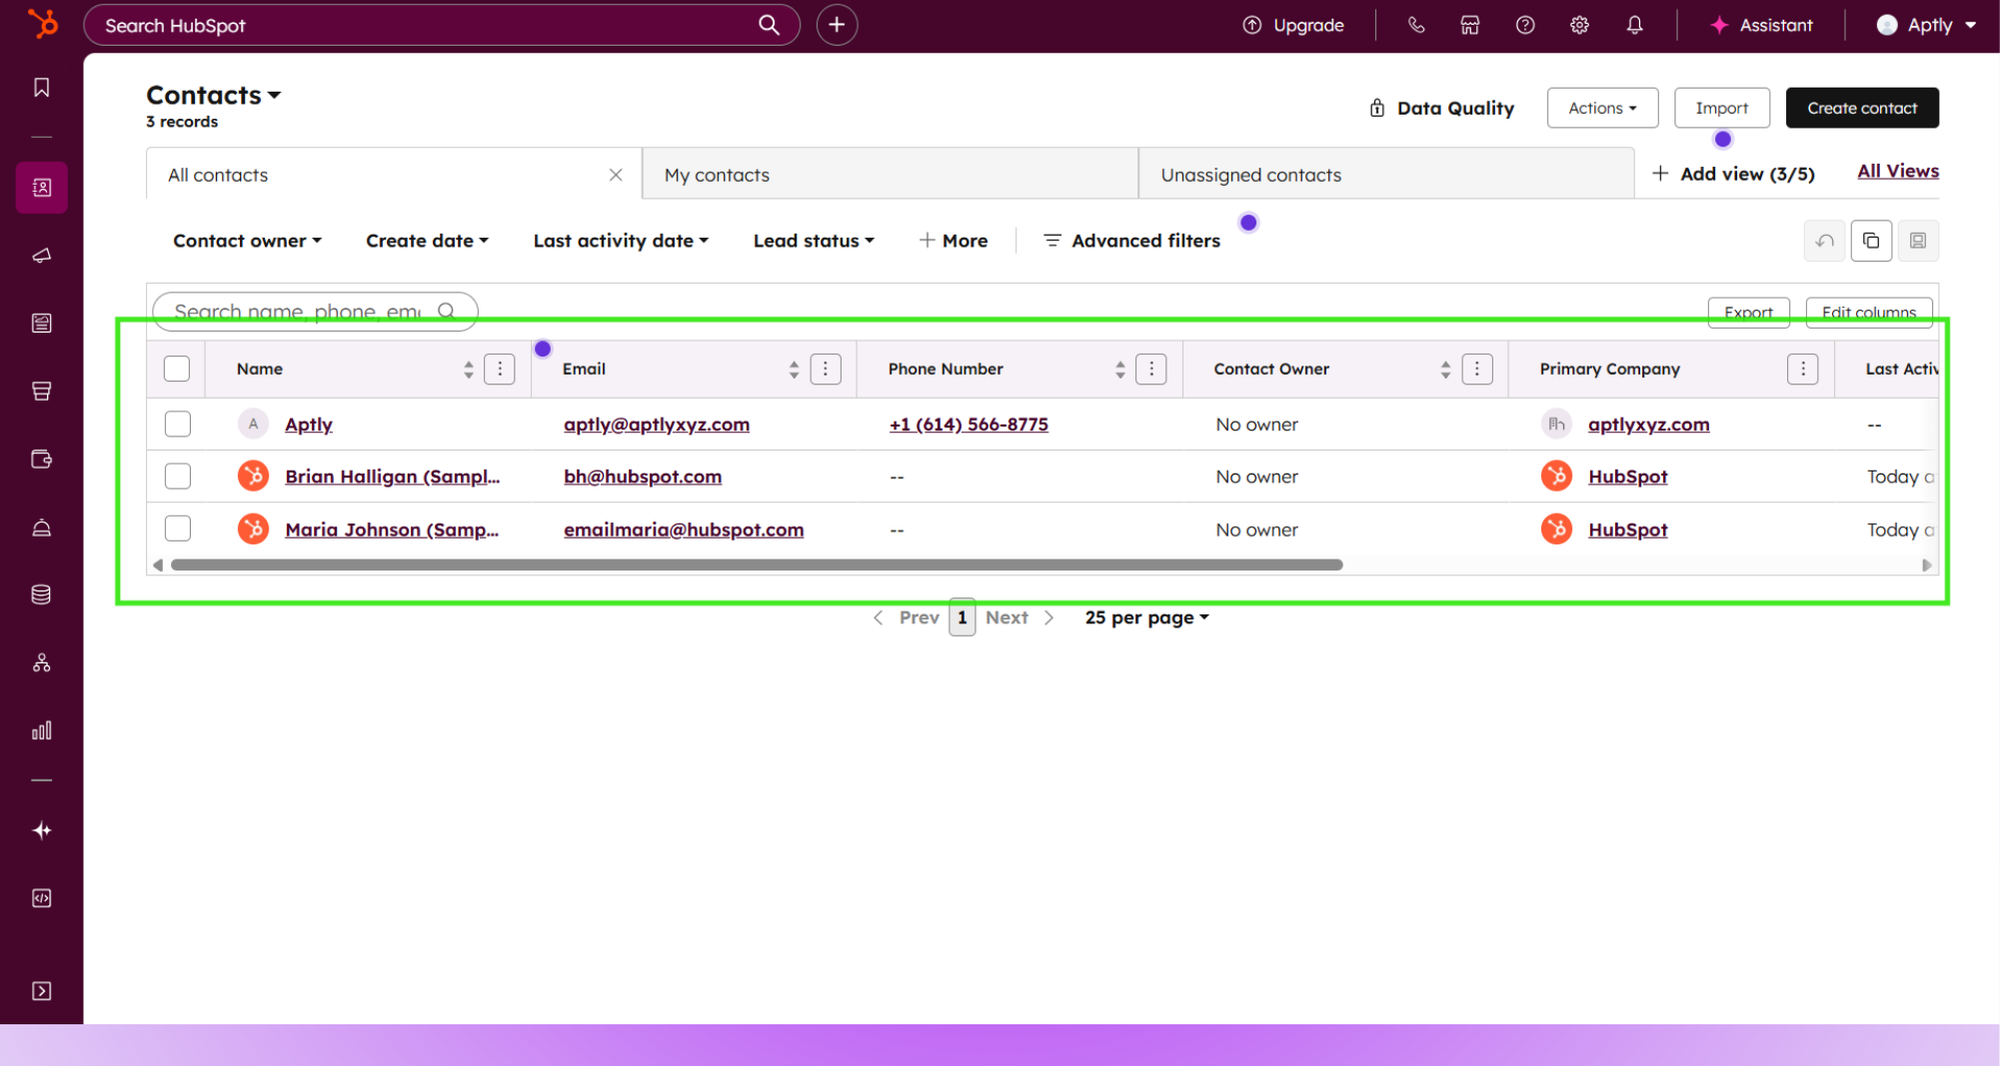
- Every collected lead is automatically pushed to HubSpot
- Contact details include name, email, phone, and any consent info
- Conversation context can be attached for sales follow-ups
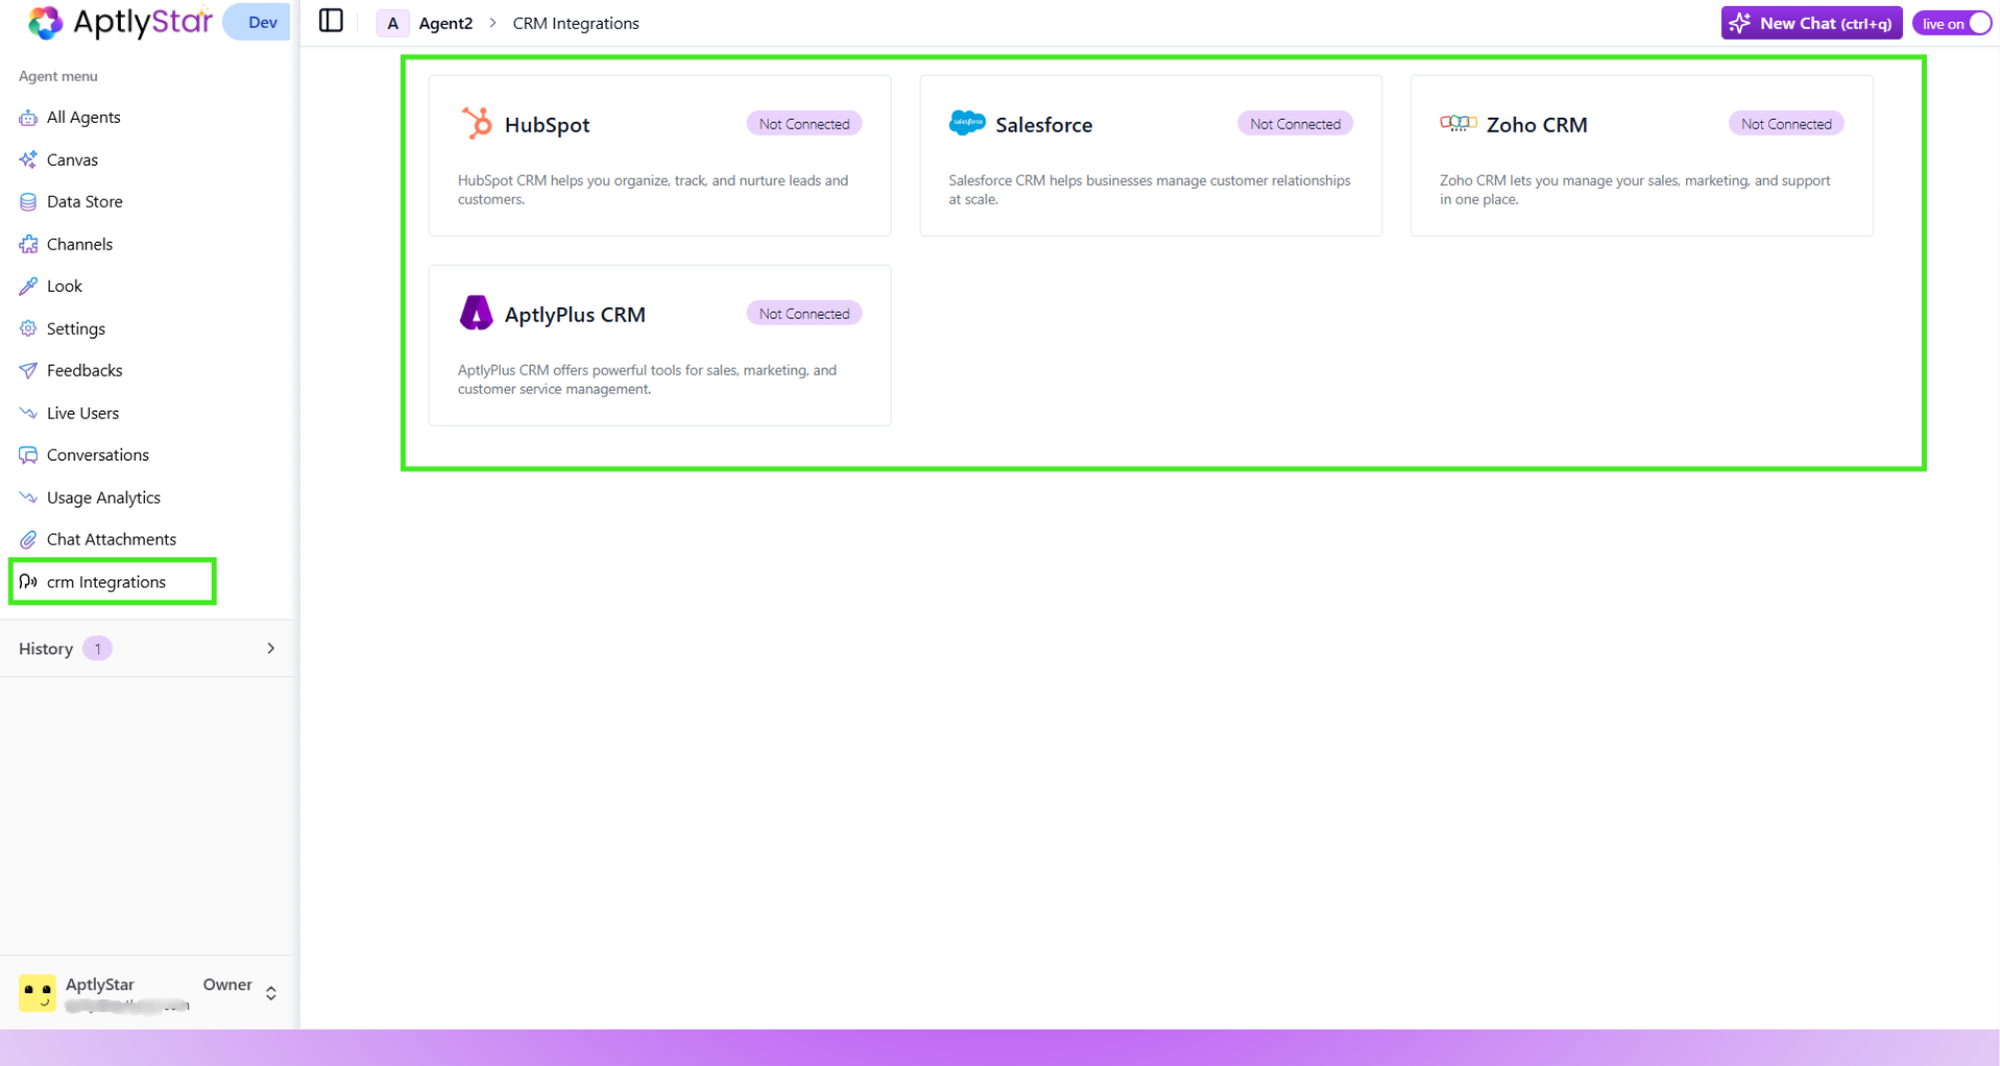
Other CRM Integrations
In addition to HubSpot, AptlyStar supports several other CRM platforms. You can view and connect them under CRM Integrations. Available integrations include:- Salesforce
- Zoho CRM
- AptlyPlus CRM
Lead Collection combined with CRM integrations creates a seamless path from first conversation to CRM record, helping teams act faster on warm leads.