Settings Navigation
Agent Settings: Part 1
Set Chat & Embedding Models
Agent Settings: Part 2
Prompt Types & Prompt Library
Agent Settings: Part 3
Adjust Agent Temperature
Starter Questions
Define Starter Prompts
Query Parameters
Pass Contextual Inputs to Agent
Semantic Similarity Score
Fine-Tune Result Relevance
Agent Settings: Part 1
Configure the base models for your agent.- Navigate to Agent Settings
- Update the Agent name (if needed)
- Choose your Chat model
- Select an Embedding model
- Save the settings
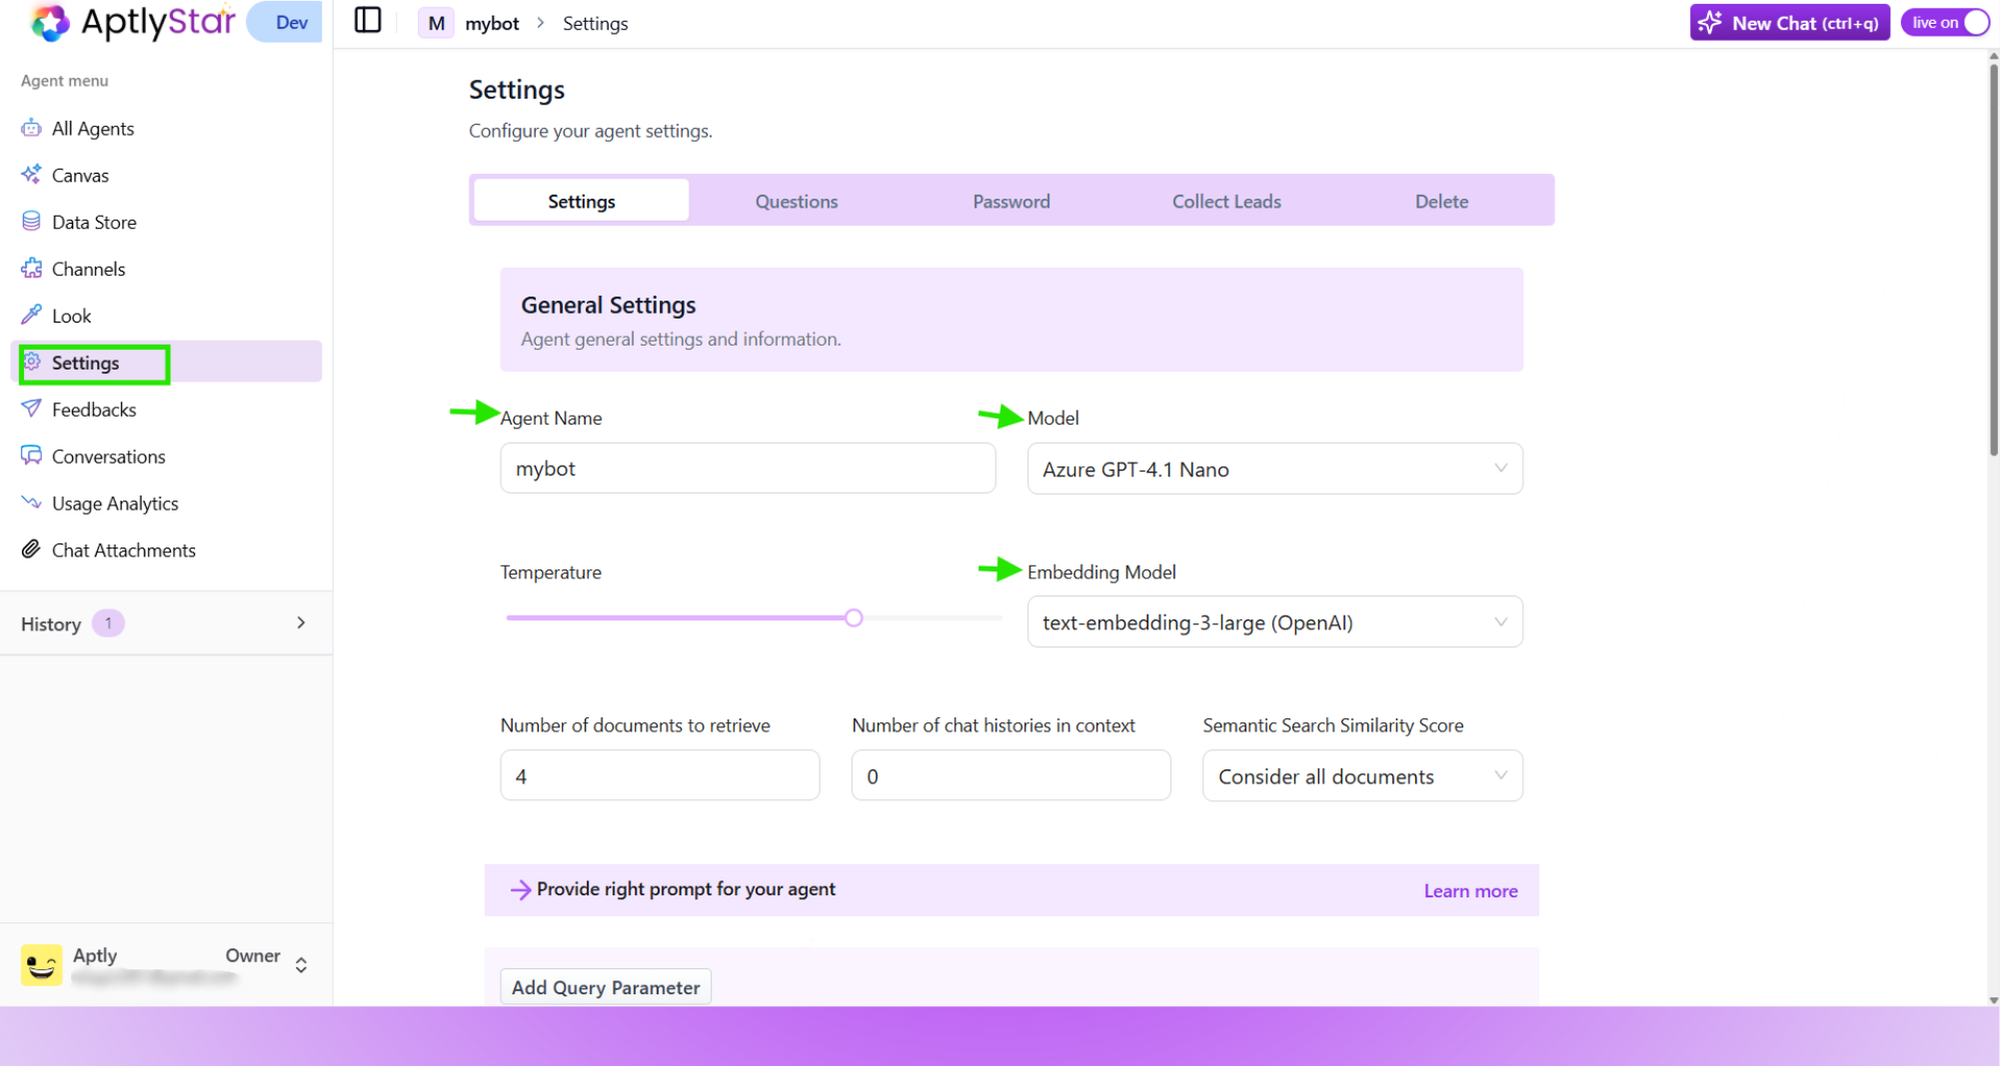
Agent Settings: General Configuration
Agent Settings: Part 2 – Prompts & Library
✅ Configure Prompt Behavior
- Prompt for Own Data: Agent only responds using provided data. No hallucinations — replies with “I don’t know” if unsure.
- Prompt for Web Data: Good for standalone, follow-up questions without context.
- Prompt Library: Use system-defined prompts for use cases like Interviewer, Educator, or Assistant.
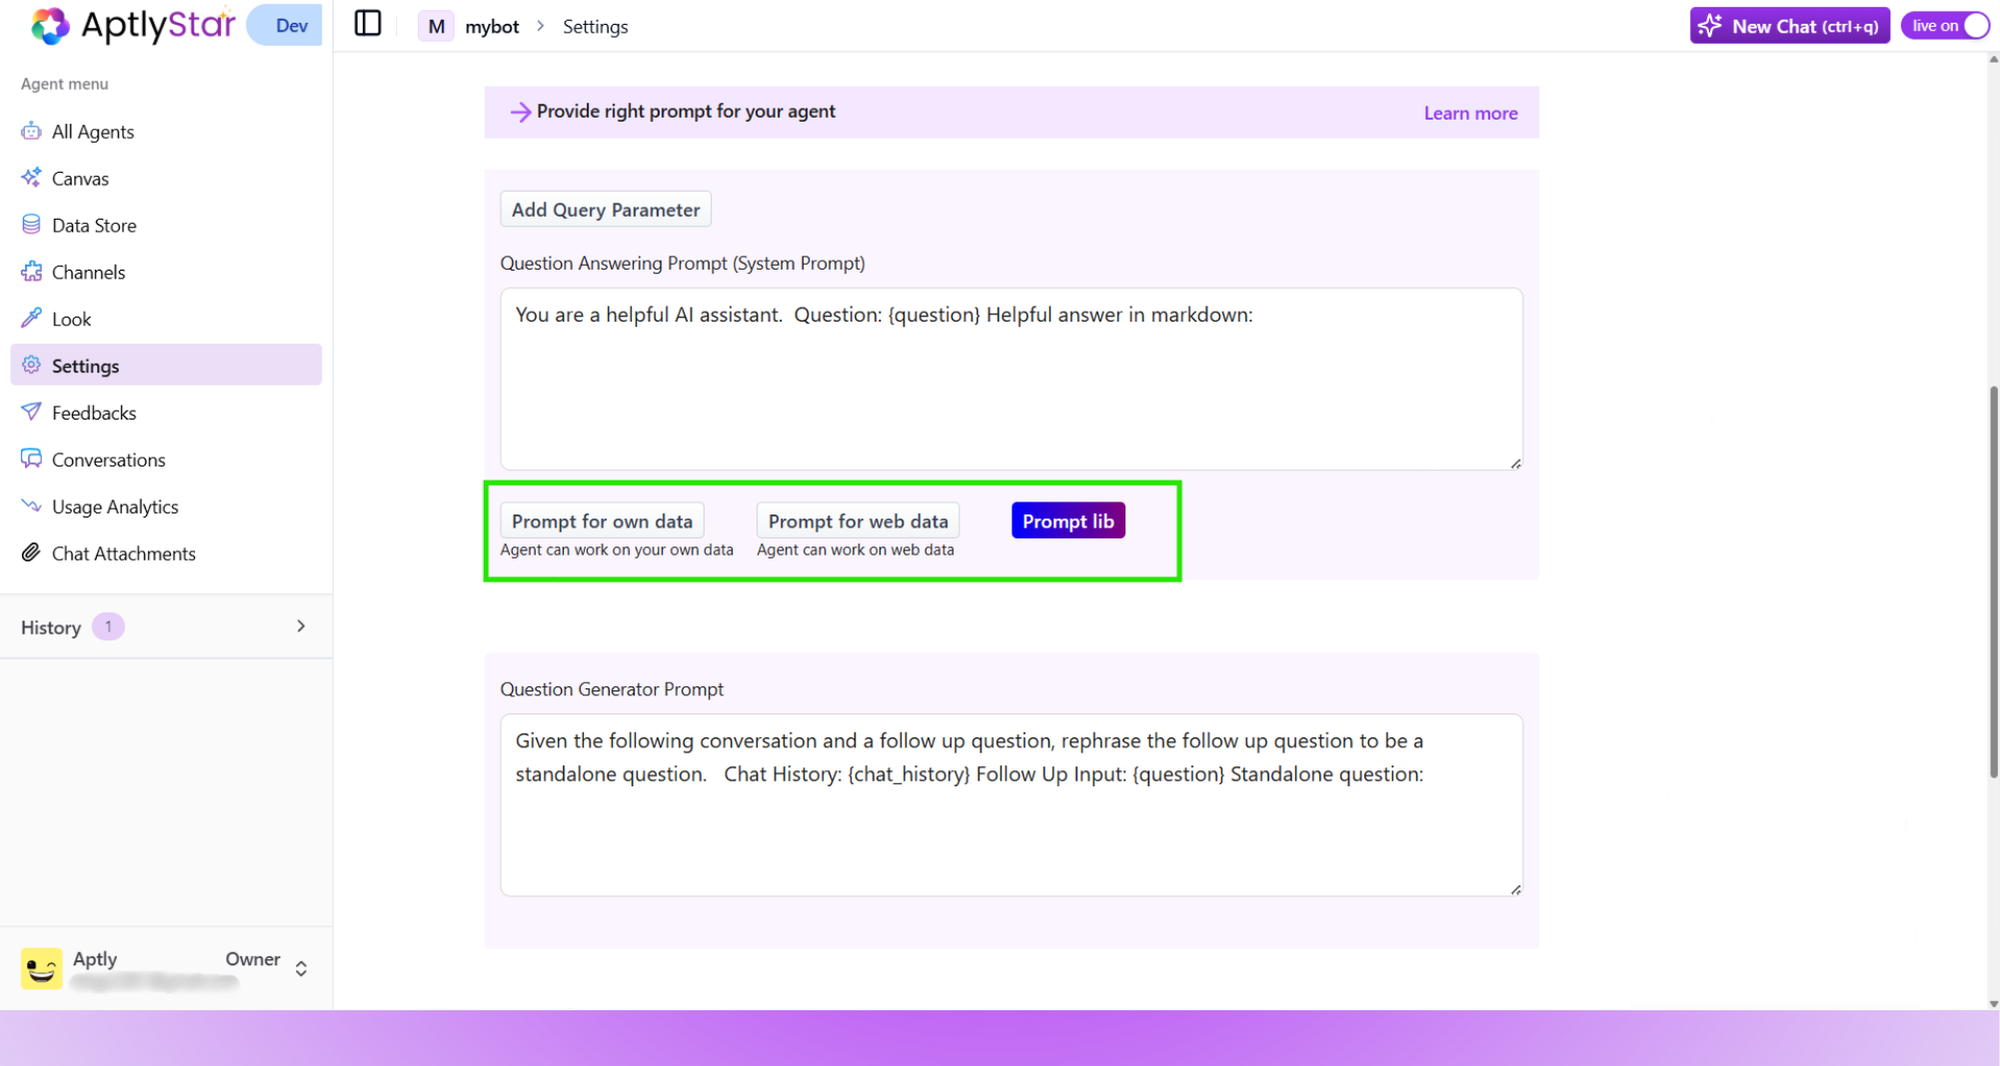
Prompt Configuration Panel in Agent Settings
Using the Prompt Library
1
Browse and Apply Predefined Prompts
Click Prompt lib to access the built-in library of system prompts.
Select a category that matches your agent’s purpose — e.g., Position Interviewer, Storyteller, FAQ Agent.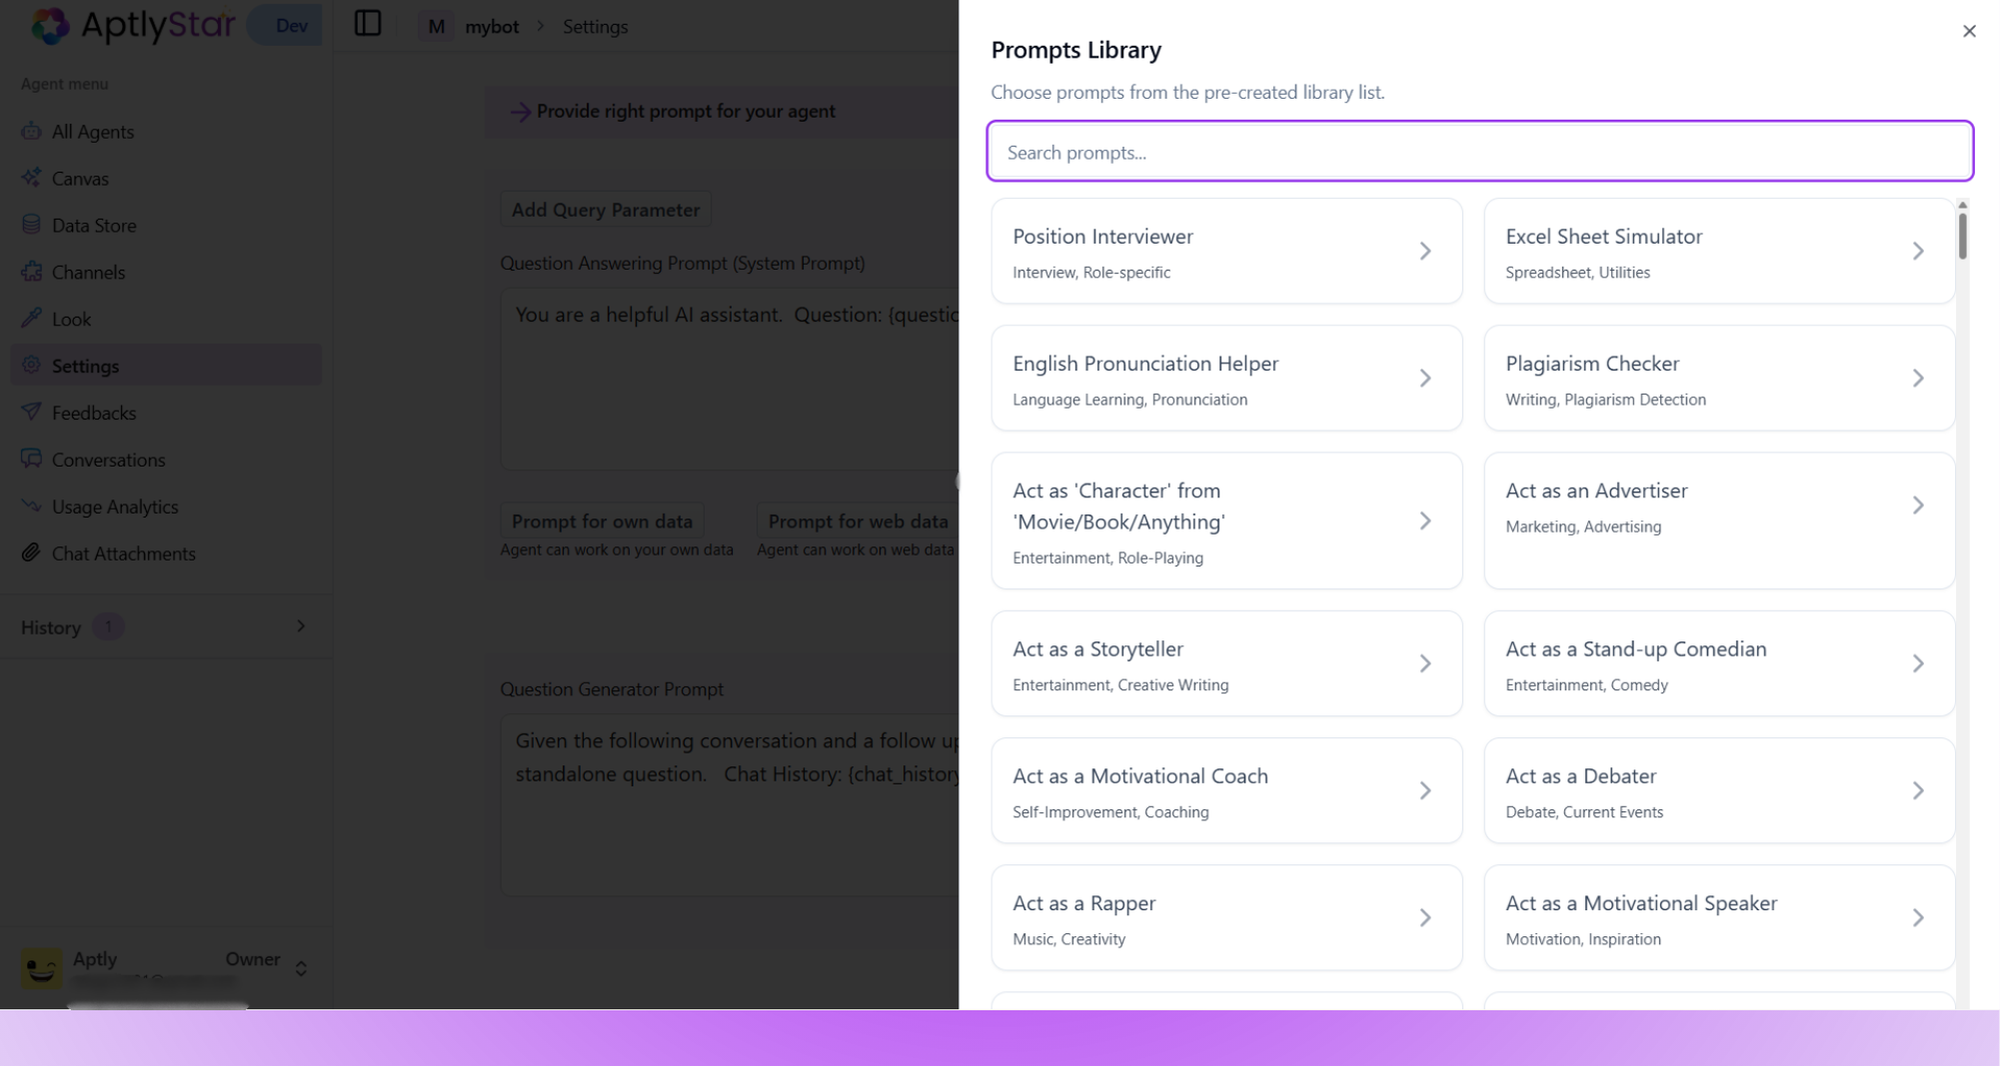
Select a category that matches your agent’s purpose — e.g., Position Interviewer, Storyteller, FAQ Agent.

Prompt Library: Browse Built-in Prompt Options
2
Preview and Confirm Selection
After selecting a prompt, preview its description and sample usage.
Click Use Prompt to confirm and apply it to your agent.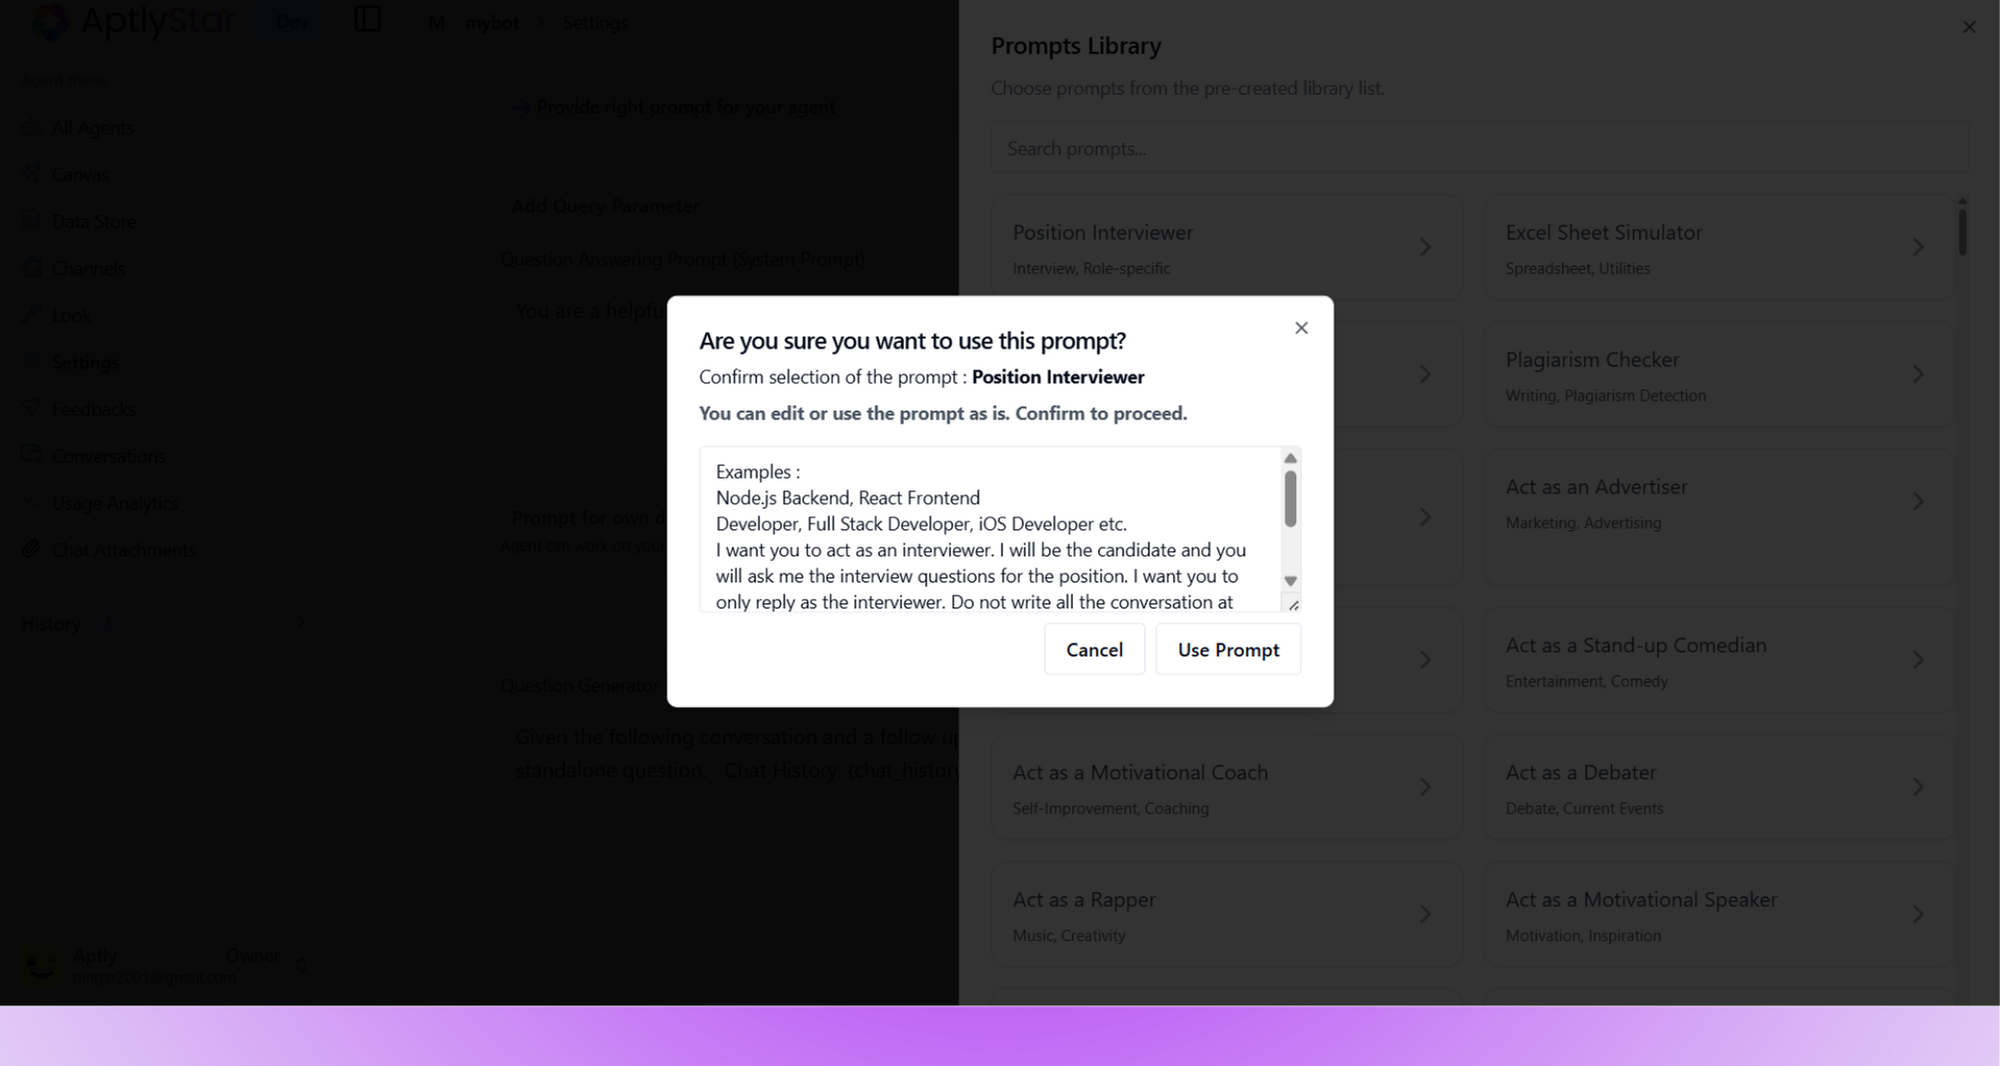
Click Use Prompt to confirm and apply it to your agent.

Prompt Confirmation: View & Confirm Prebuilt Prompt
Agent Settings: Part 3 - Temperature
Control the creativity or precision of your agent responses:0.0 – 0.3: Very accurate and focused0.4 – 0.7: Balanced response generation0.8 – 1.0: More imaginative and open-ended
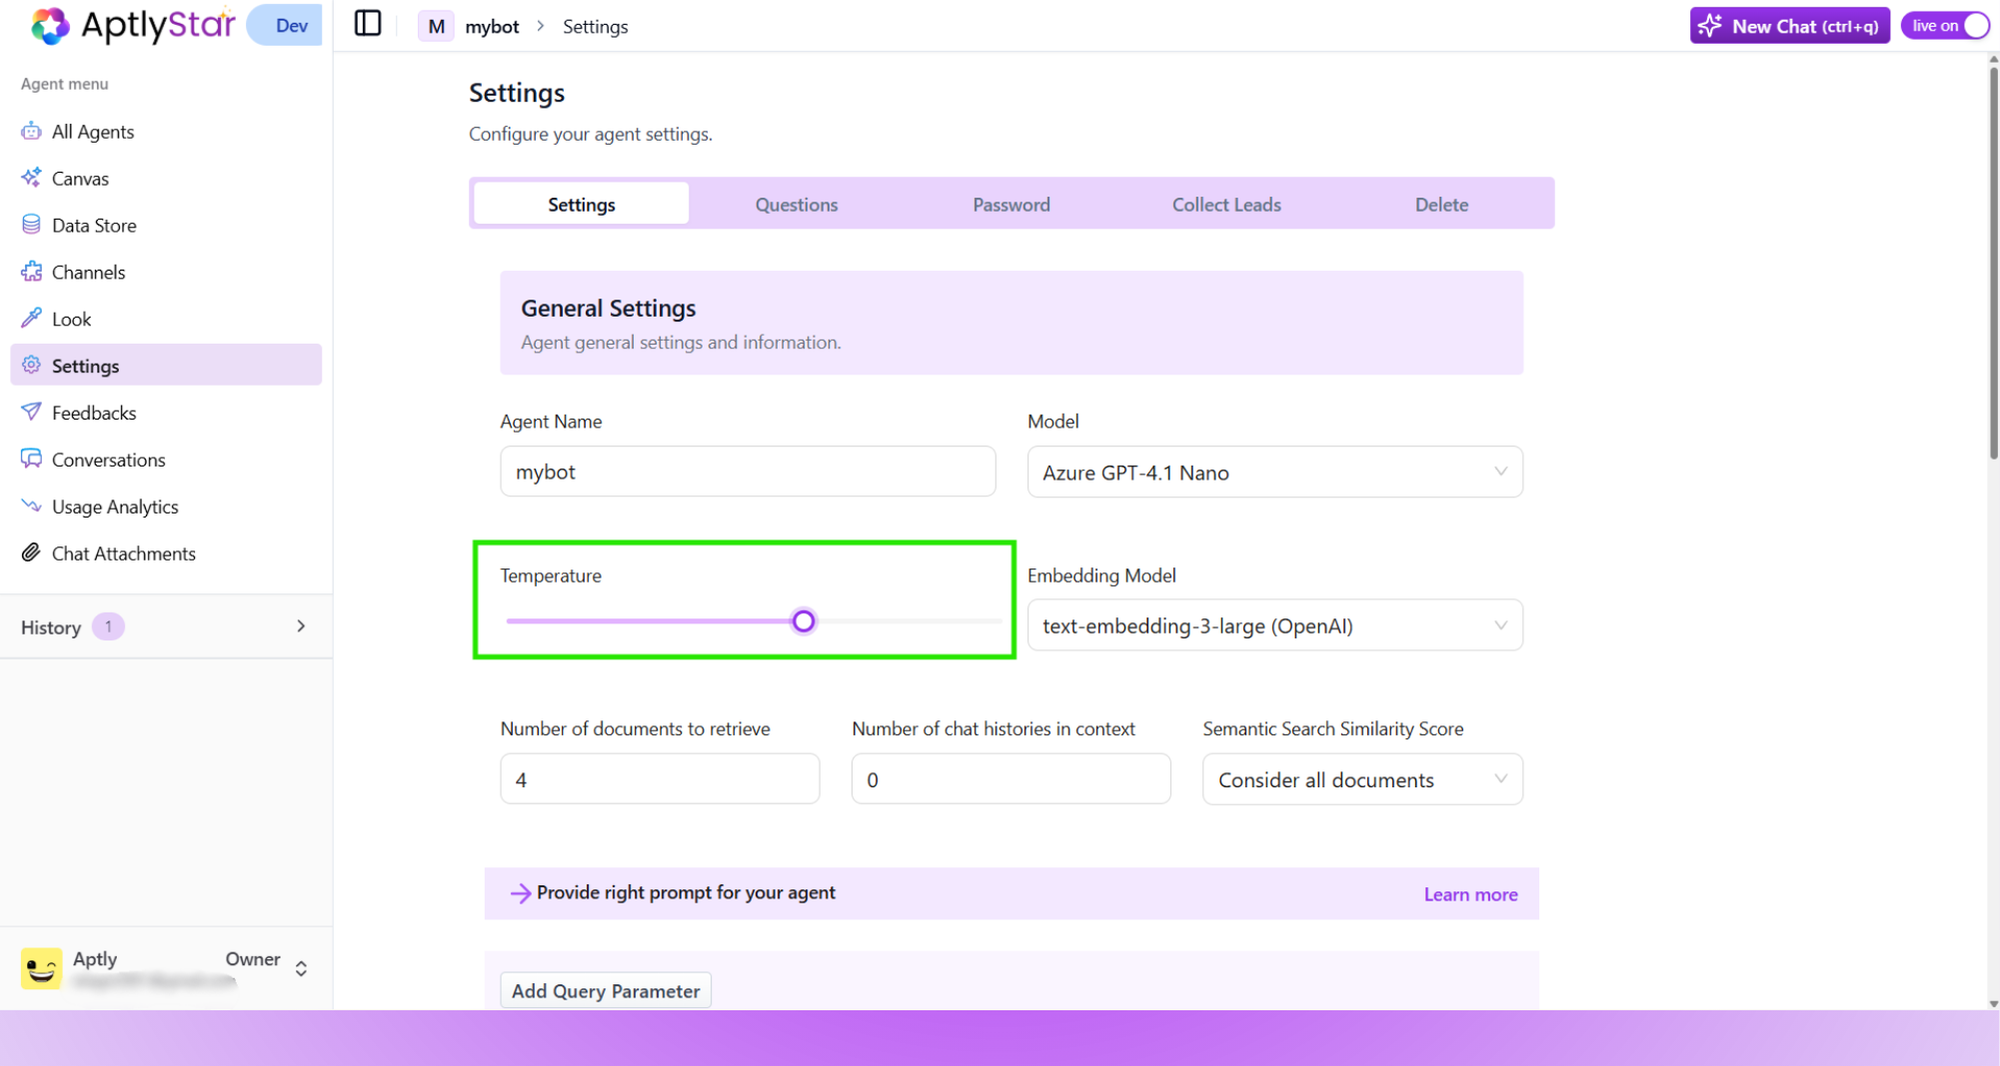
Agent Settings: Adjusting Response Temperature
Starter Questions
Let users quickly start conversations with predefined questions.How to Add Starter Questions
- Go to Agent Settings → Starter Questions
- Add up to 4 questions relevant to your agent
- Click Add and then Save
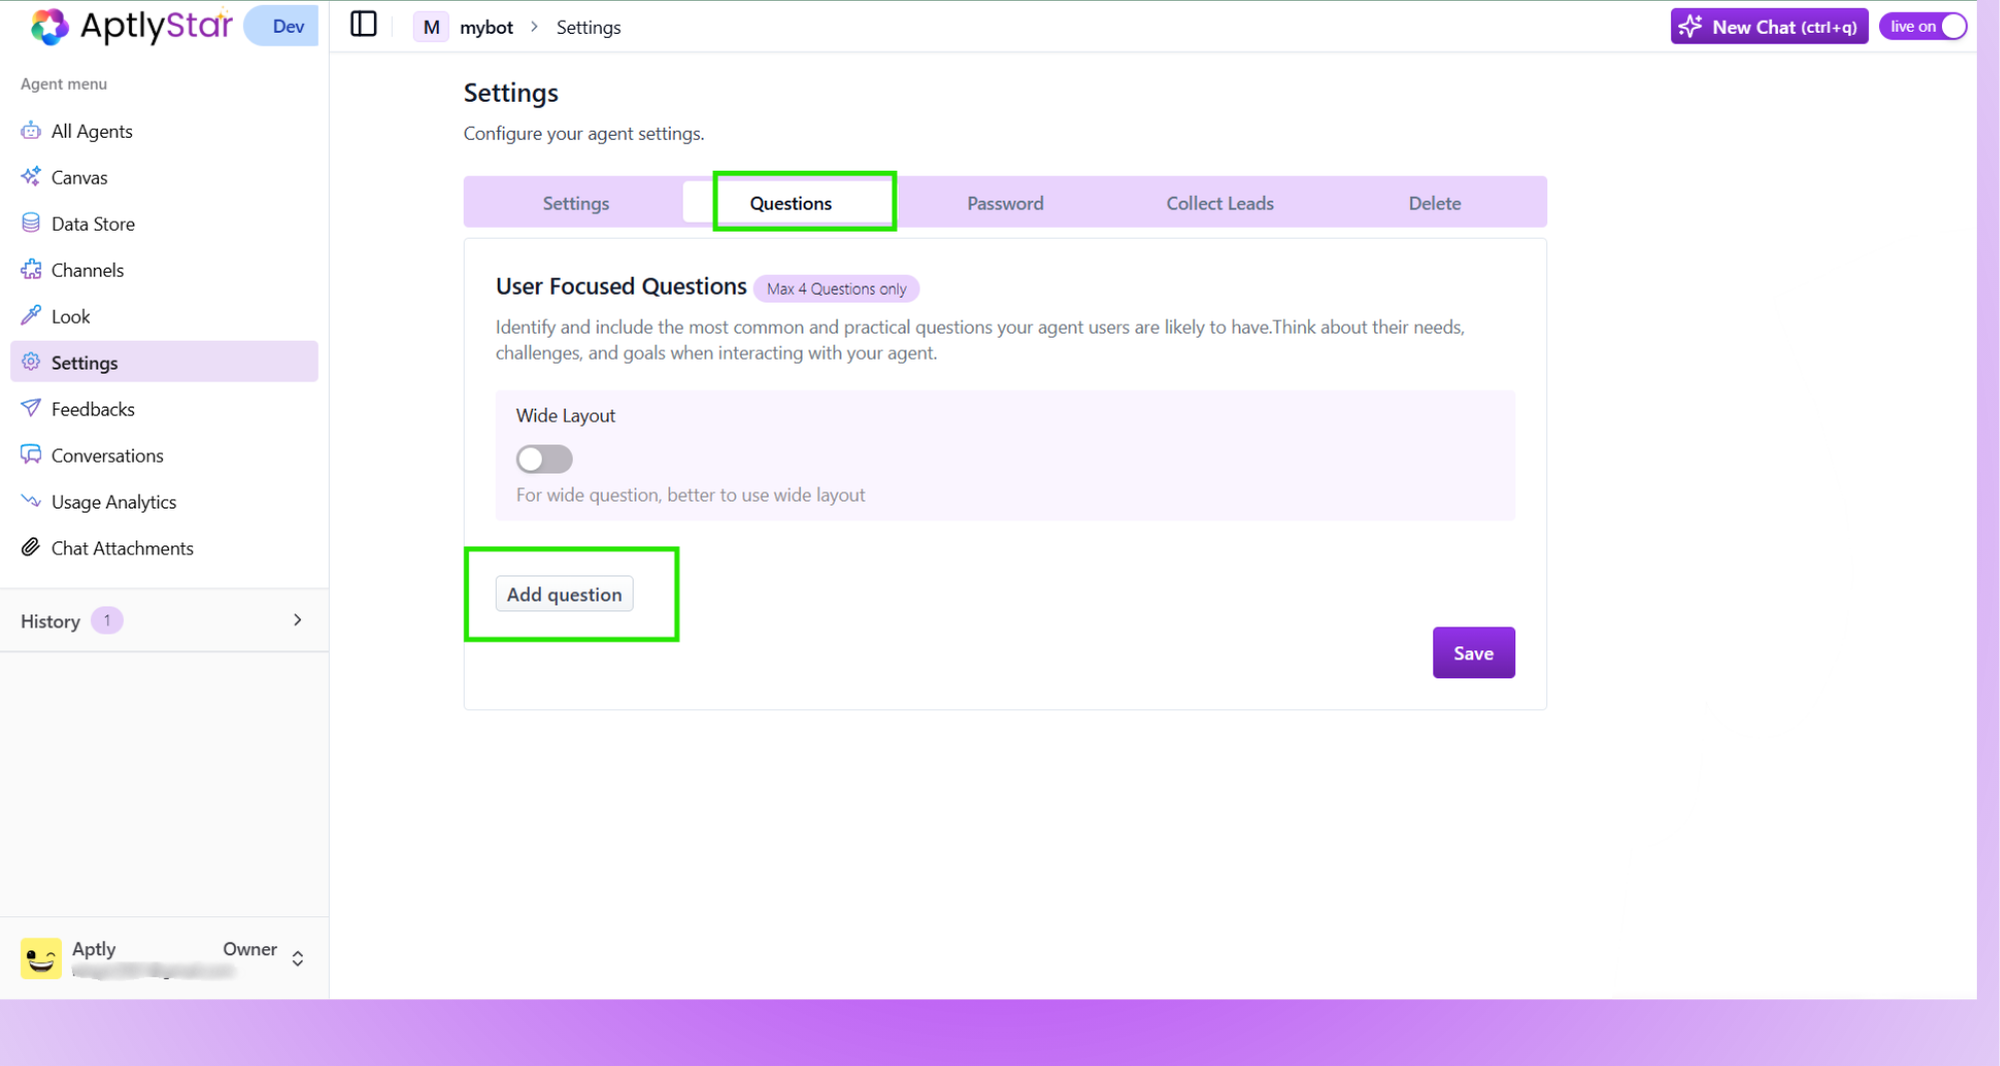
Starter Questions: Configuration Screen
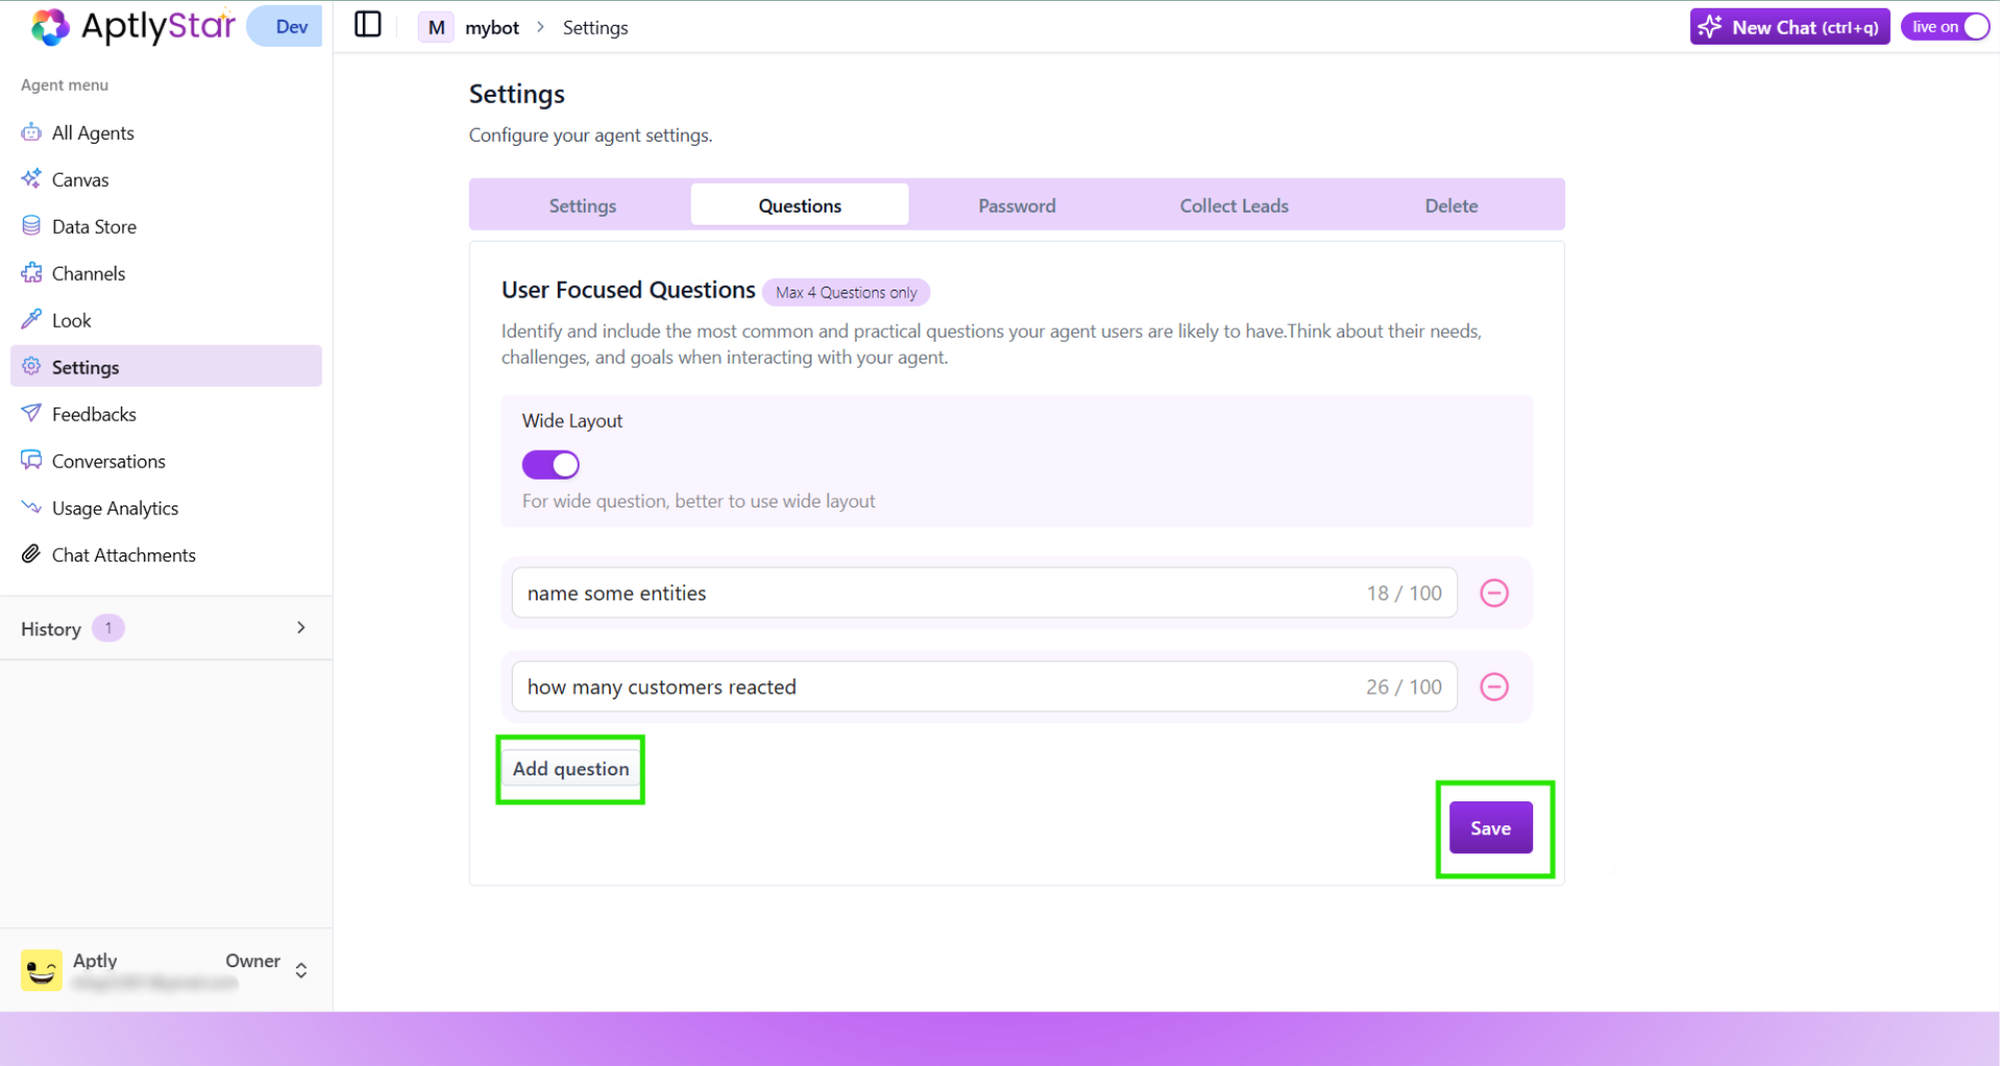
Starter Questions: Configure Screen
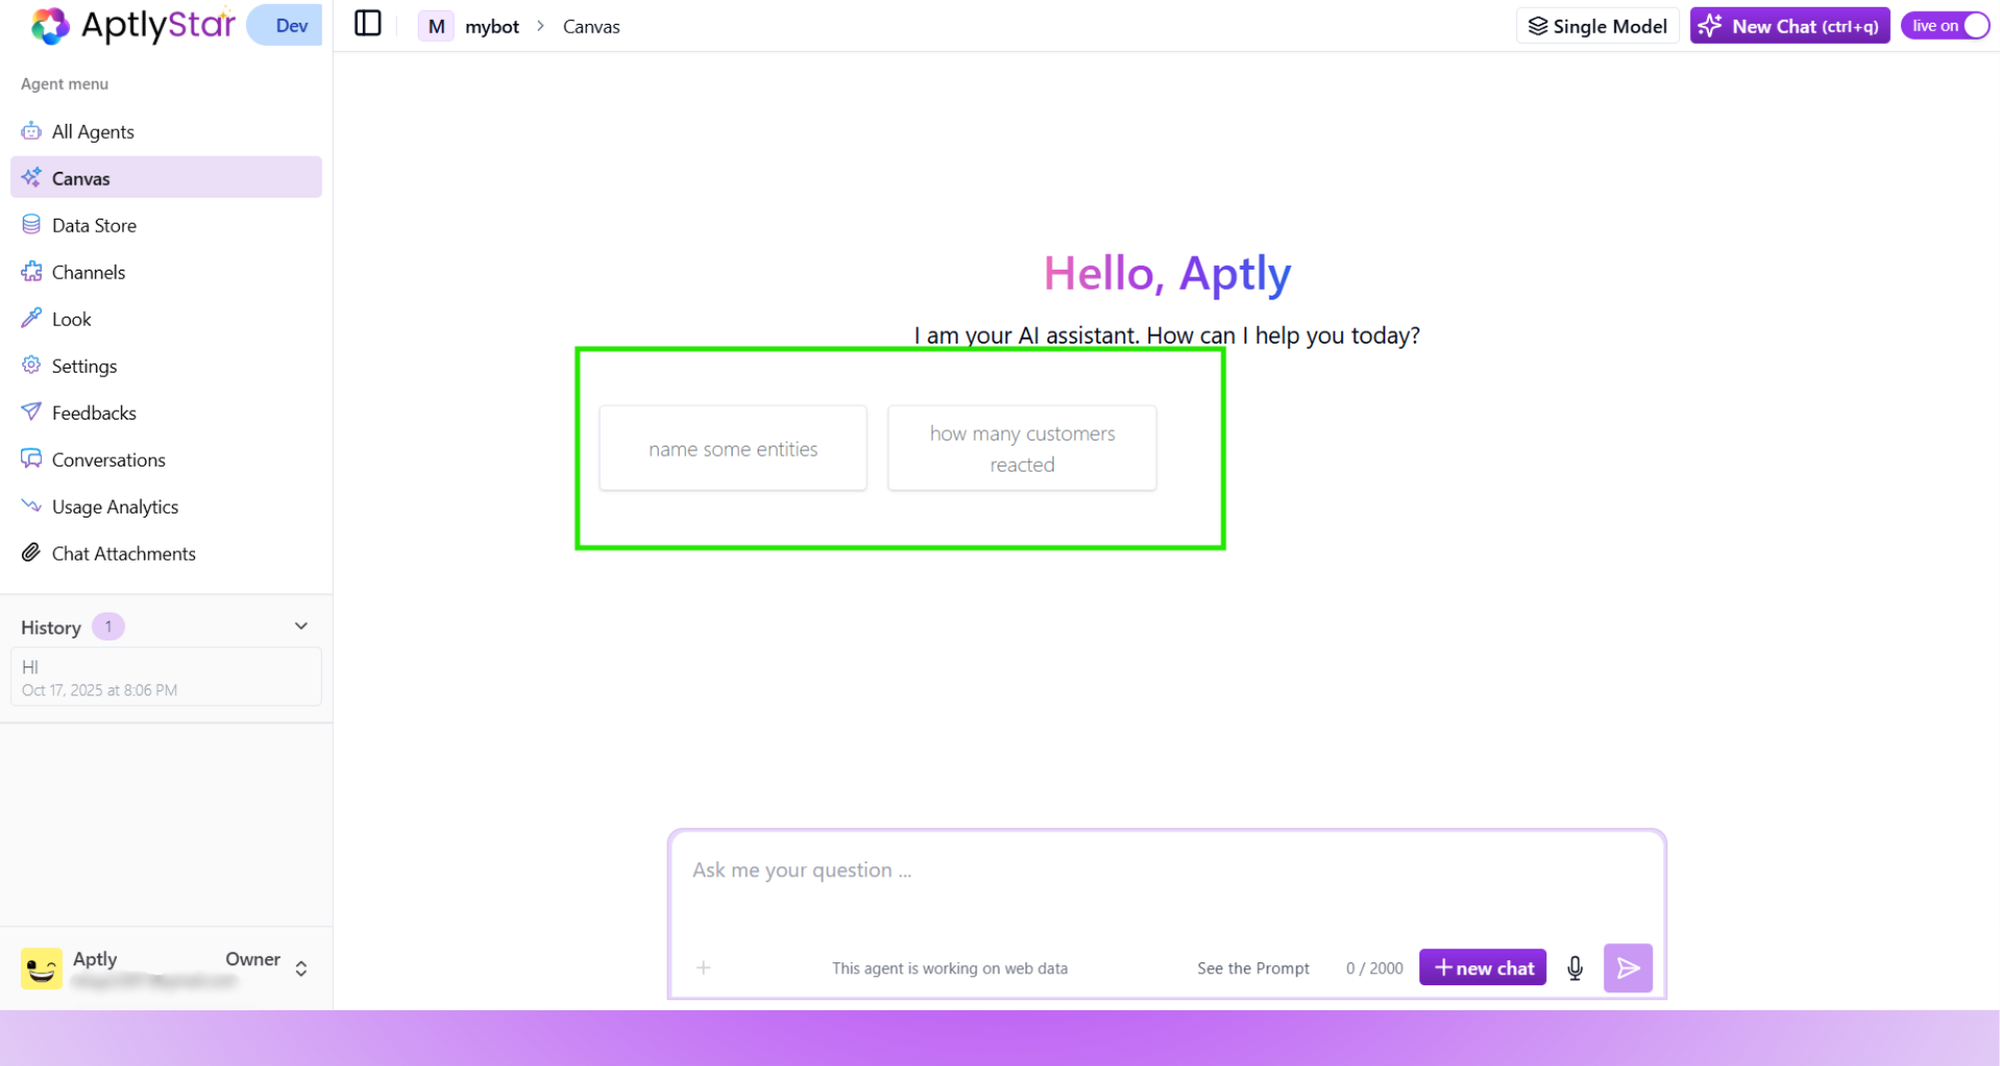
Starter Questions: Display in Playground
Query Parameters
Query parameters allow you to inject dynamic data — like user ID, department, or context — directly into your agent’s logic.How to Add Query Parameters
- Go to Agent Settings
- Click Add Query Parameter
- Provide a name and reference in your prompt
- Save the changes
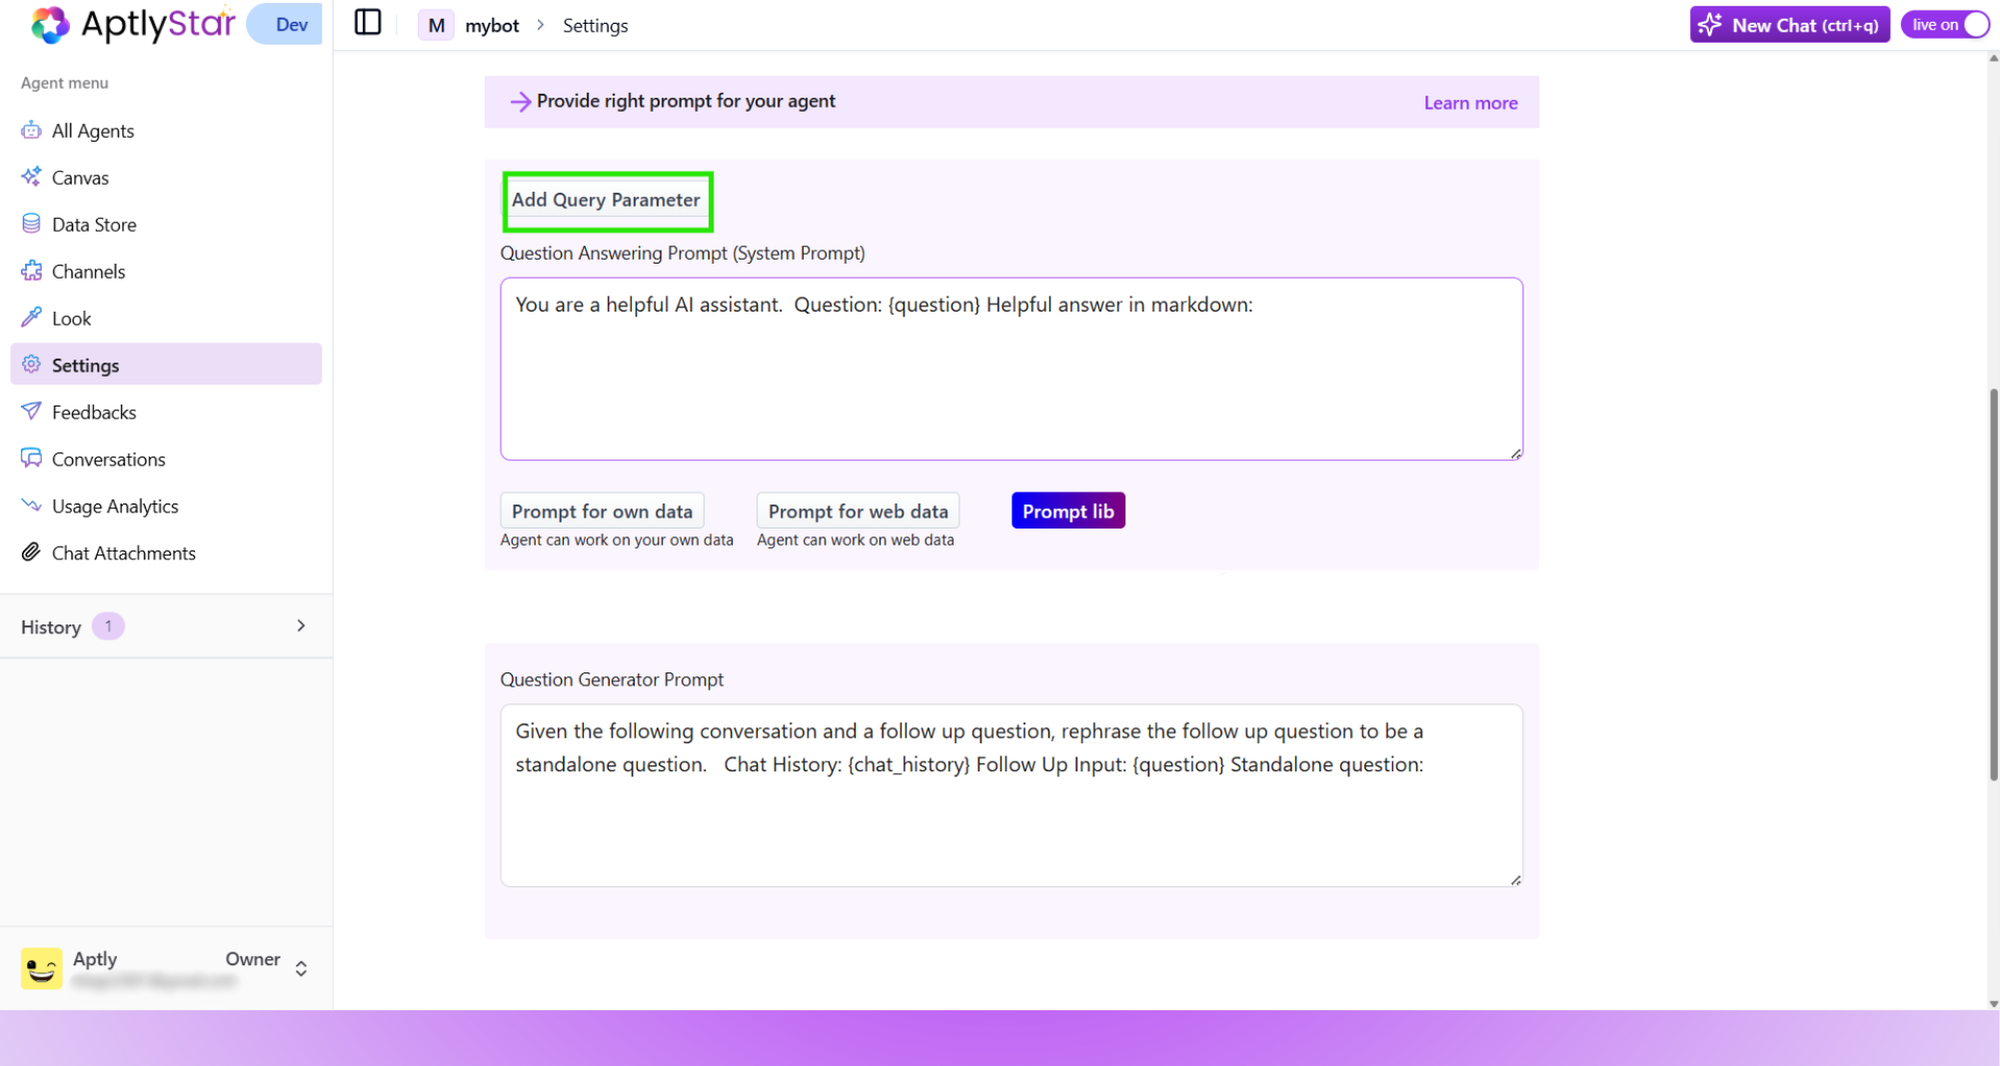
Query Parameters: Configuration in Settings
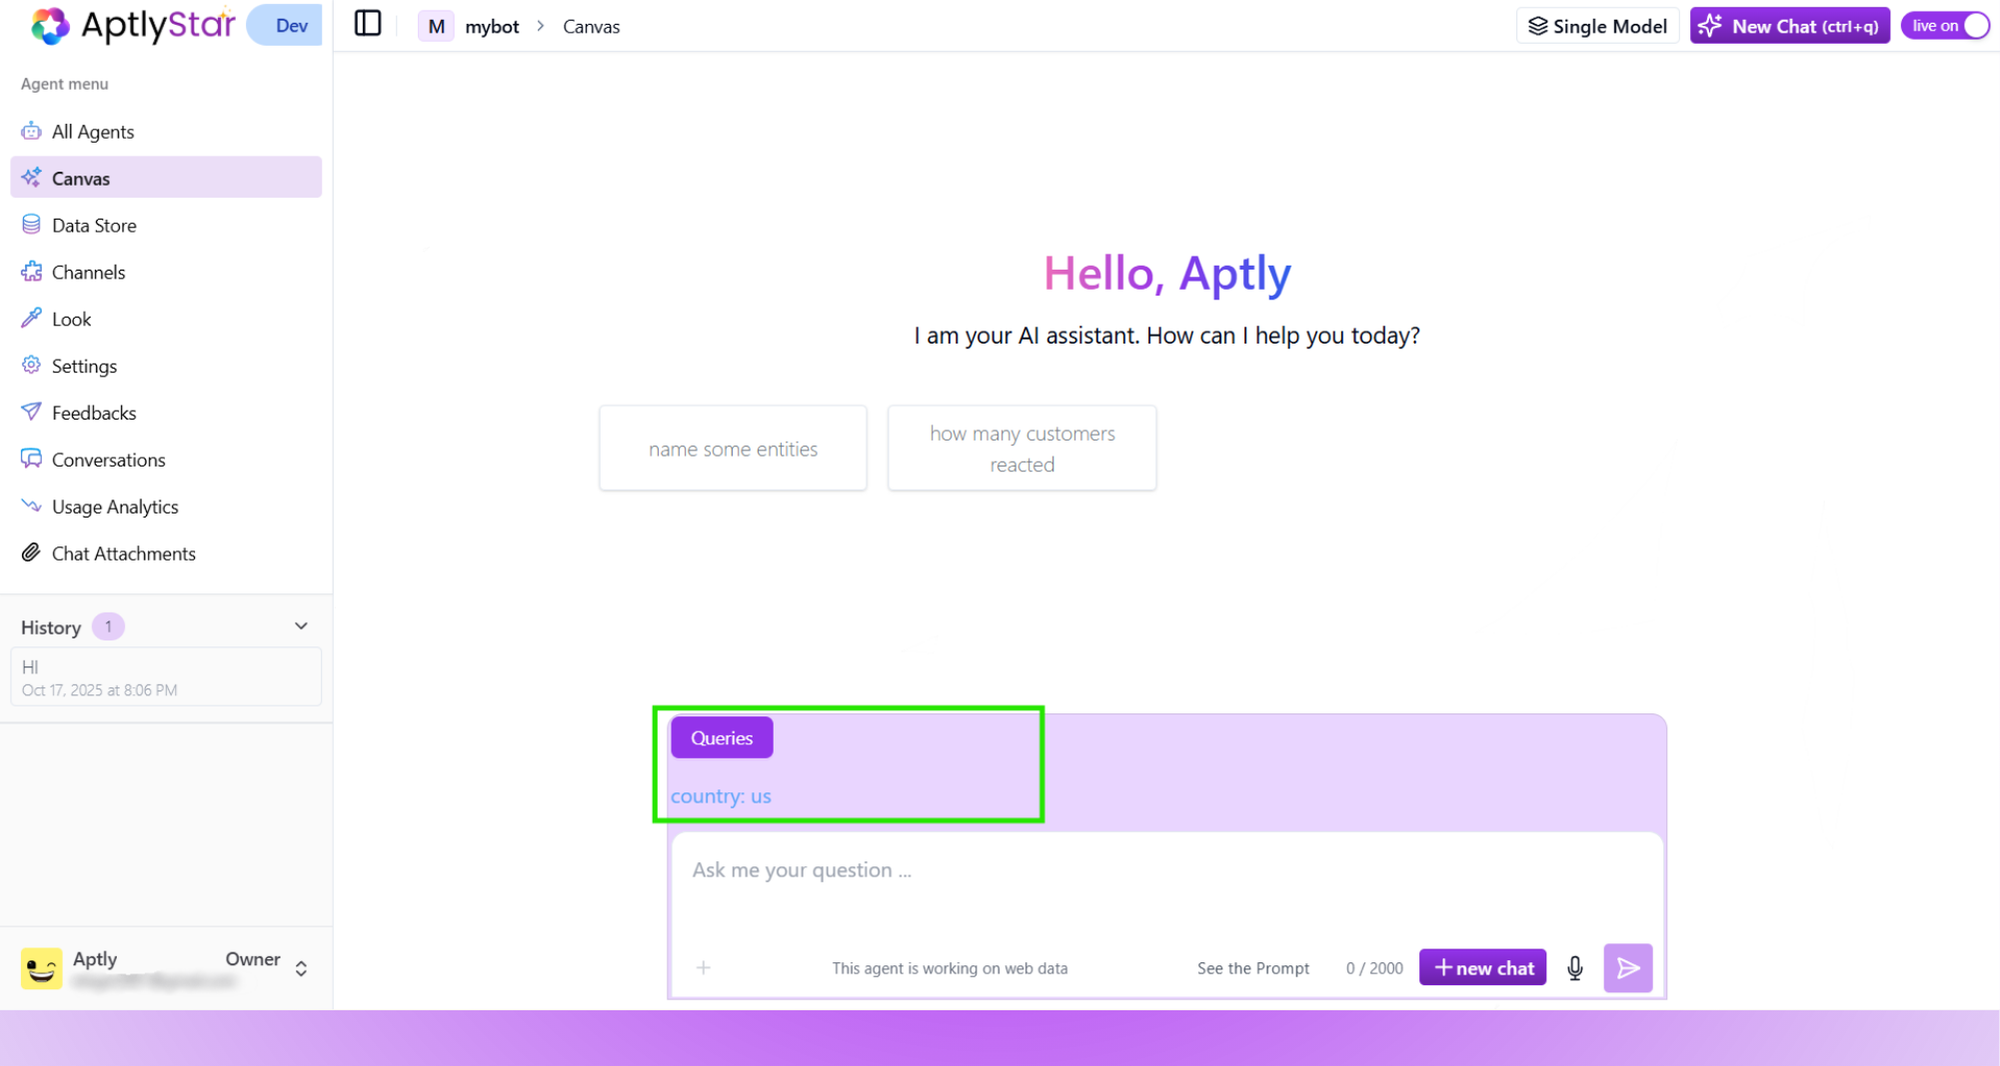
Query Parameters: Visible in Playground
🎯 Semantic Search Similarity
Control how precisely the agent matches your knowledge base.Relevance Thresholds
≥ 0.2: Broad, flexible match≥ 0.5: Moderate contextual relevance≥ 0.7: Strict precision
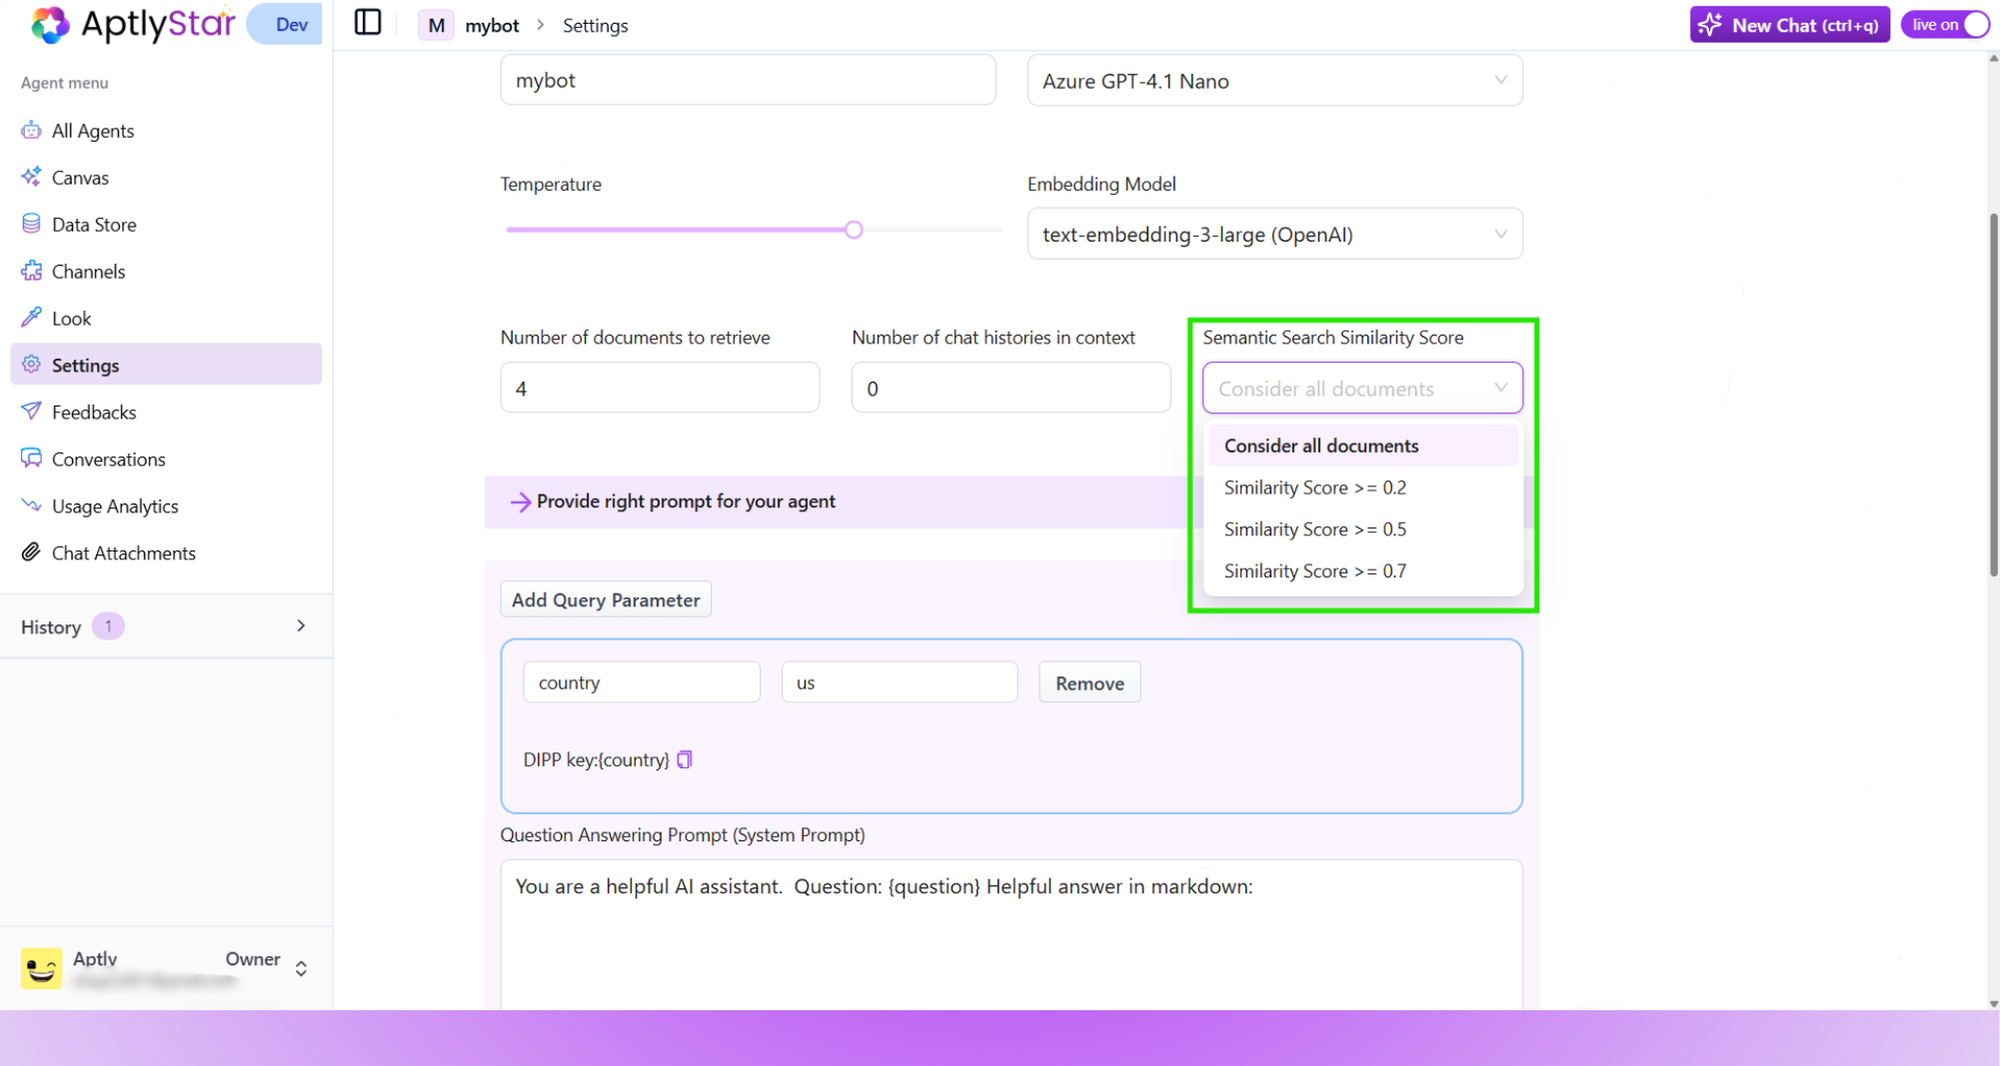
Semantic Scoring: Changing the Match Threshold
📩 Lead Collection
You can now enable lead collection directly from the Settings panel.How it Works
- When Enable Lead Collection is turned on, a contact form will be shown inside the agent widget.
- This form gathers user information like name, email, and optional notes.
- It helps convert casual visitors into potential leads or customers.
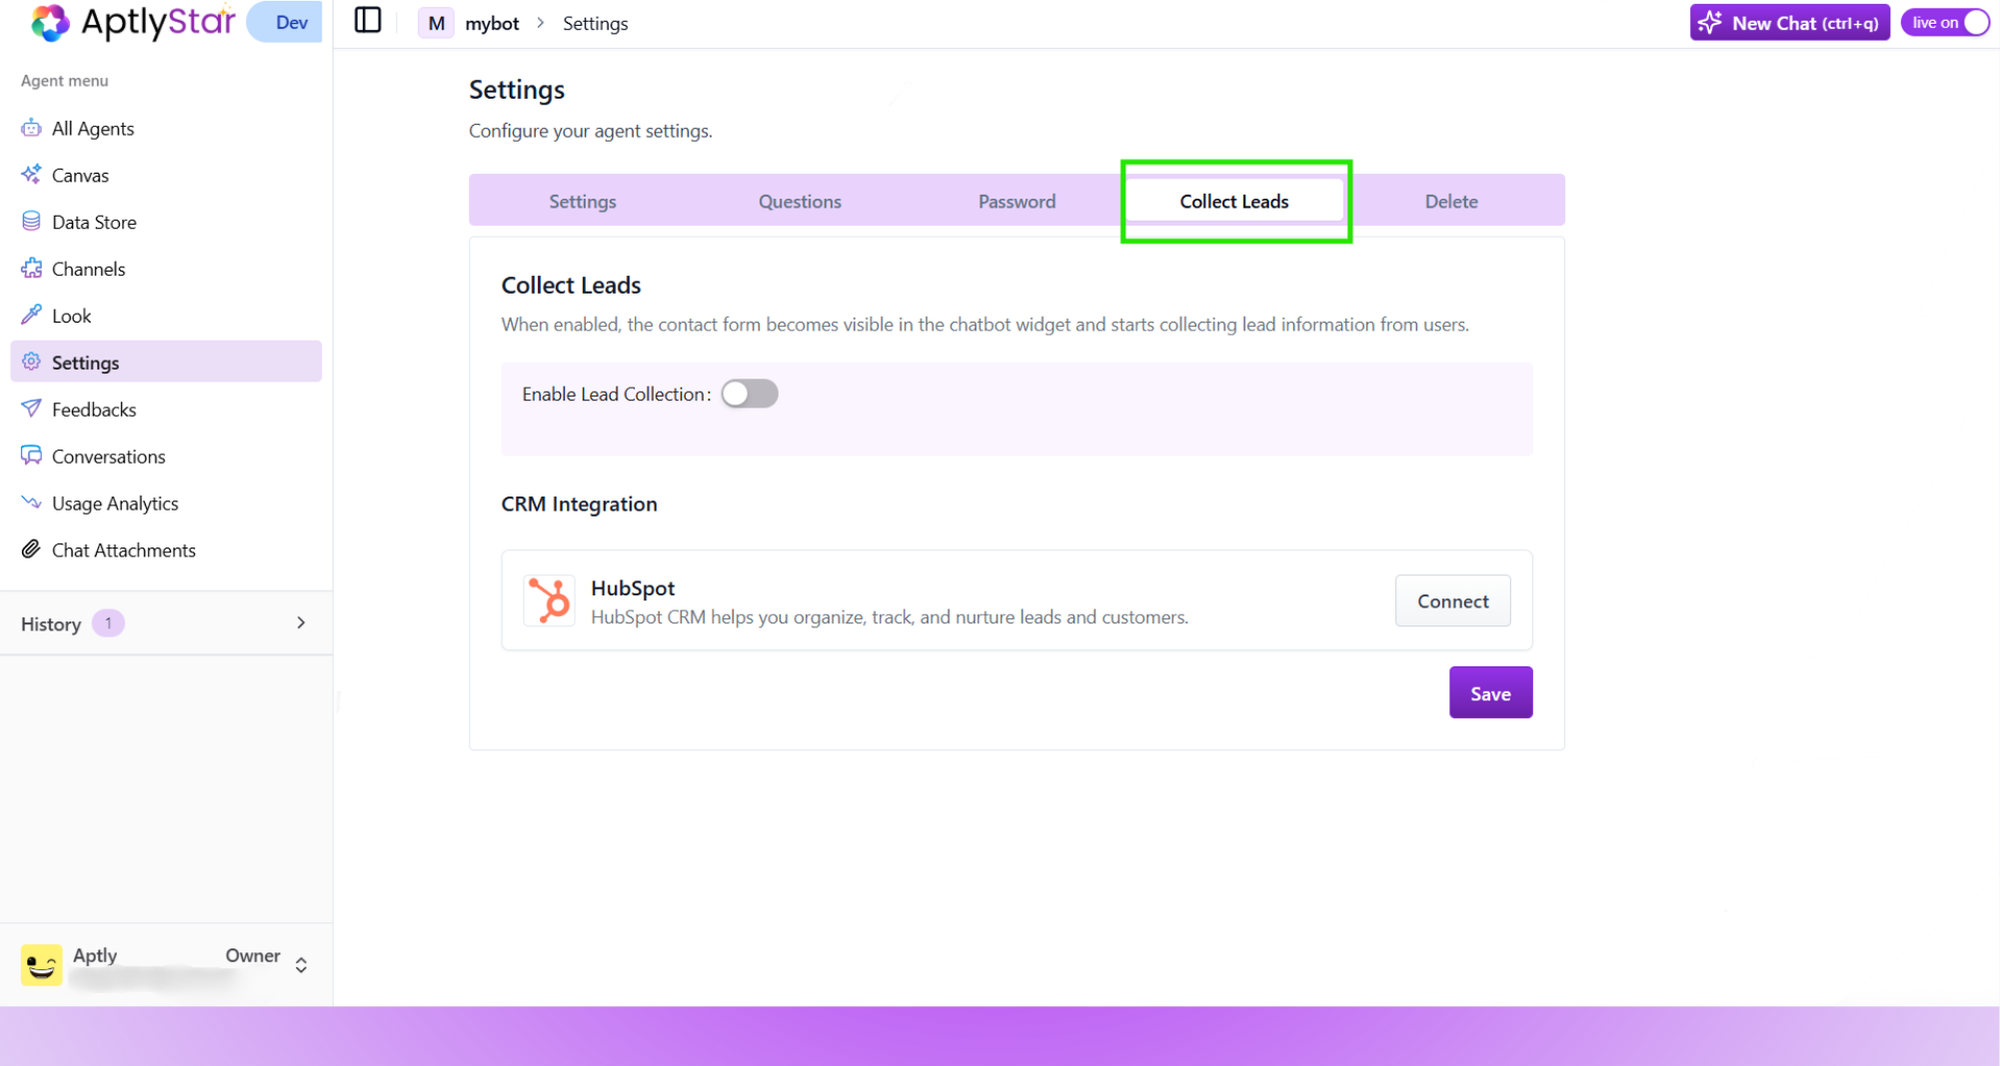
Settings: Lead Collection Toggle
Lead collection is a powerful way to capture qualified interest and convert chat interactions into actionable sales or support opportunities.
Configure these settings thoughtfully to ensure your agent delivers helpful, relevant, and contextually aware responses every time.

