Users in Your Organization
The Users section displays a list of all members within your organization. You can assign them roles with varying permissions based on their responsibilities. This enables clear role-based access control for managing projects, agents, and settings.Roles and Responsibilities
There are three types of user roles in the organization, each with distinct levels of access and responsibility:1. Owner of Organization
- Full access to all organizational settings, users, and permissions
- Can add, edit, delete, or activate/deactivate users
- Can invite users as Admin or Owner
2. Admin of Organization
- Can manage users, data, and organization settings
- May have limited access to owner-level features
3. User / Agent Manager
- Can access assigned projects and resources
- Cannot manage other users or modify organizational settings
User Management Actions
Add Users in Organization
Add and invite users to your organization and assign them roles.
User Console
View and manage user details in the User Console.
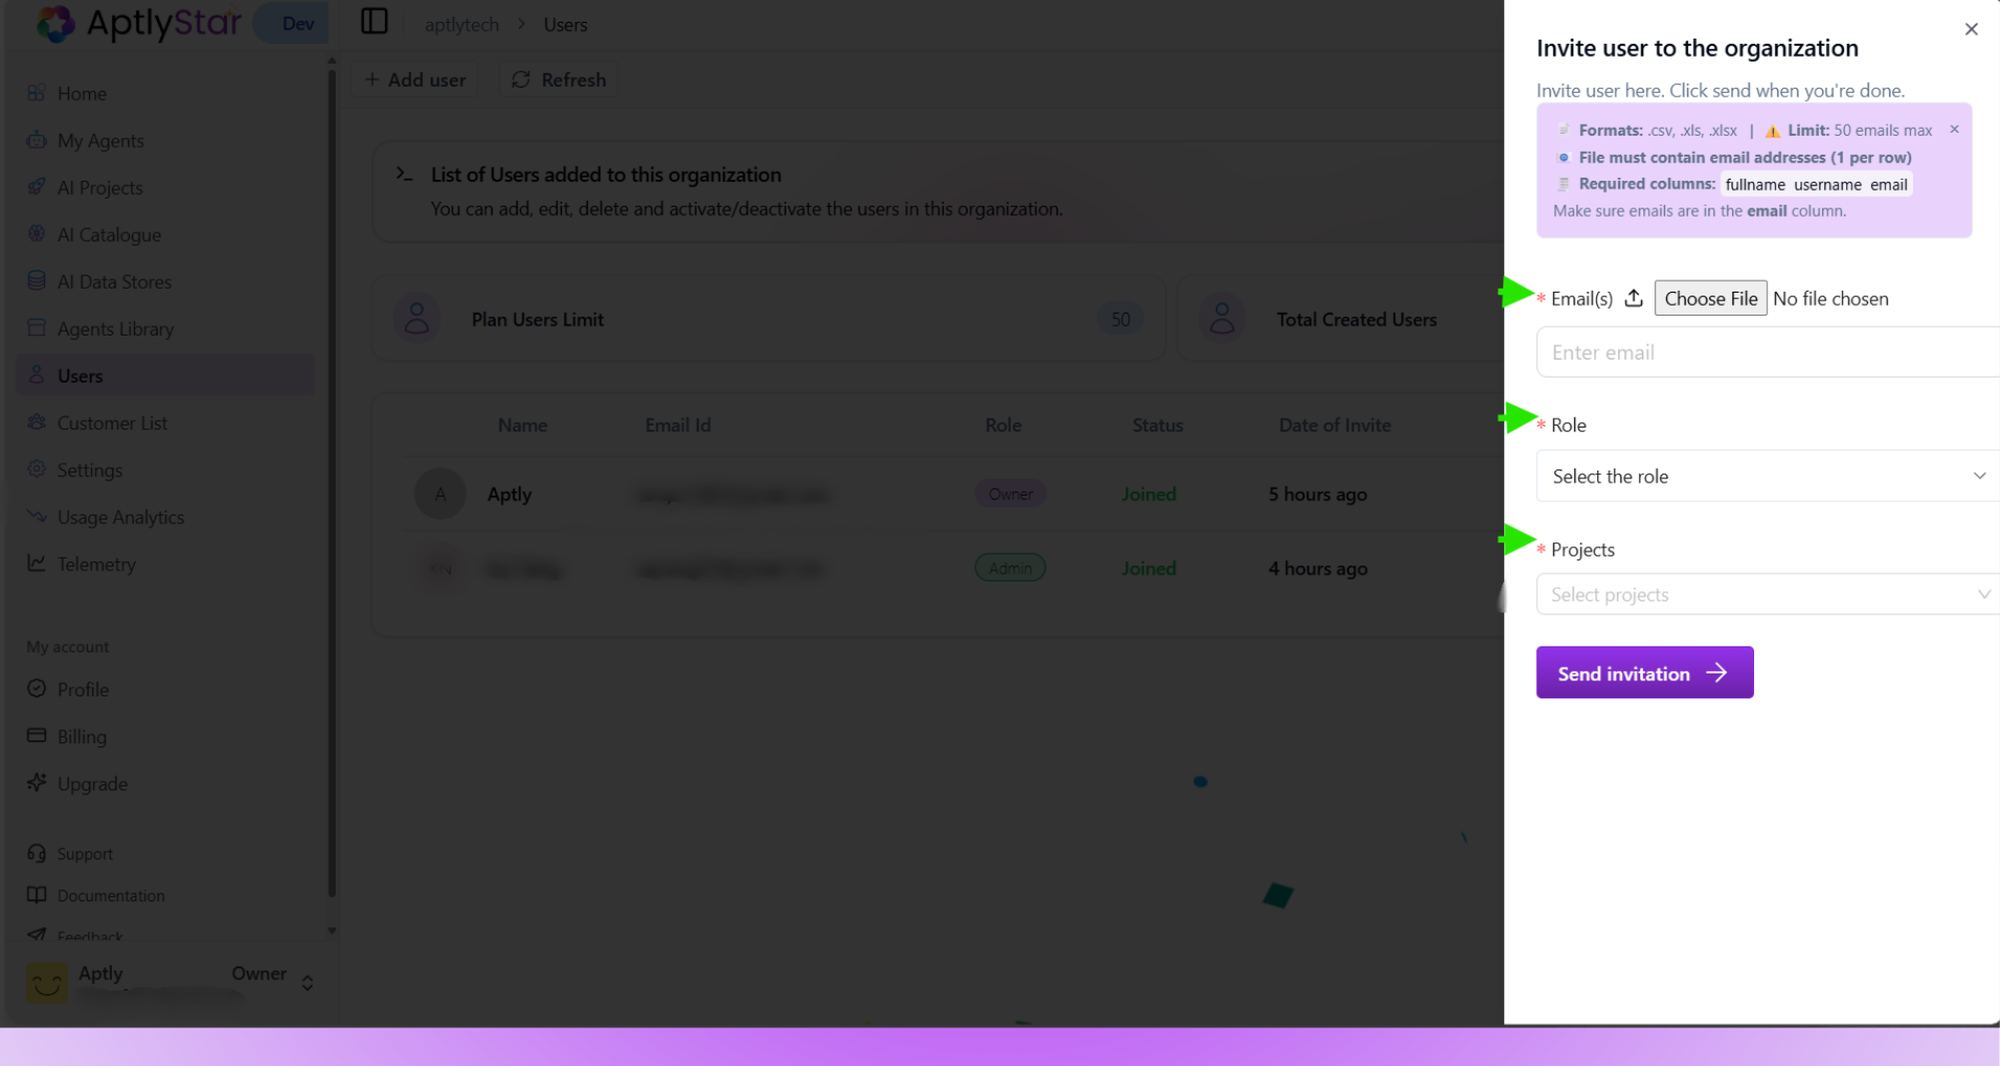
Add Users to Your Organization
To add a new user:- Navigate to the Users section (1)
- Click on Add User (2)
- Fill out the following:
- Email address (3)
- Role selection (4)
- Assign to project(s) (5)
- Click Send Invitation (6)

Bulk User Upload via CSV
In addition to adding users one by one, you can also invite multiple users at once using a CSV or Excel file. This is useful for onboarding larger teams quickly — simply upload a file containing multiple email addresses.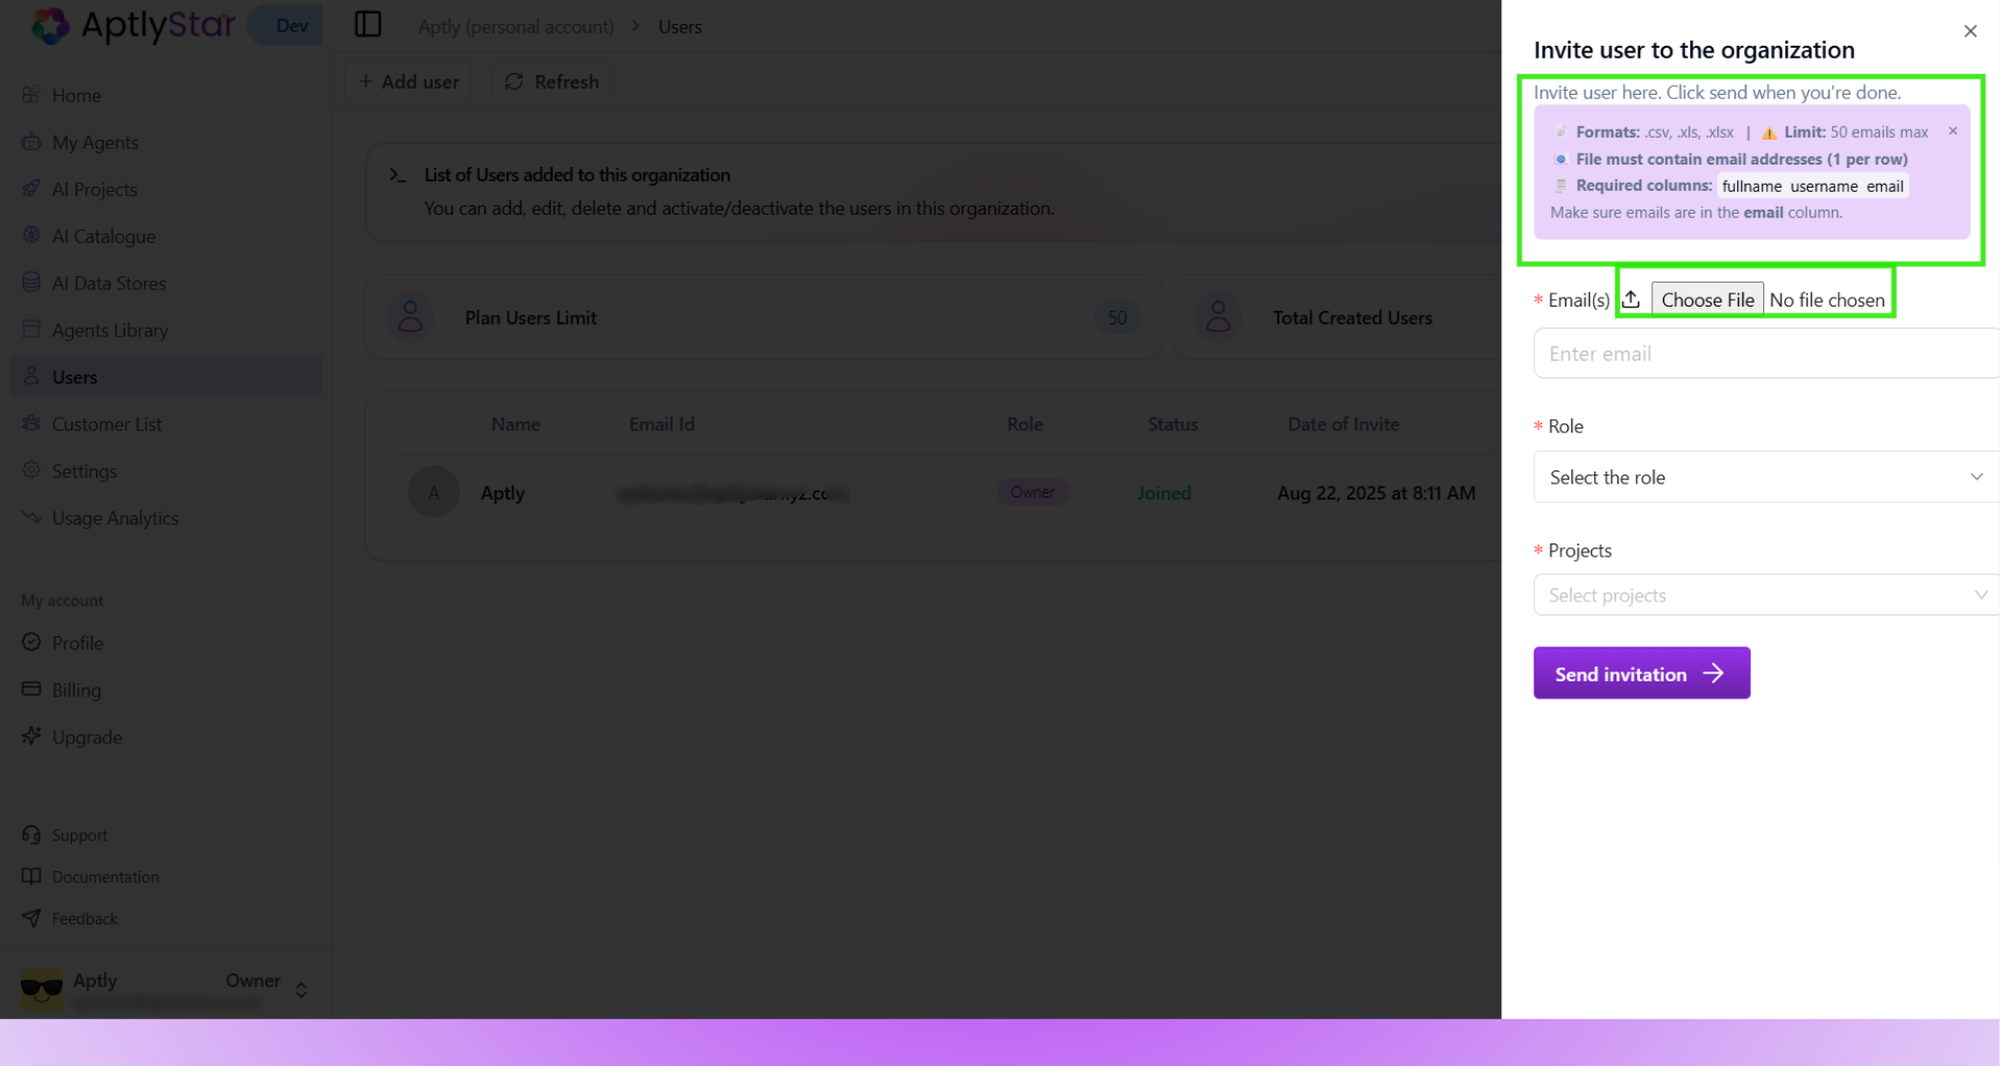
CSV Upload Requirements
- Accepted formats:
.csv,.xls,.xlsx - Limit: Up to 50 email addresses per upload
- File rule: Each email address must appear on a separate row
- Required columns:
fullnameusernameemail(ensure all emails are listed in this column)
Once uploaded, the system validates the file format and displays any errors if the structure doesn’t match the required fields.
💡 Tip: Double-check that the CSV includes the column headers exactly as shown (fullname,username,
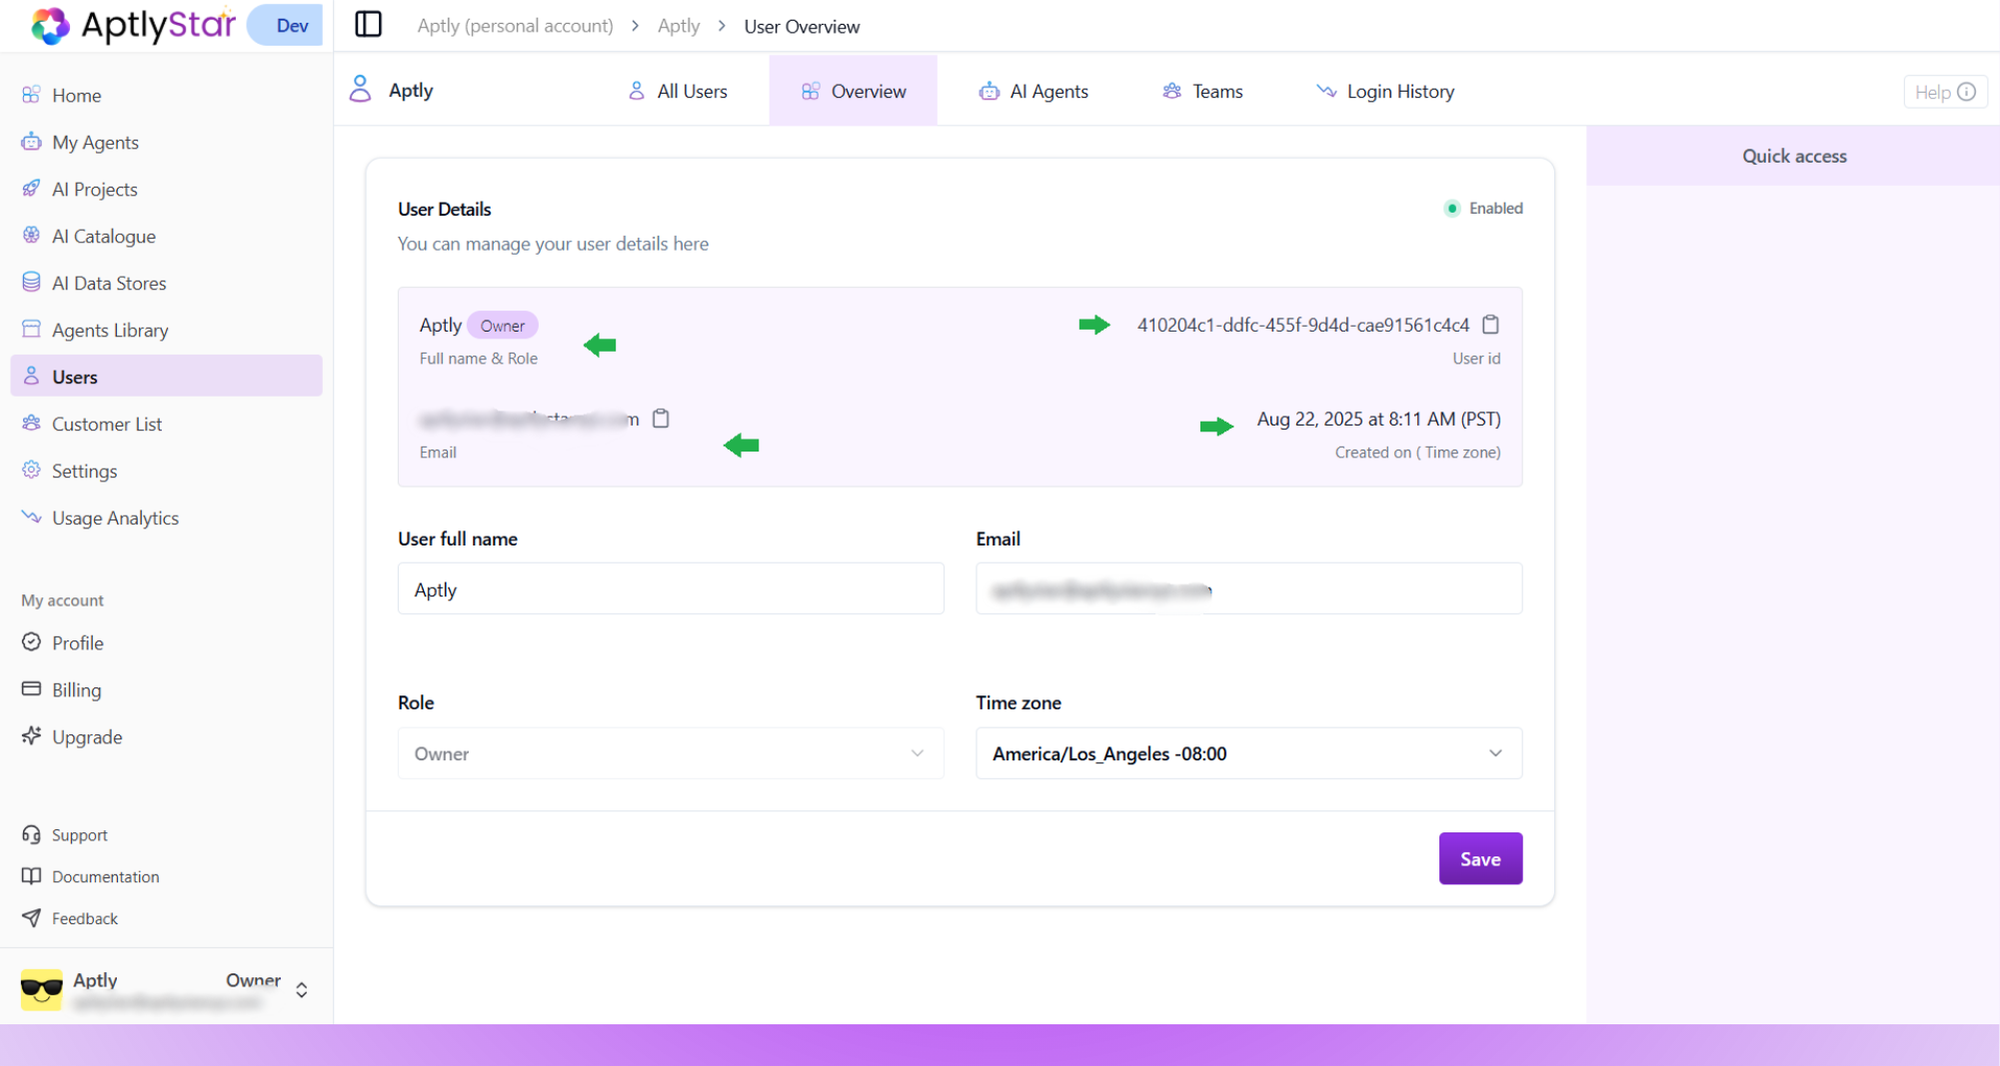
User Console
The User Console provides a complete view of your profile and access details within the organization.Here, you can view and update your account information such as:
- Full Name
- Email ID
- Role (e.g., Owner, Admin, or User)
- User ID
- Time Zone
- Account Creation Date
- Status (Enabled/Disabled)
Tabs in the User Console
The top navigation tabs allow you to explore different views:- All Users – View a list of all members in the organization
- Overview – Manage your personal details and settings
- AI Agents – See agents created or managed by you
- Teams – Check which teams or projects you belong to
- Login History – Review all your login activities
Login History
The Login History tab displays detailed records of your login activity.It helps you track your access sessions and ensure account security.
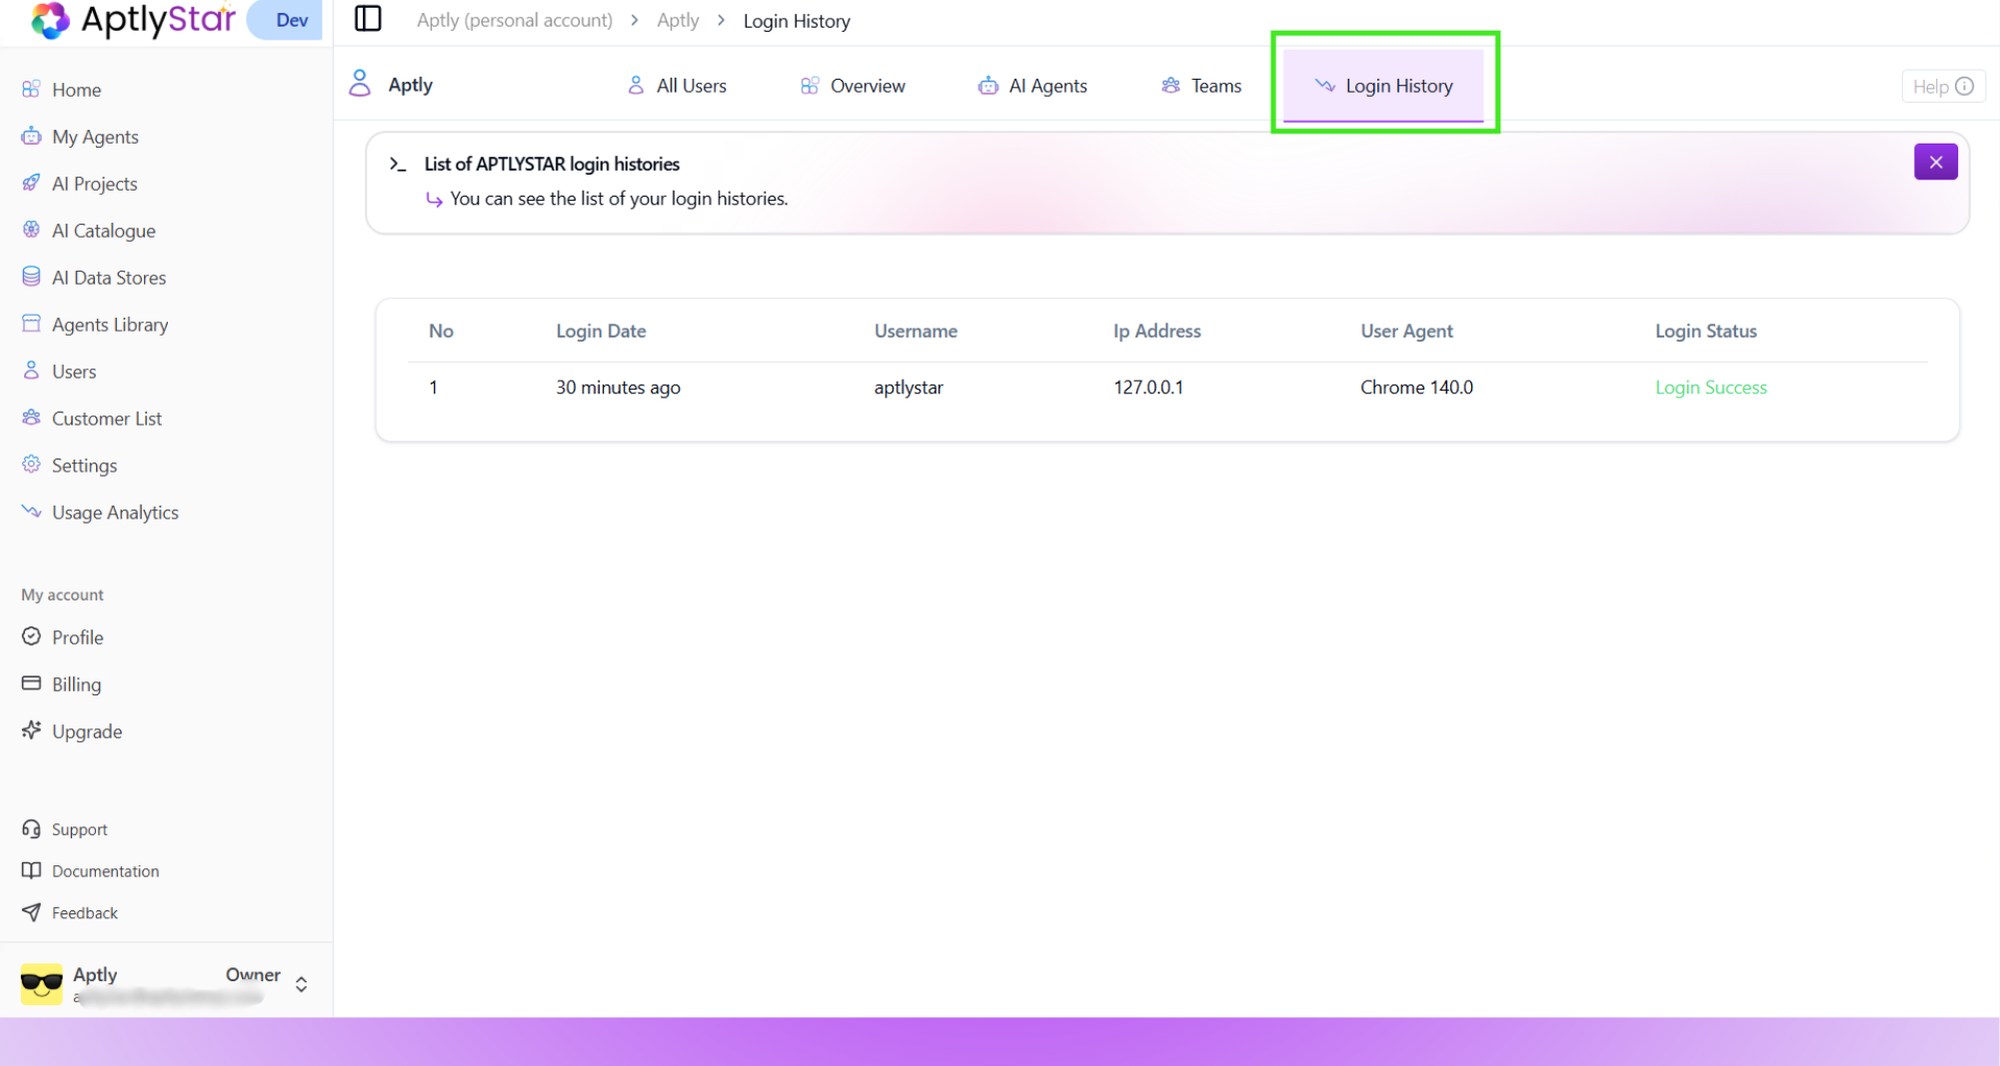
Information Shown in Login History
- Login Date & Time – When you last accessed your account
- Username – The name used during login
- IP Address – The network location of your session
- User Agent – The browser or device used to log in
- Login Status – Whether the attempt was successful or failed
💡 Use this tab to review your recent sessions and identify any unfamiliar login attempts.