- Reach users directly inside their preferred apps and tools
- Create consistent multi-platform agent experiences
- Seamlessly embed or launch agents on any digital interface
Enable Live Mode for Integrations
Before using any integrations in the Channels tab, you must activate Live Mode. This toggle — located at the top-right of your agent page — ensures your agent is ready to communicate on external platforms.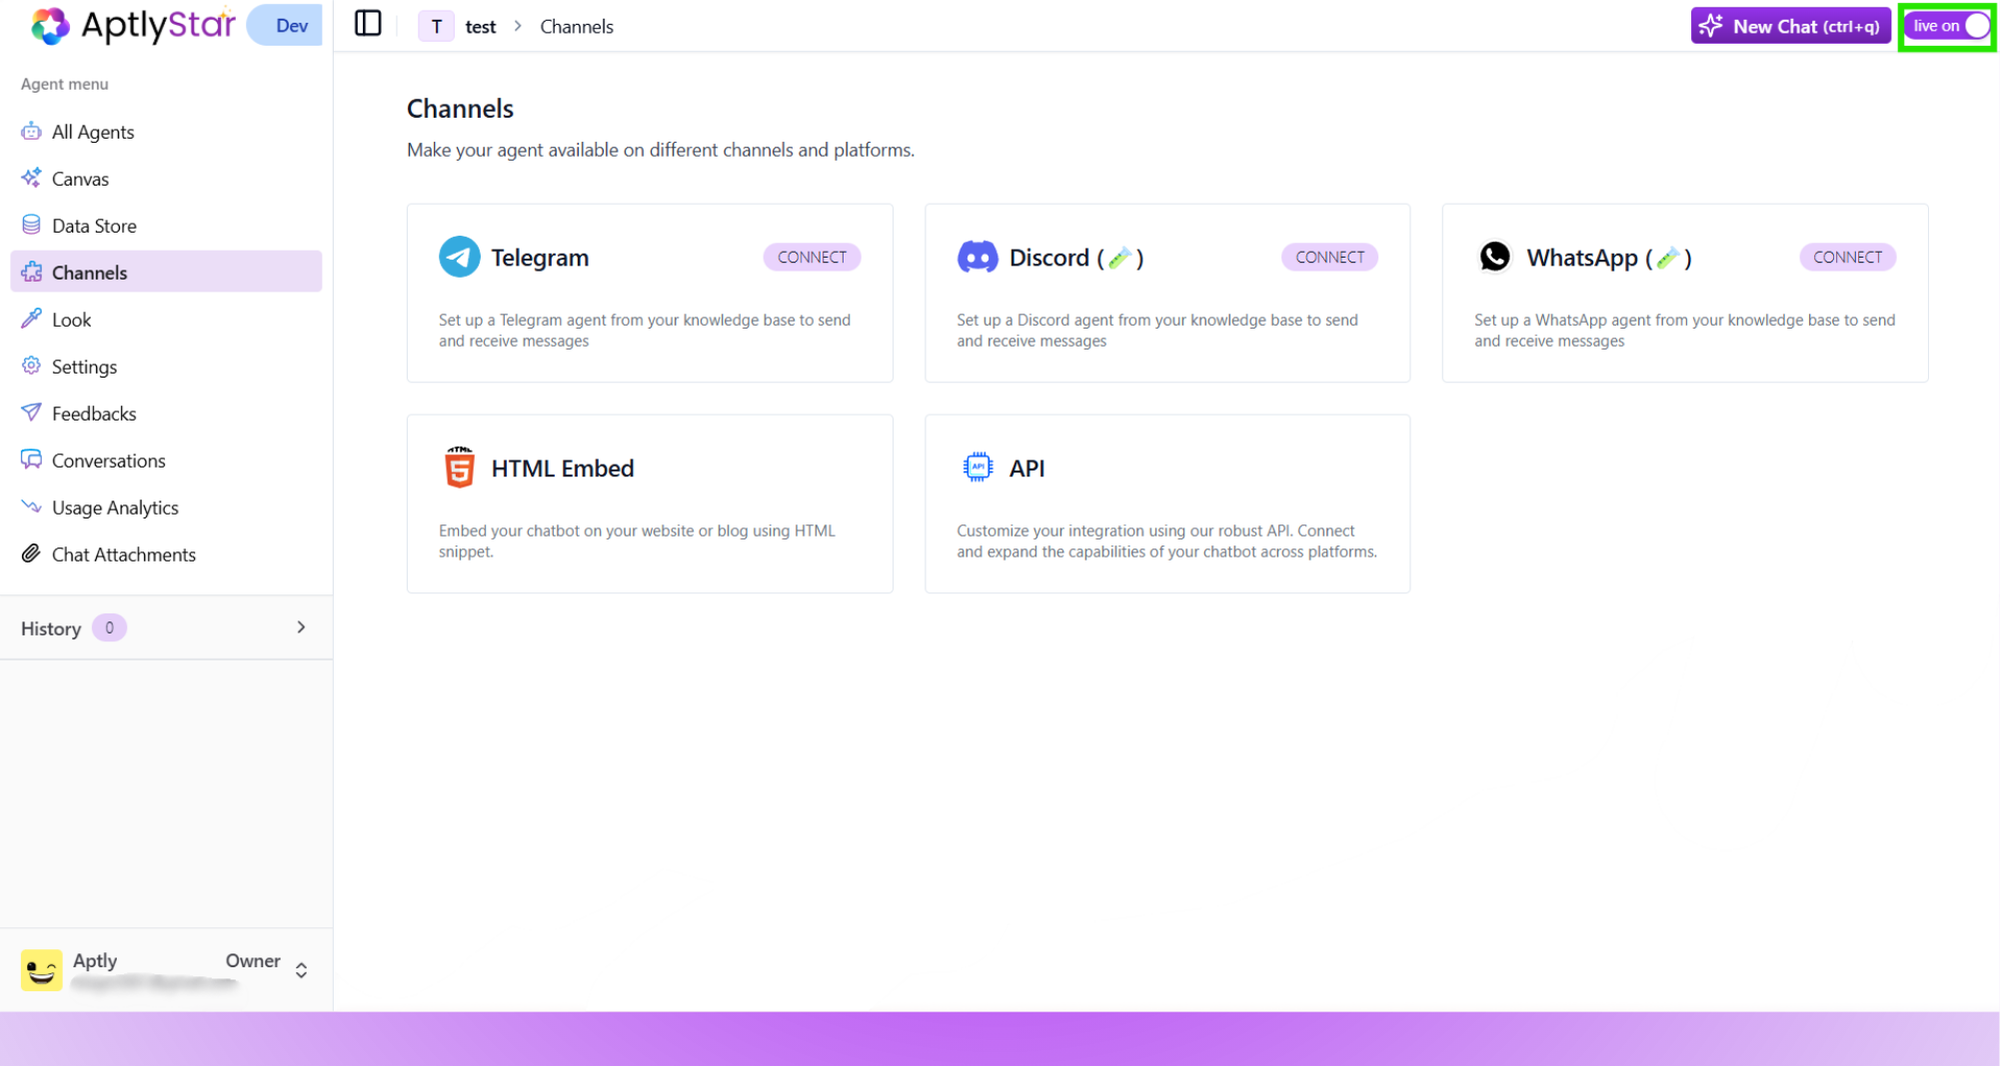
Without enabling Live Mode, integration options will remain disabled.
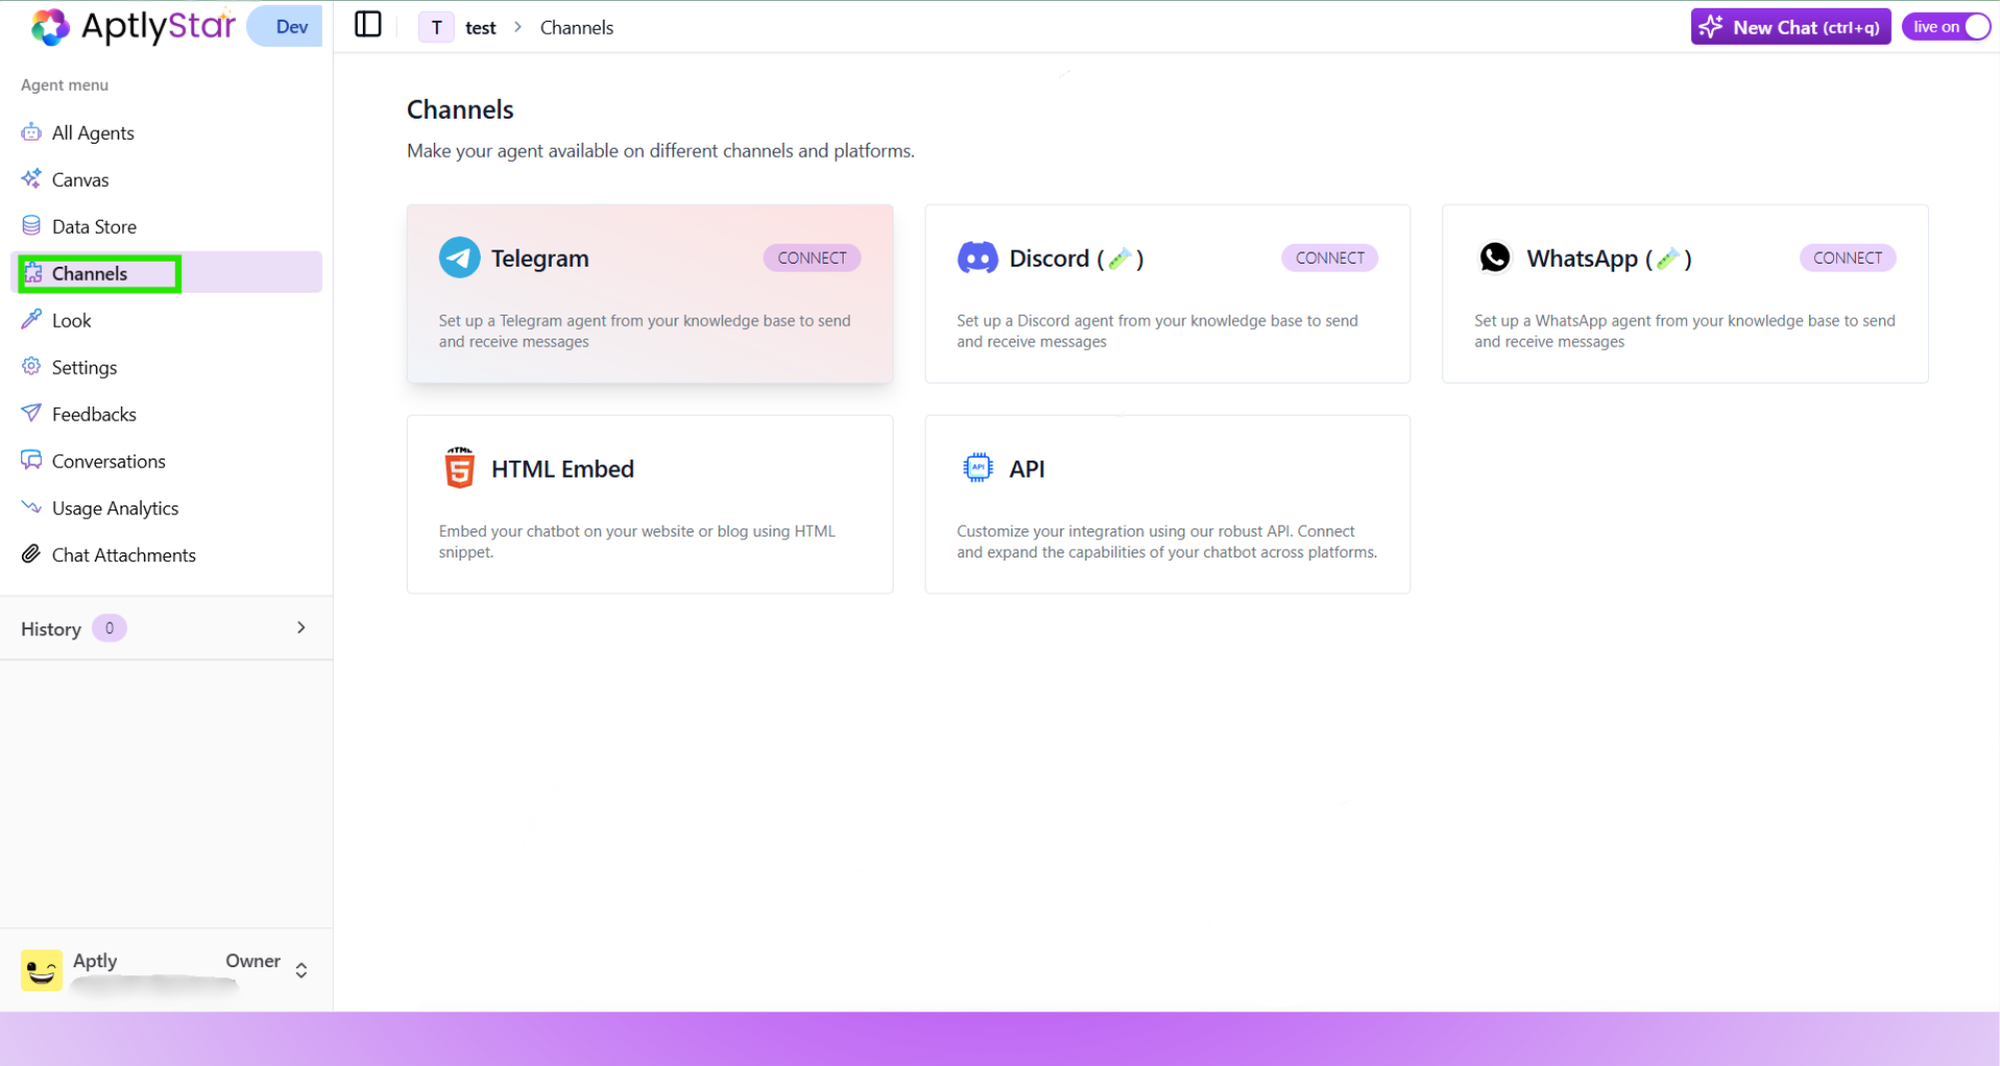
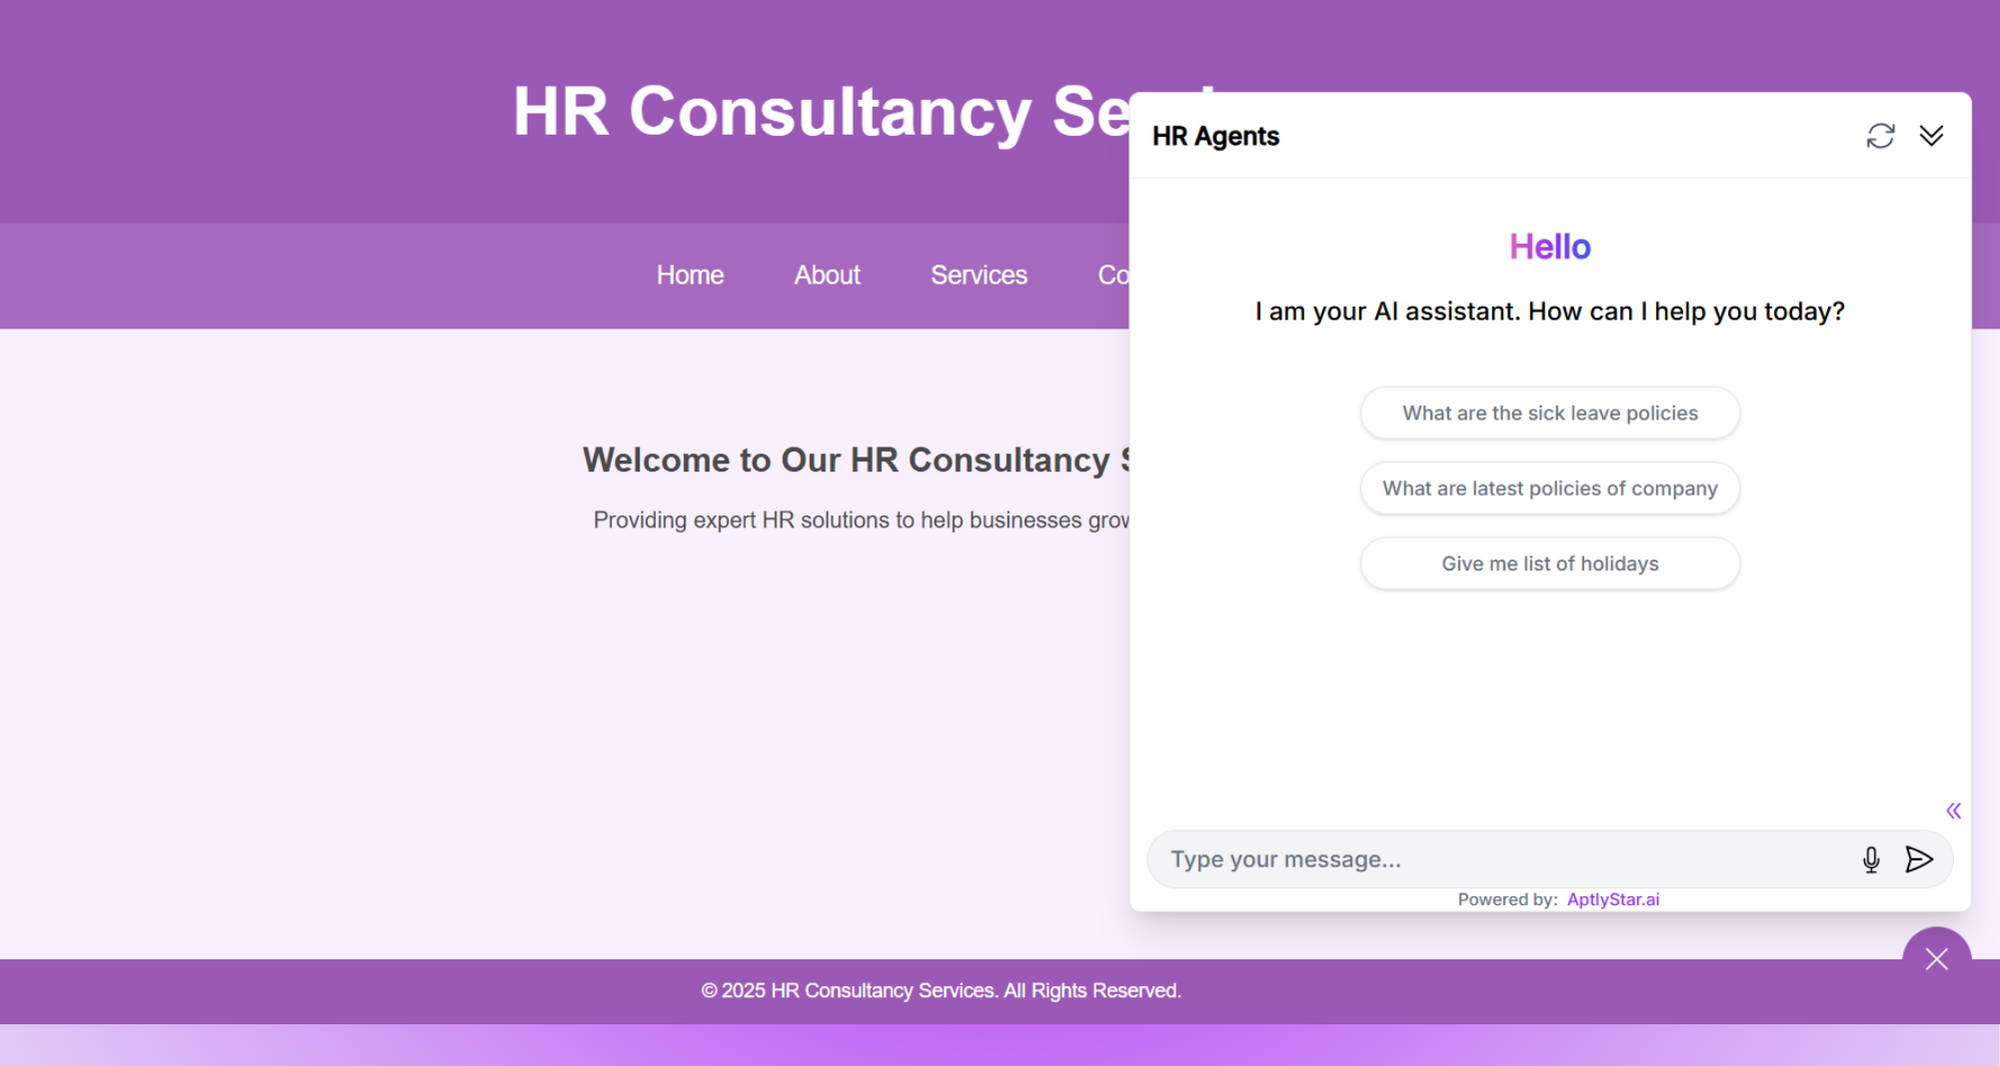
Embedding the Agent via HTML
To embed your AI agent into your website:
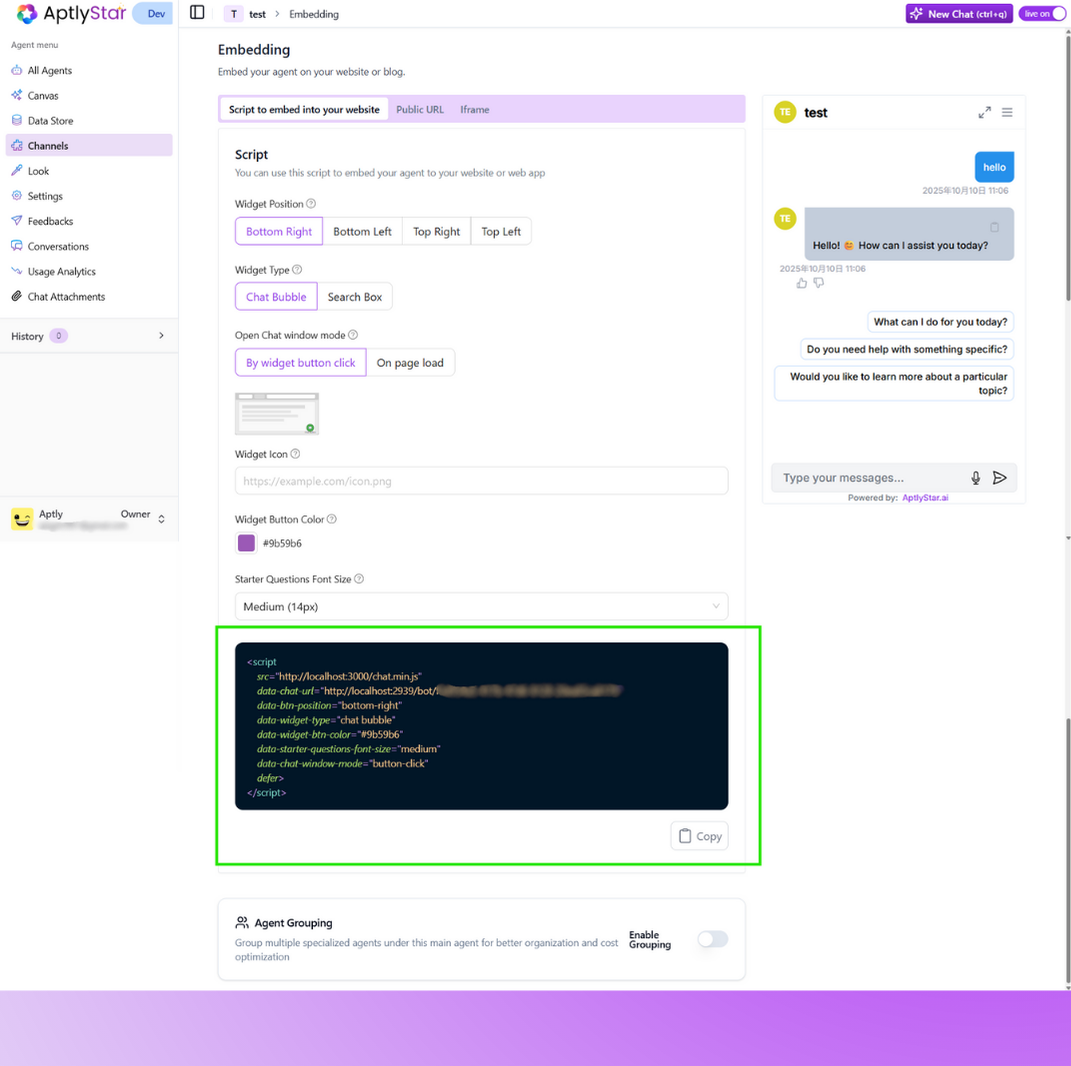
Widget Customization Options
The HTML Embed interface includes flexible controls to adapt the widget to your brand or use case.Customization Tabs
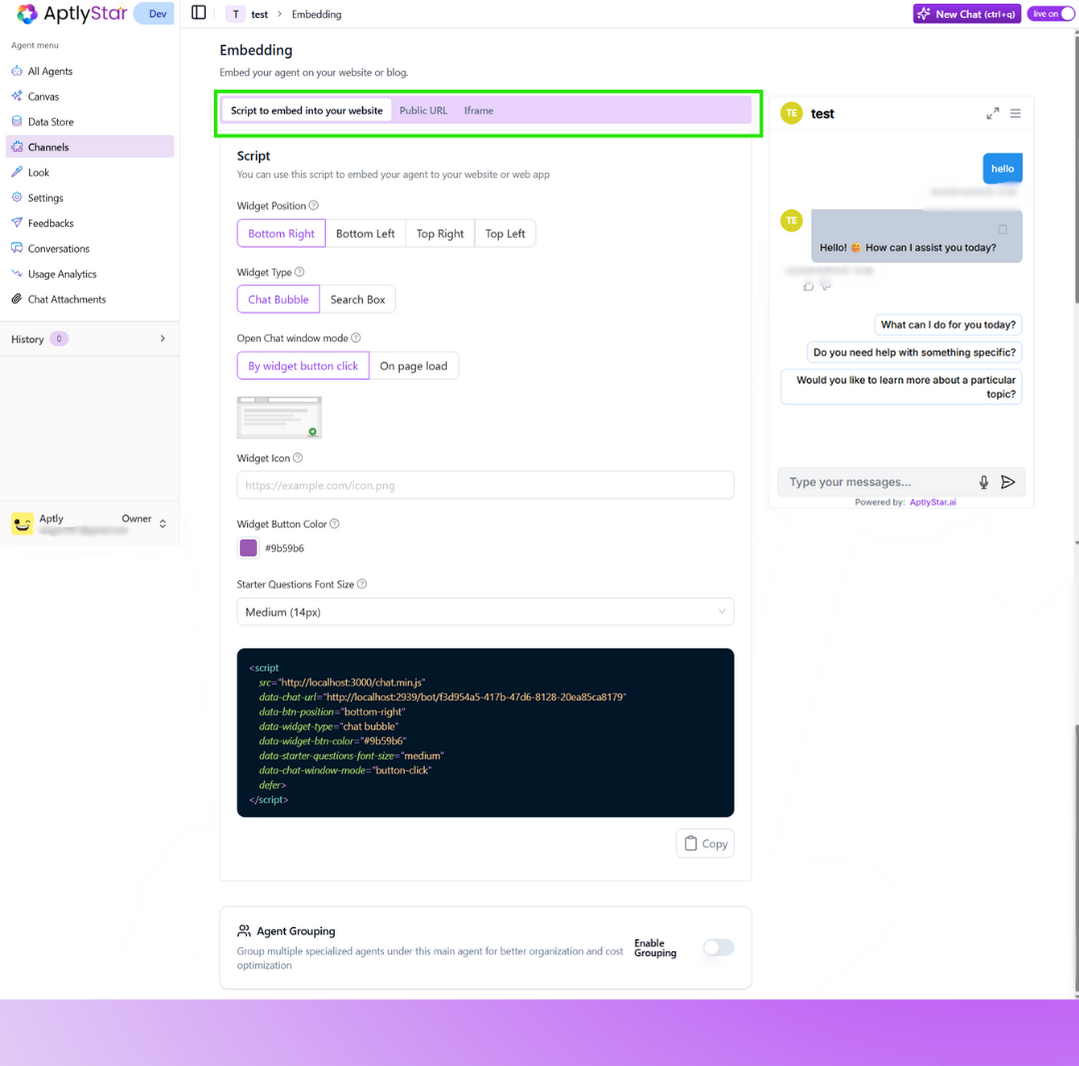
- Script to embed into your website
- Public URL: shareable hosted link to the chat interface
- Iframe: embed the agent using an iframe tag inside your site layout
Visual Customizations

- Widget Position: Bottom Right, Bottom Left, Top Right, Top Left
- Widget Type: Chat Bubble or Search Box
- Open Mode: Open via widget click or automatically on page load
- Widget Icon: Supply a custom icon URL
- Widget Button Color: Customize button color using a hex code
- Starter Questions Font Size: Choose between Small (12px), Medium (14px), and Large (16px)