- Webpage links
- Text files
- File uploads (PDFs, DOCs, etc.)
- REST APIs
- YouTube links
- GitHub repositories
🧩 Steps to Add Data Sources
1
Select a Data Store and Open the Data Sources Tab
From the AI Data Stores console, choose your desired data store.Then: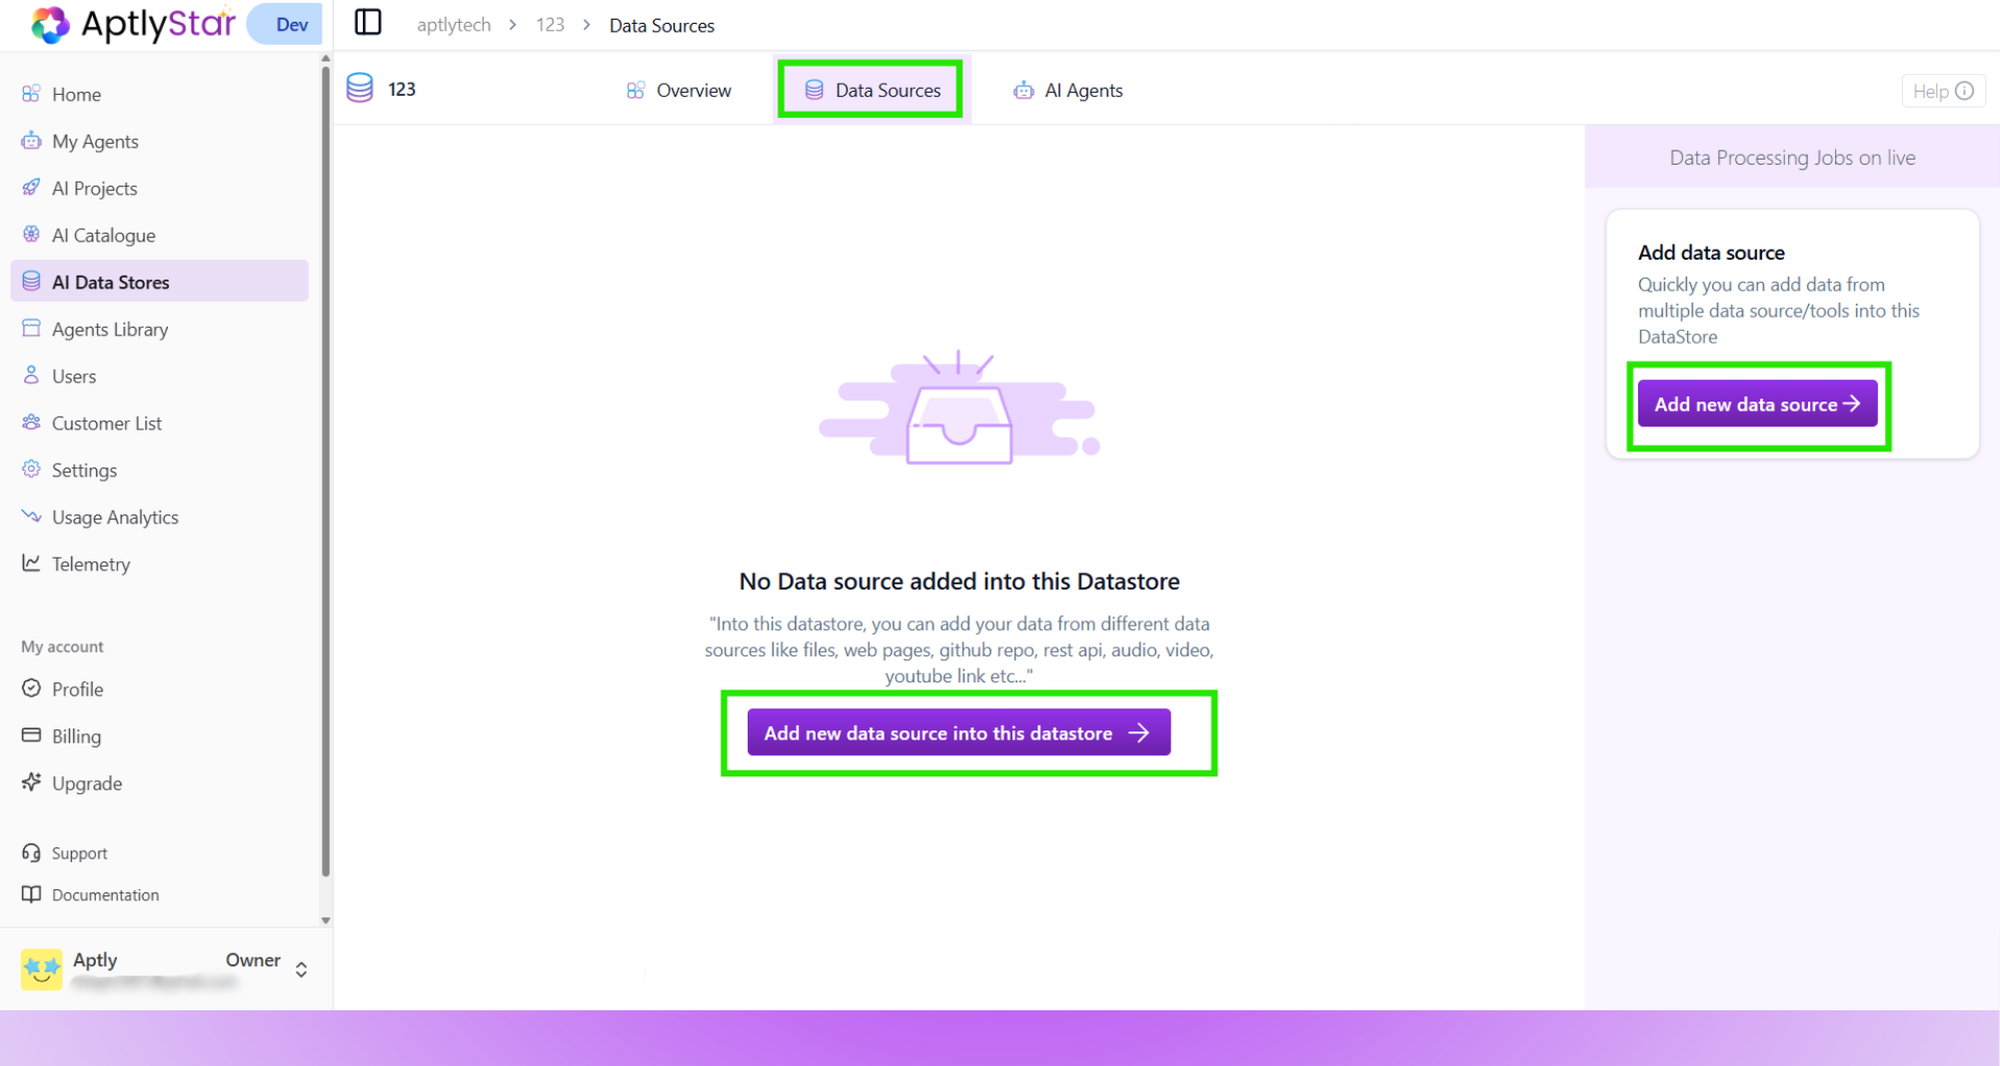
- Click on the Data Sources tab (1)
- Click Add new data source (2)
2
Choose & Import Data Source
Now you can import data by:
You can add multiple sources to populate your data store.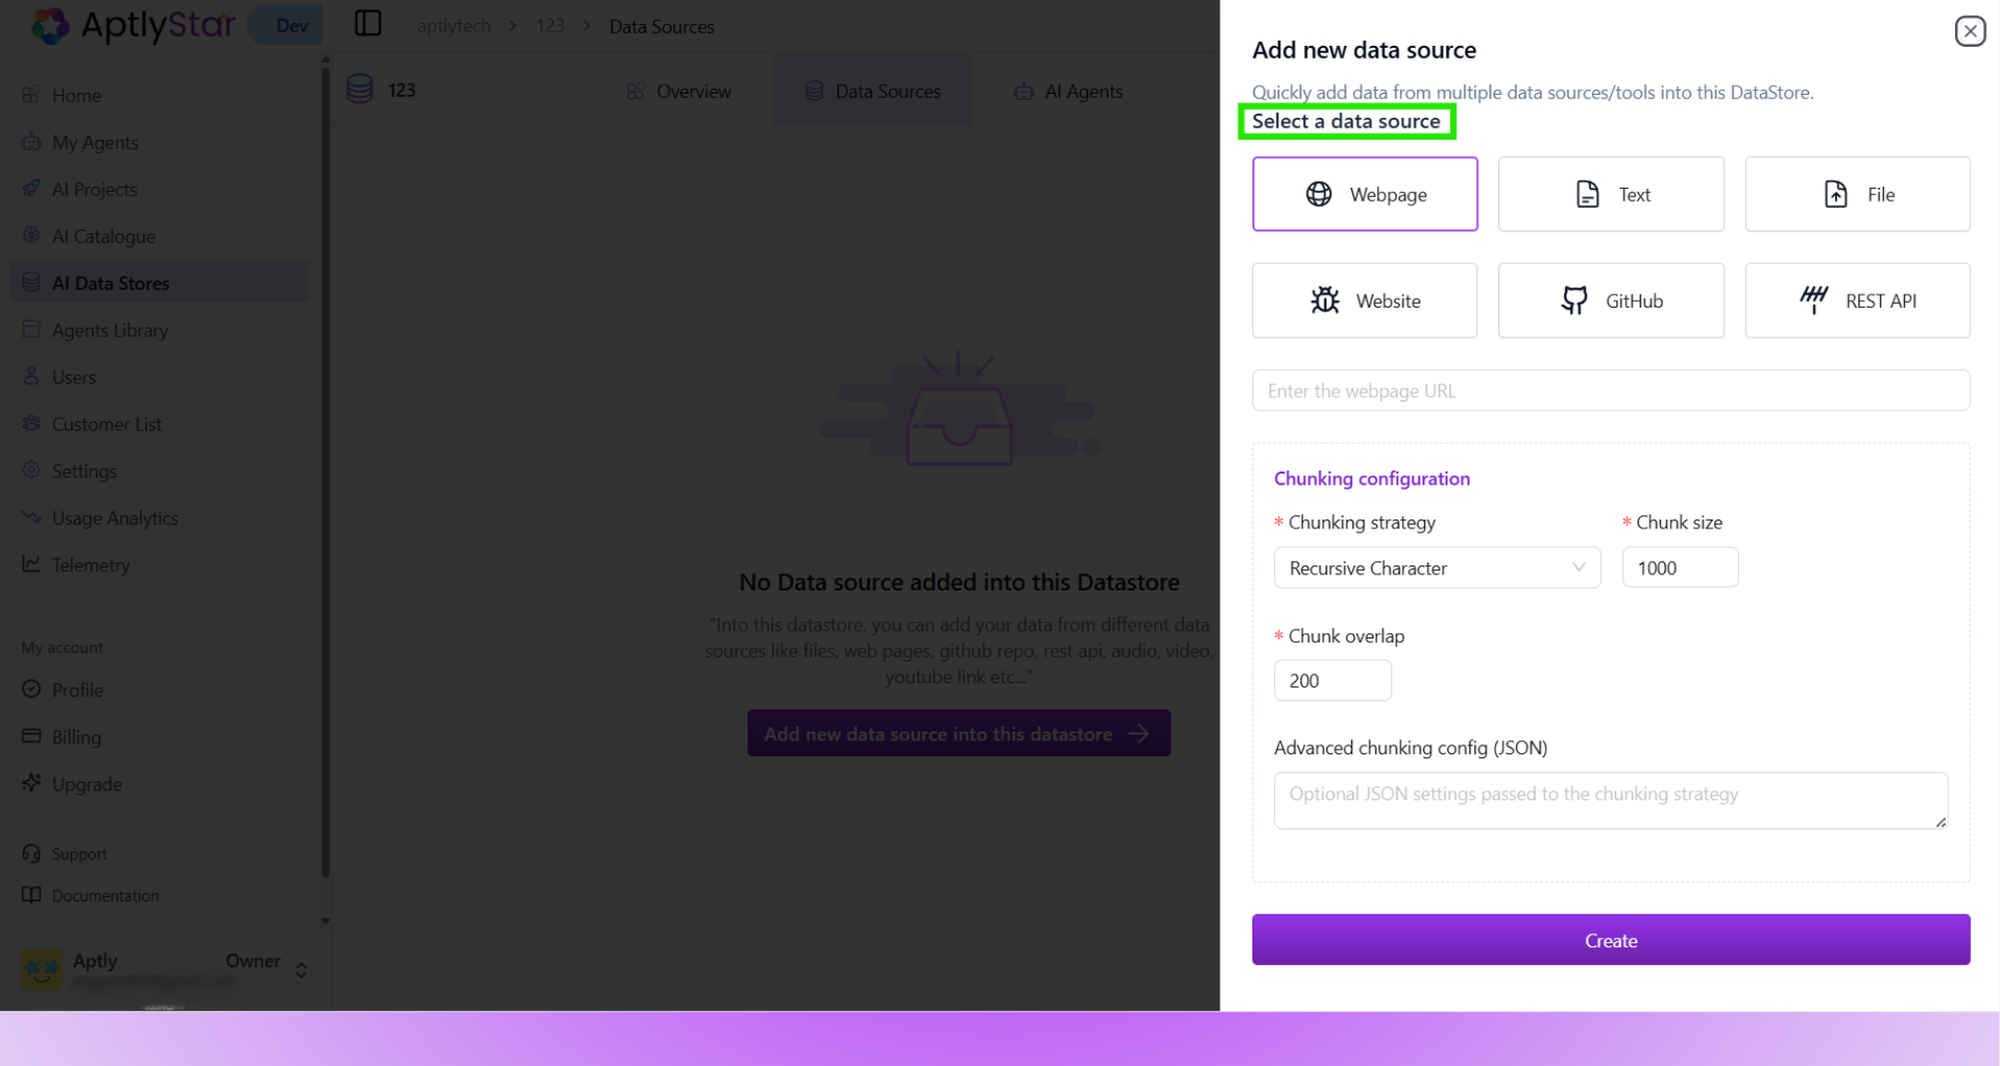
- Entering a webpage URL
- Uploading a file
- Adding plain text
- Connecting via REST API, YouTube, or GitHub
You can add multiple sources to populate your data store.
3
Verify Data Import
Once completed, a “Finished” success message will appear.
You can now see all imported sources listed in your datastore under the Data Sources section.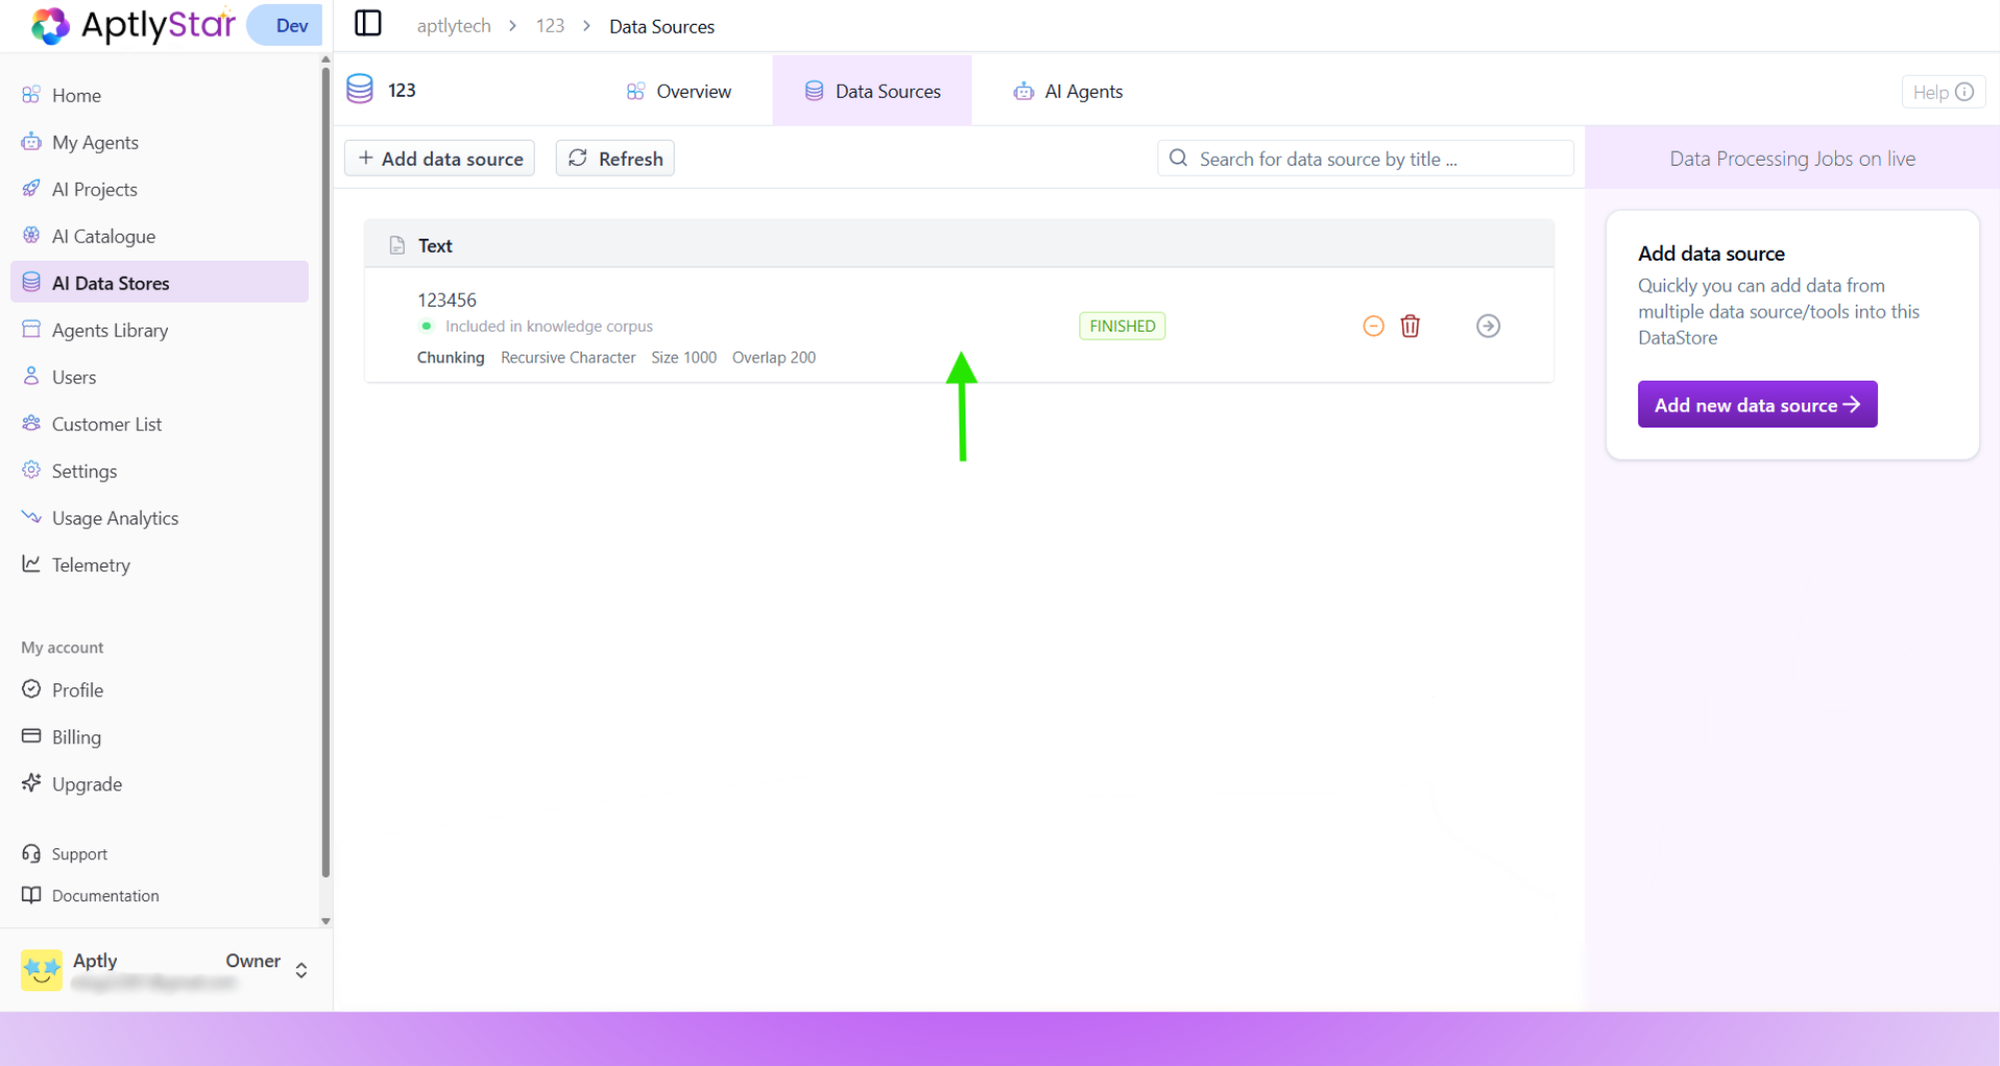
You can now see all imported sources listed in your datastore under the Data Sources section.
Re-finetune the existing data
The edit feature allows you to quickly correct mistakes, update outdated information, or refine the quality of your AI agent’s knowledge base — ensuring more accurate and reliable responses.1
Step 1: Go to Data Sources Tab of a Data Store
Navigate to AI Data Stores, select your data store, and click on the Data Sources tab.
2
Step 2: Open the Data Source
Find the data source you want to edit and click the arrow icon next to it to view its details.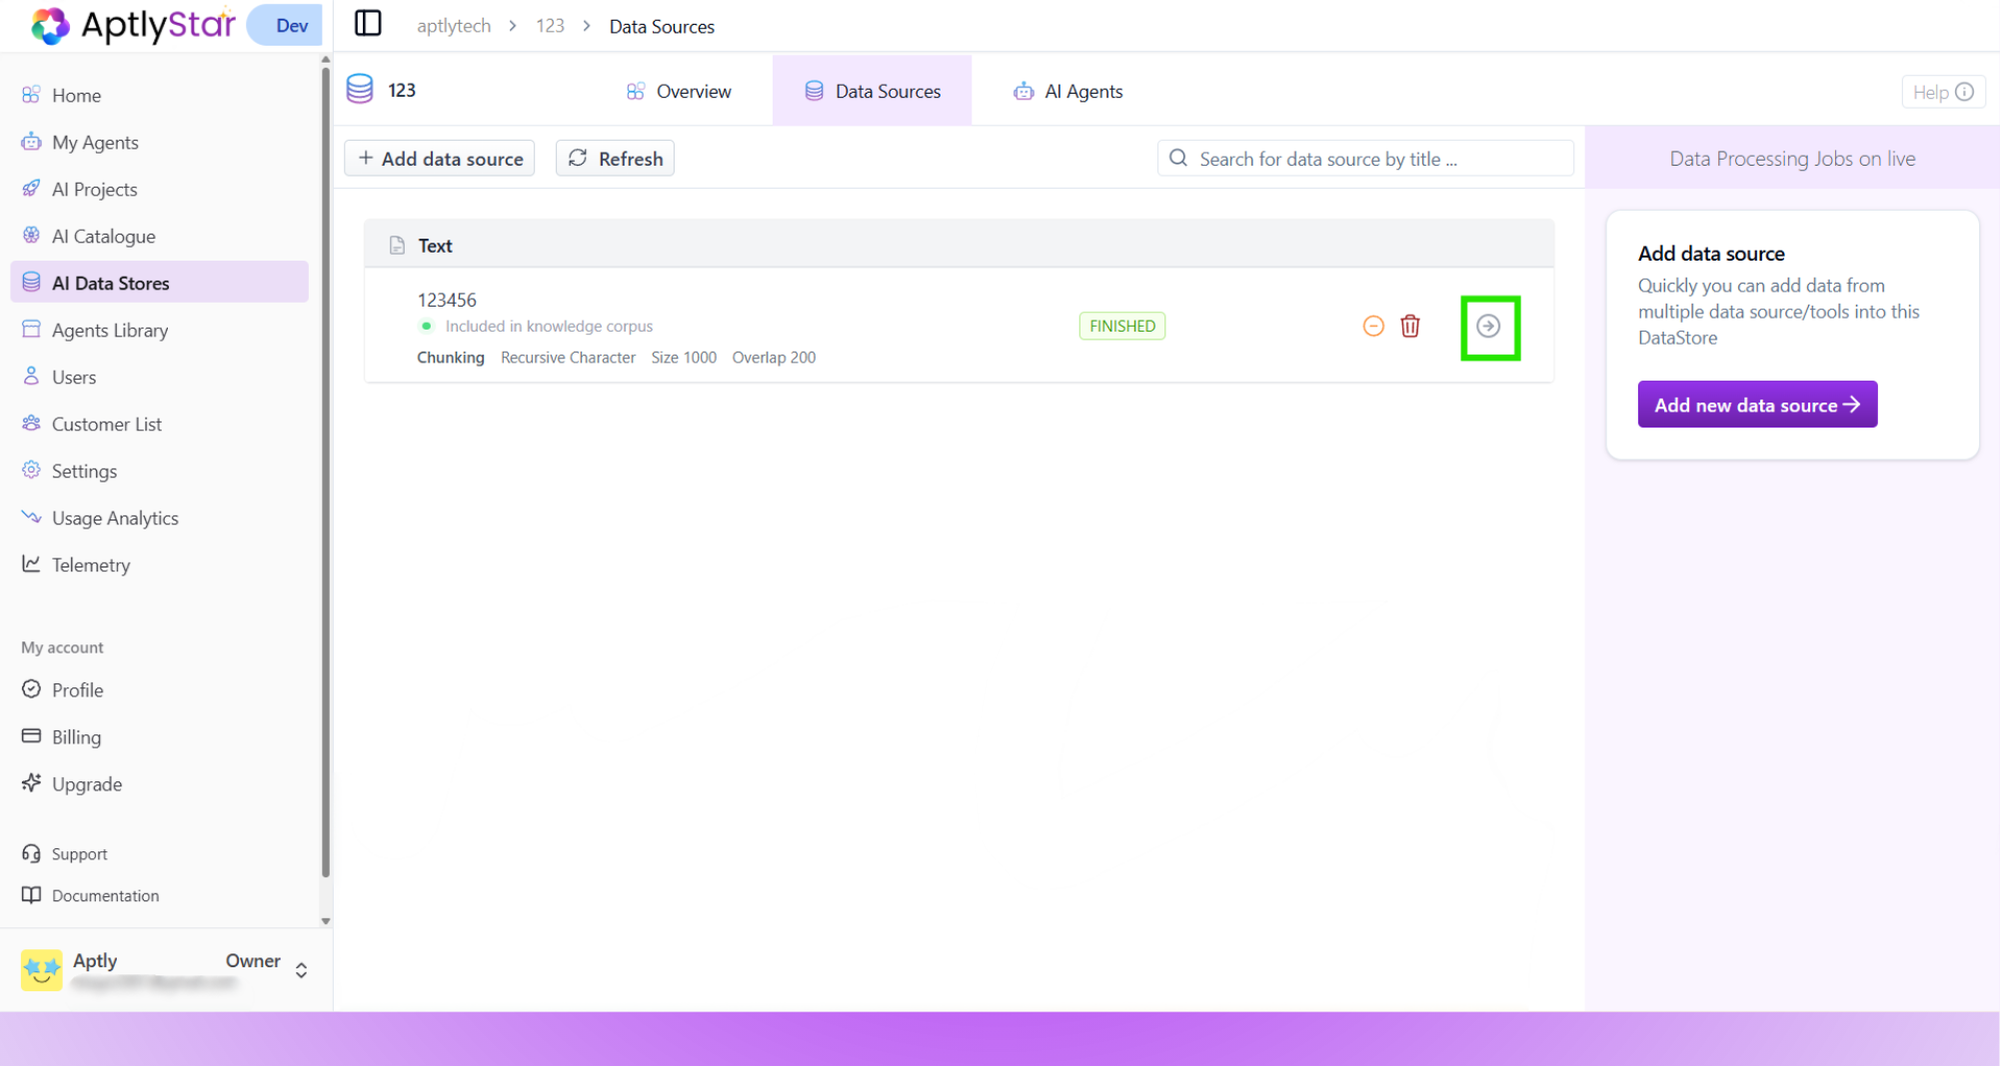
3
Step 3: Click Edit to Modify
Inside the detail view, click the Edit button to start modifying the content of the data chunk.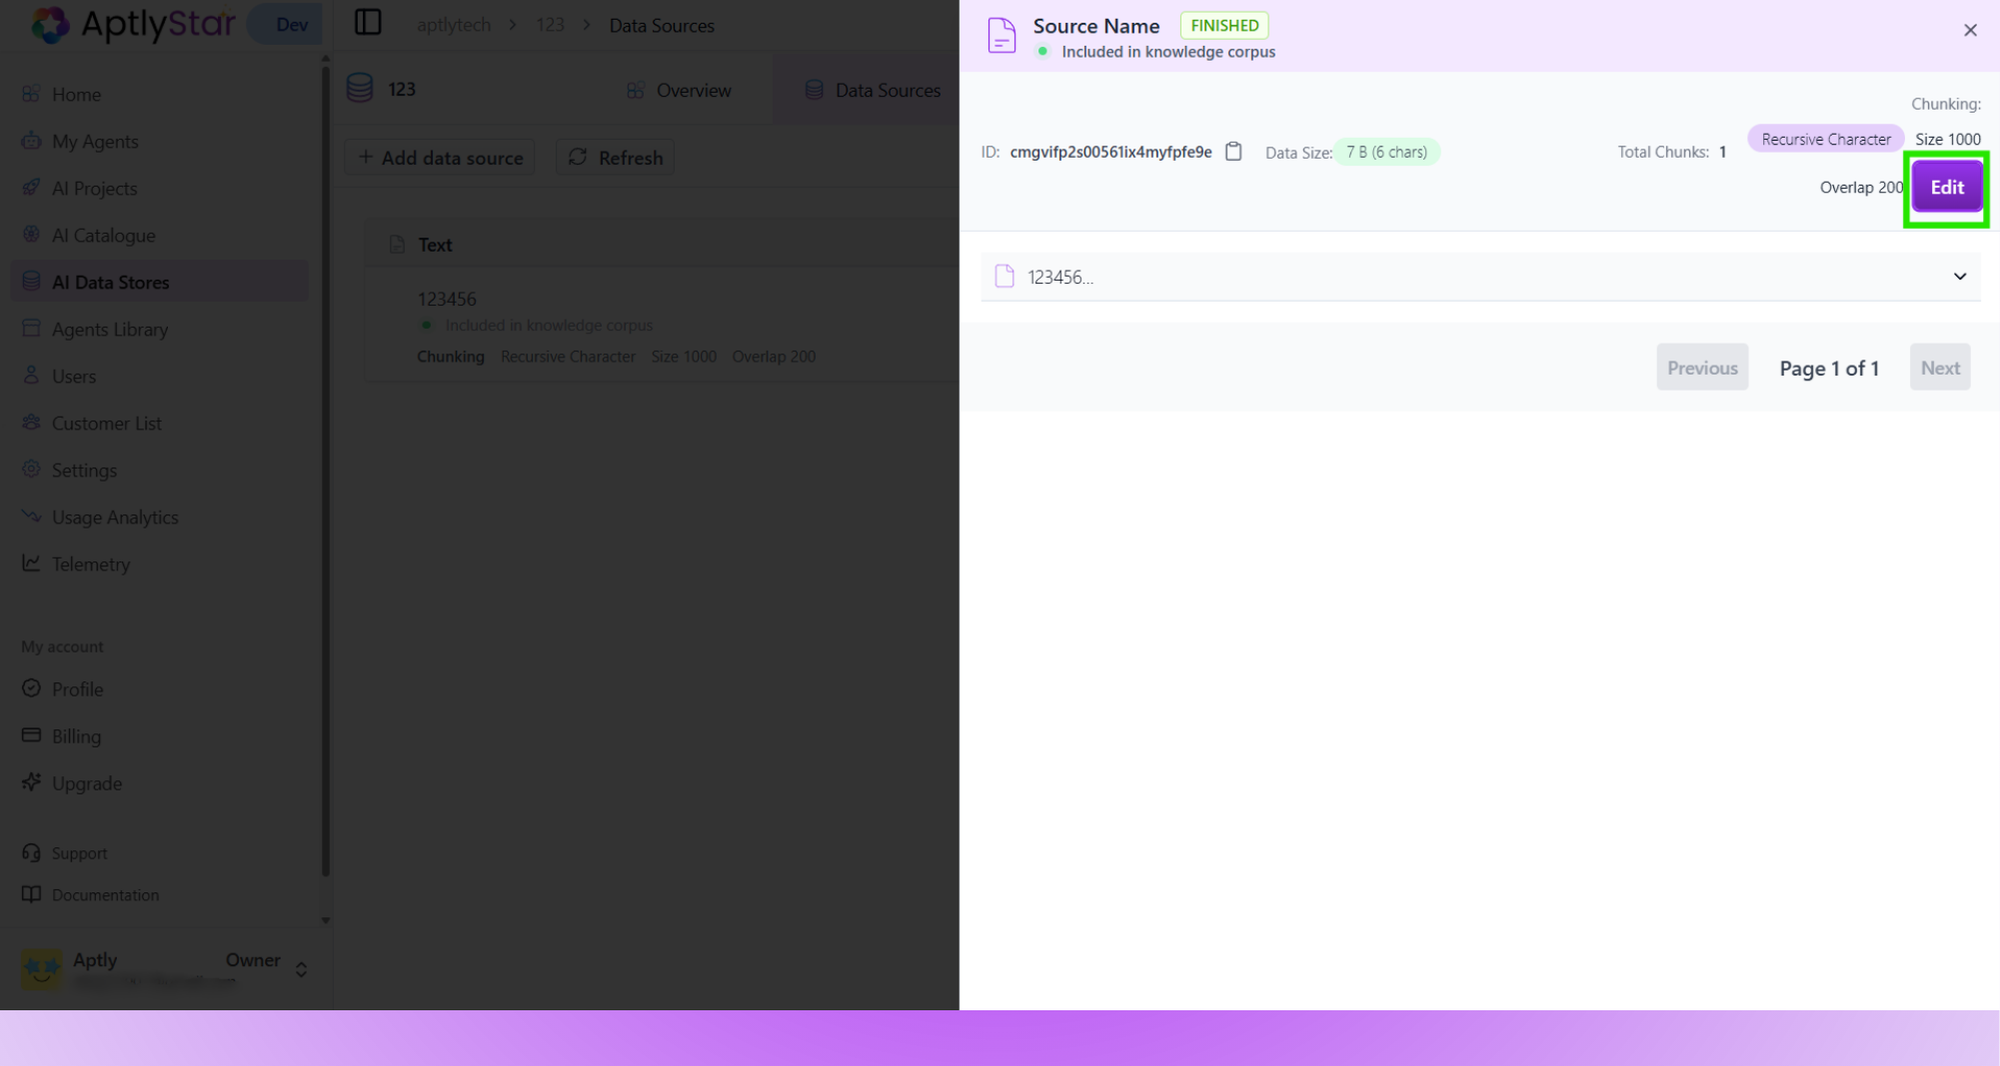
4
Step 4: Update Content and Save
Make your desired changes to the text and click Save to update the data source.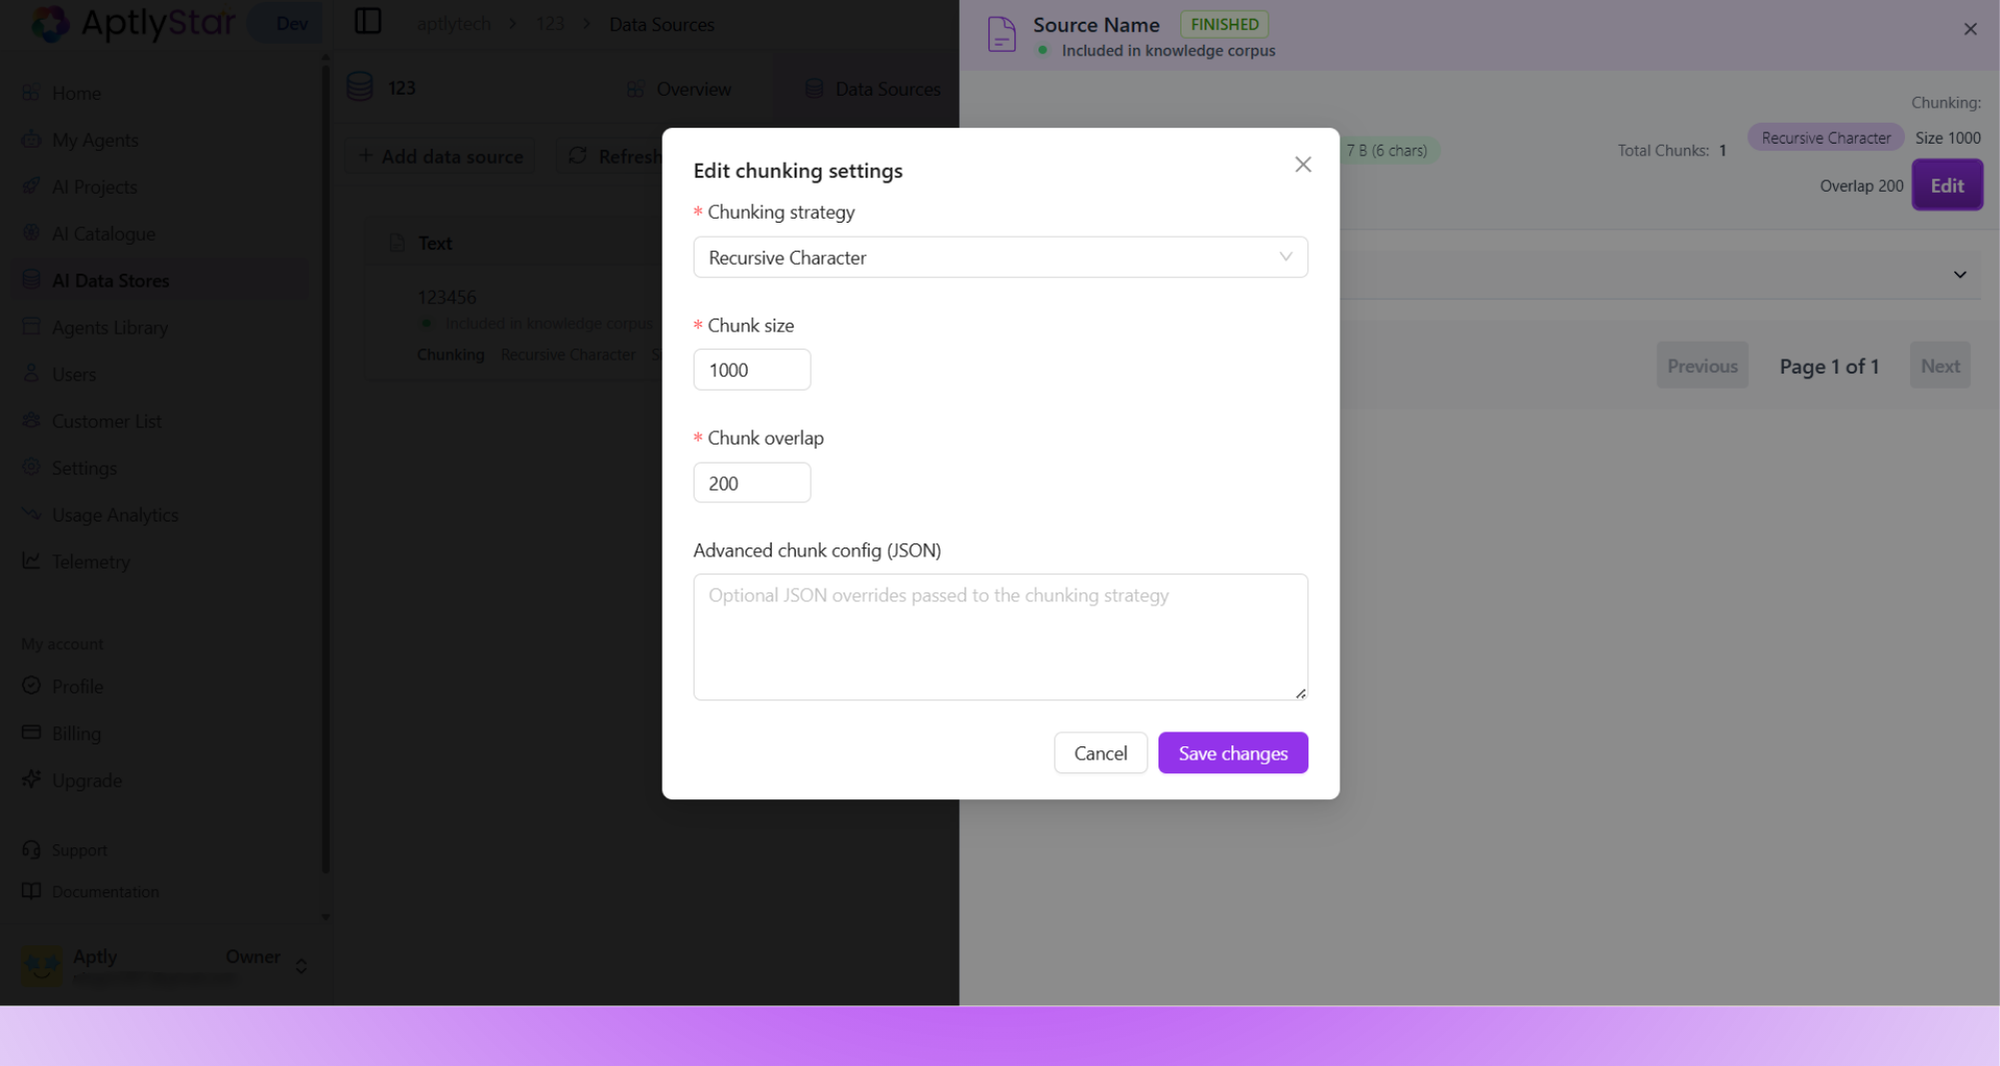
Want to link this data to a agent?
Head over to the AI Agents guide for connecting your agent to data stores.