> ## Documentation Index
> Fetch the complete documentation index at: https://docs.aptlystar.ai/llms.txt
> Use this file to discover all available pages before exploring further.
# Creating AI Agent
Standard/Instant Access or Dashboard Path
You can begin agent creation from multiple entry points:
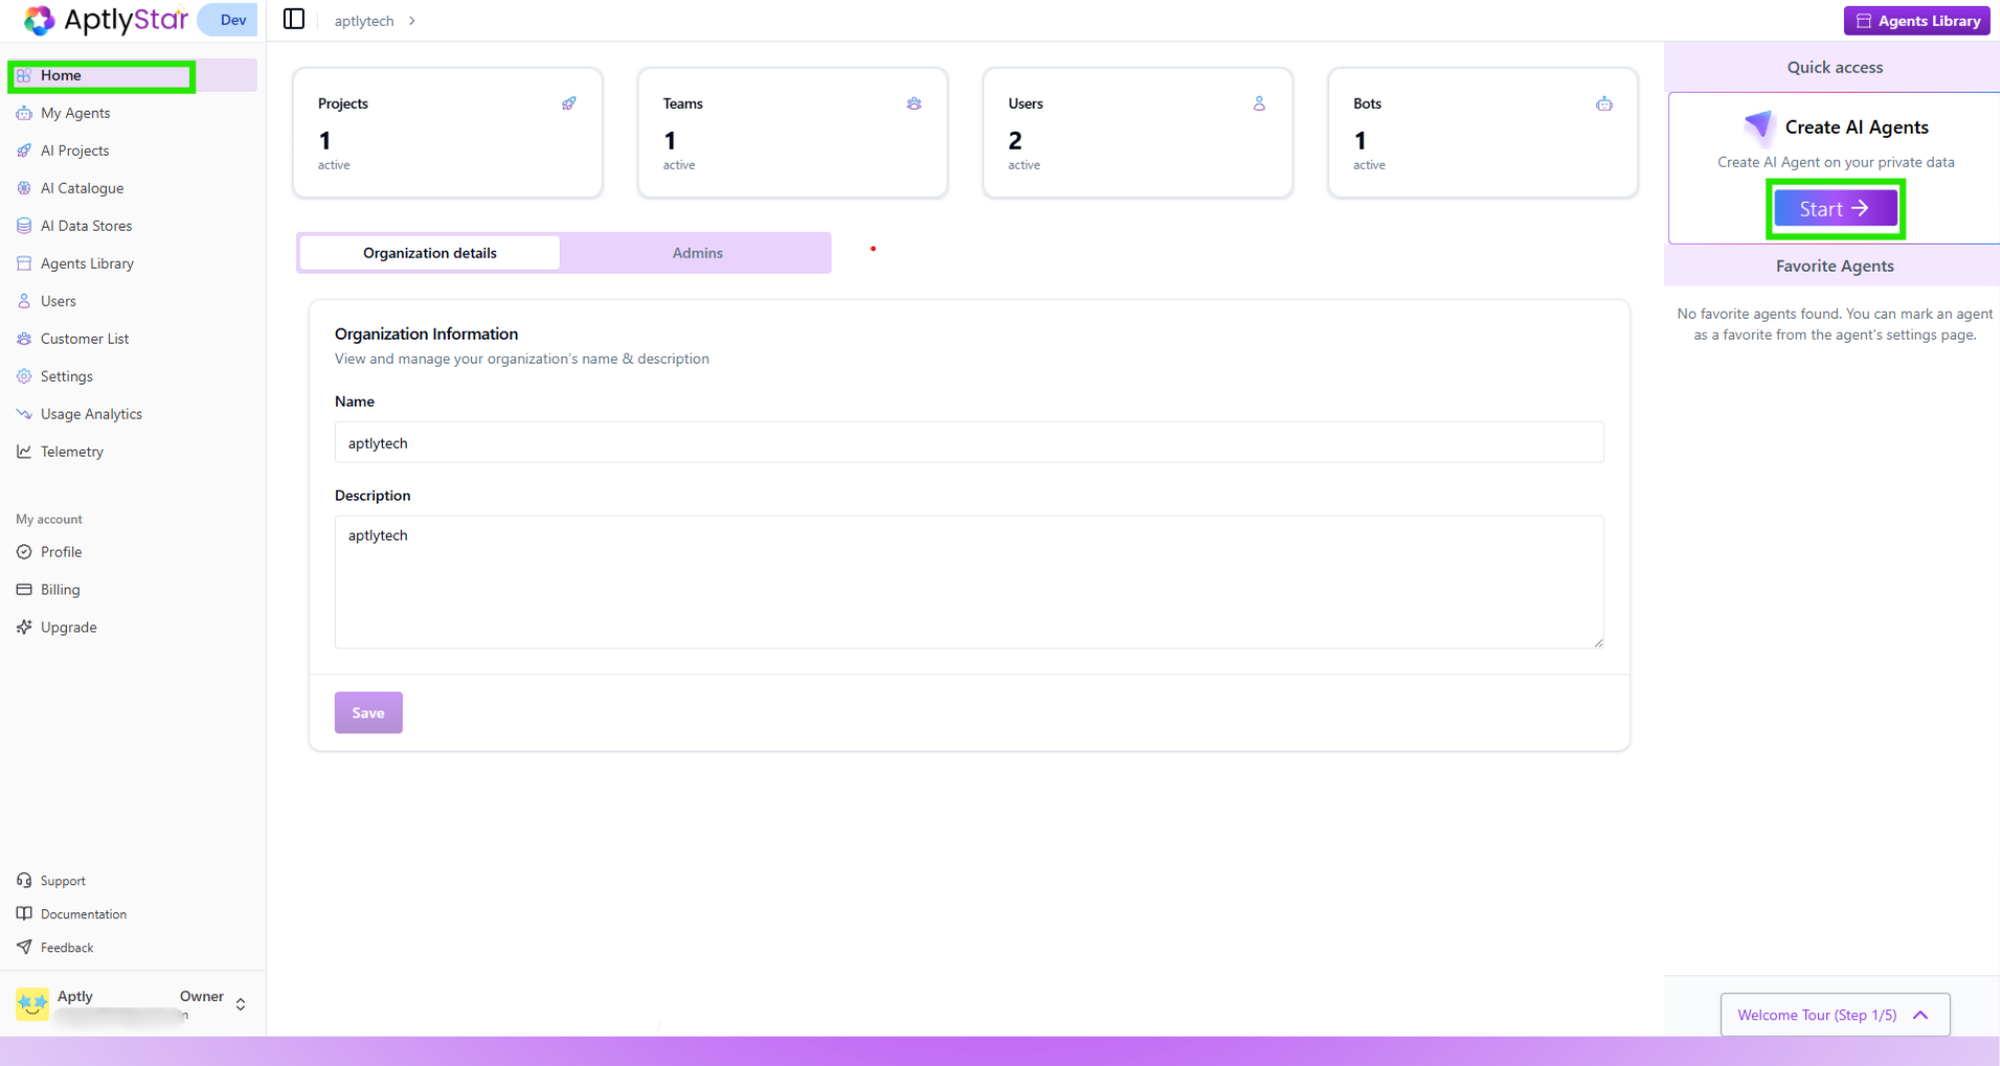
From the **Home** screen, click on **Start** under **Create AI Agents**.
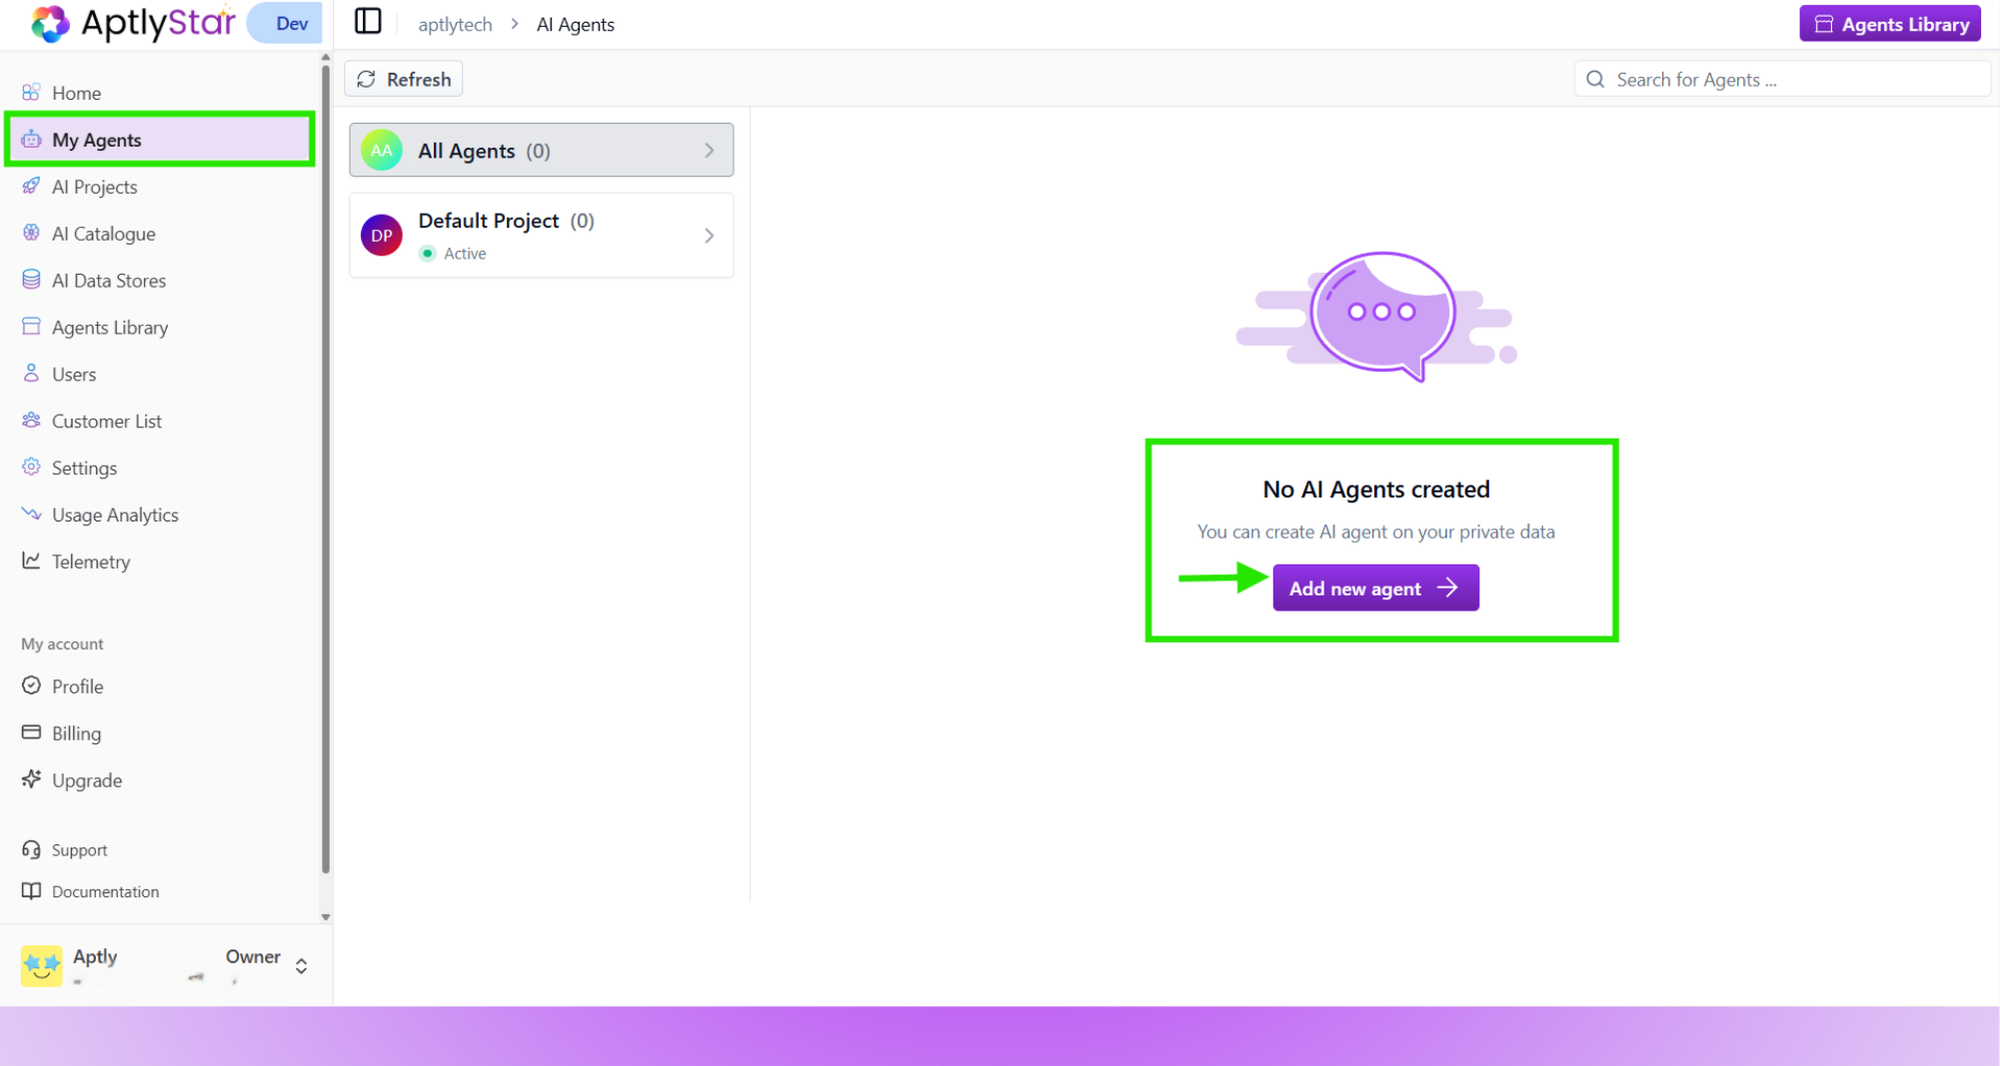
 Or navigate to **My Agents** and click on **Add new agent**.
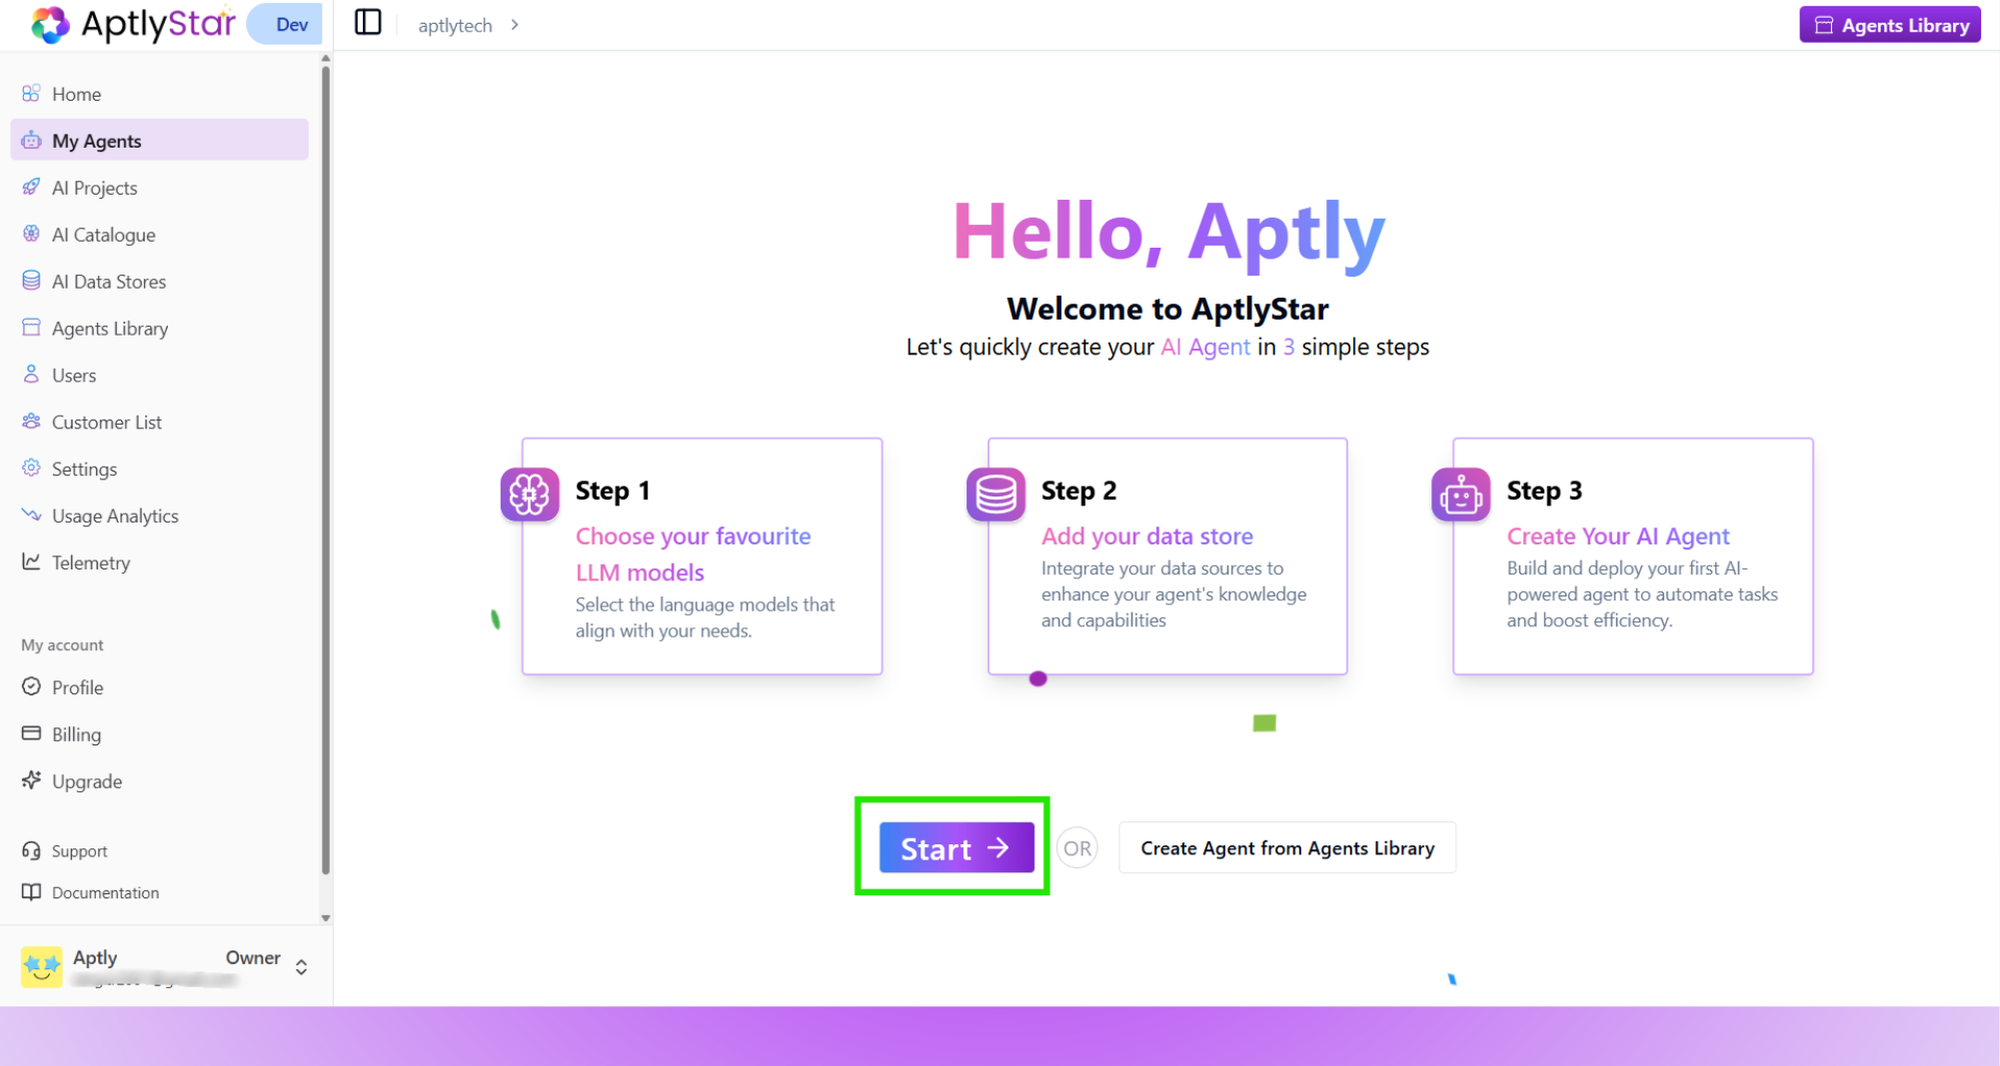
 This opens the guided creation wizard with 3 simple steps:
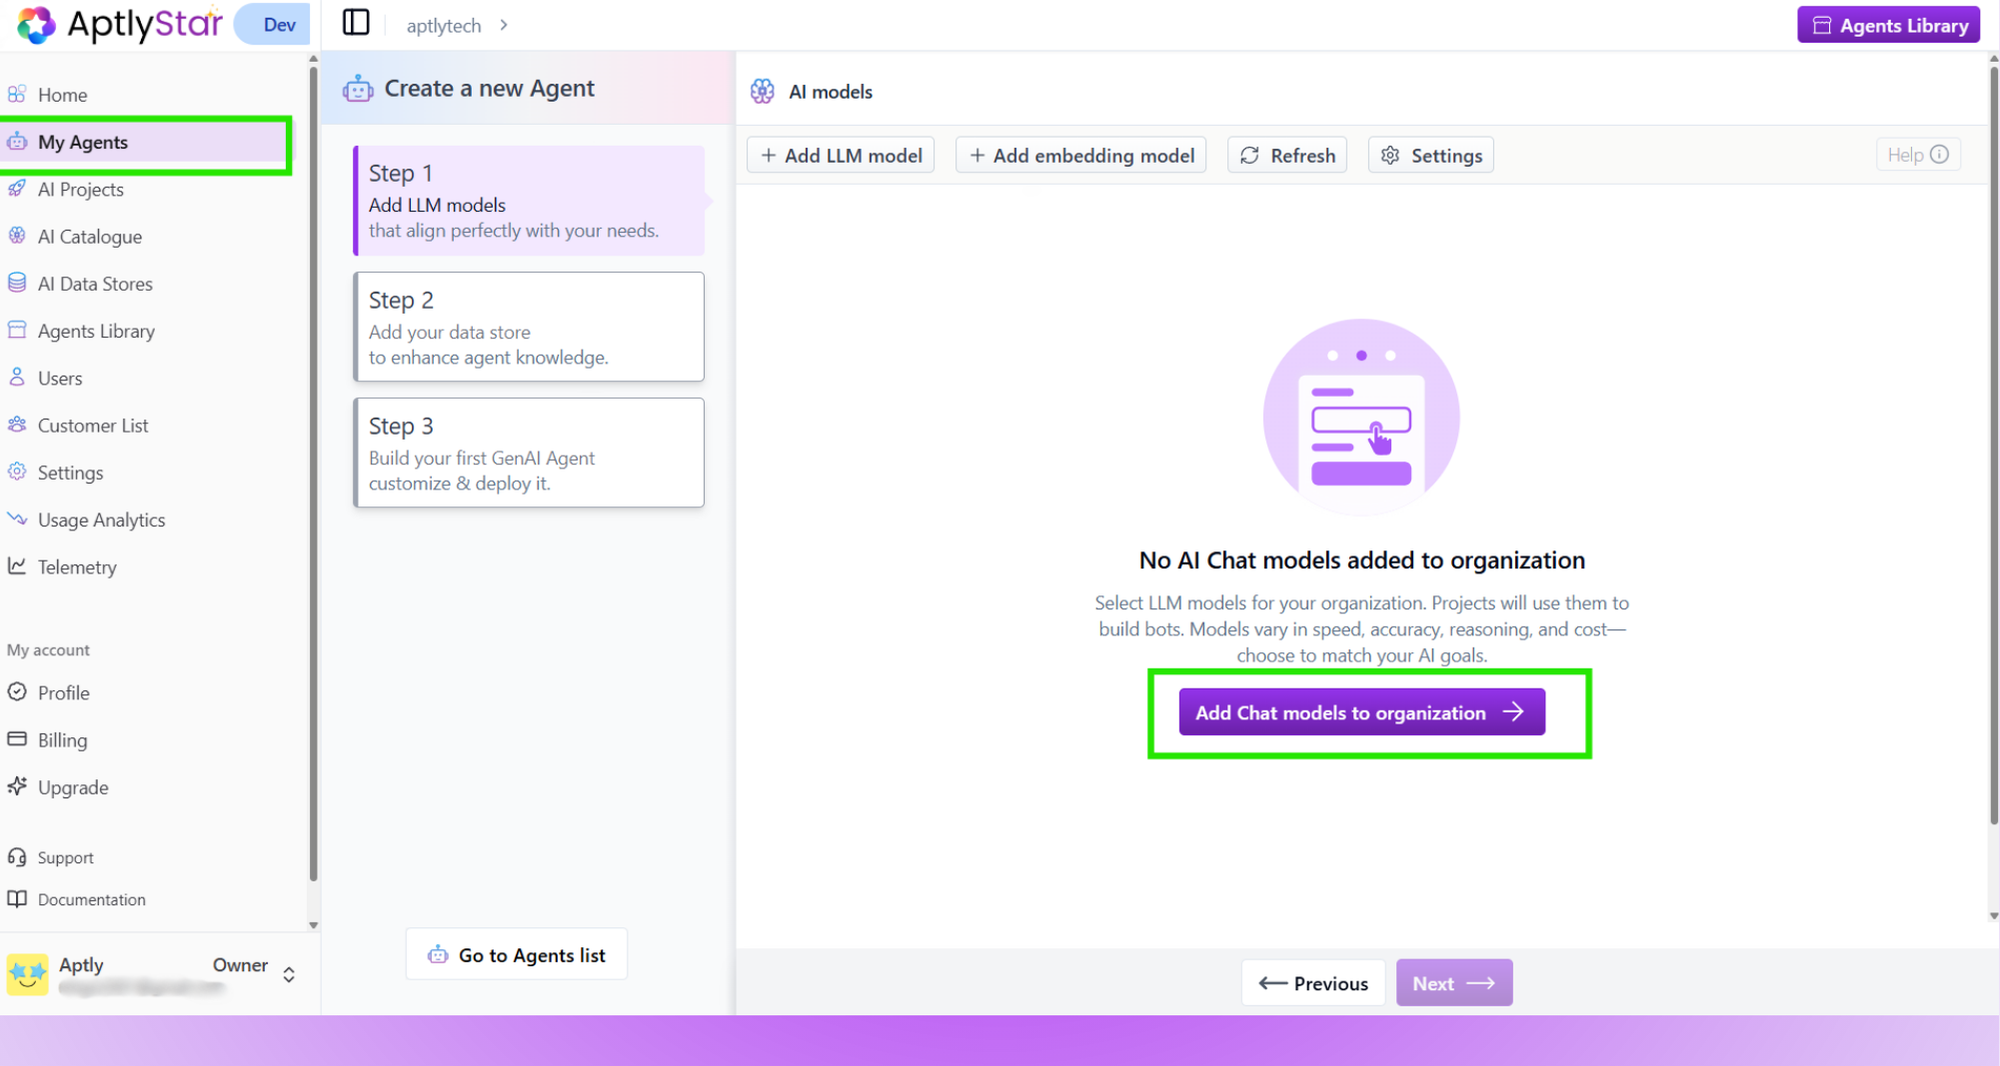
 Start by adding the necessary AI models for your Agent.
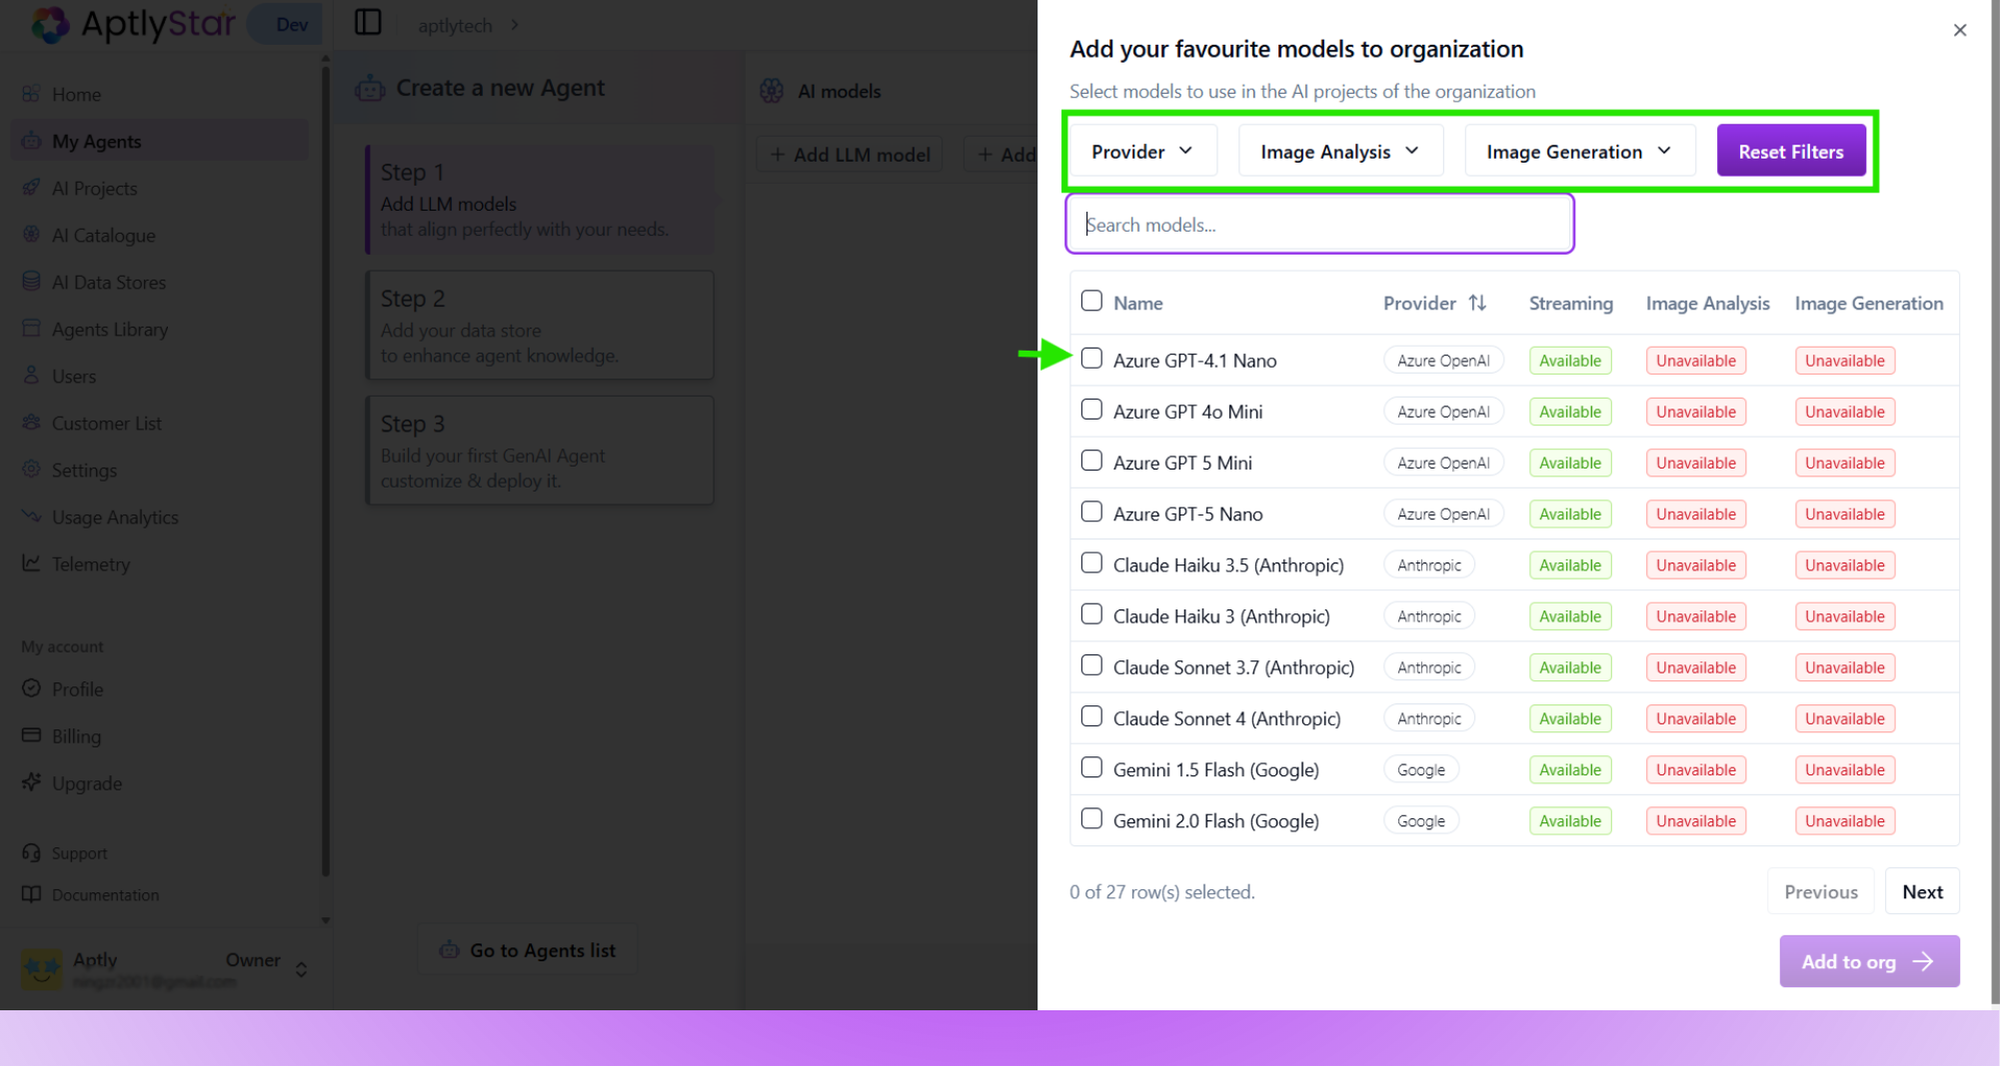
* Click **Add AI model** and choose a supported LLM (e.g., GPT-4o).
Start by adding the necessary AI models for your Agent.
* Click **Add AI model** and choose a supported LLM (e.g., GPT-4o).
 * Use the filters at the top of the selection modal to refine results:
* **Provider Filter** – show models from a specific provider (e.g., OpenAI, Anthropic, Azure)
* **Capability Filters** – such as *Image Analysis*, to quickly find multimodal models that support vision tasks
* Select one or more models from the filtered list
* Click **Add to org** to complete
* Use the filters at the top of the selection modal to refine results:
* **Provider Filter** – show models from a specific provider (e.g., OpenAI, Anthropic, Azure)
* **Capability Filters** – such as *Image Analysis*, to quickly find multimodal models that support vision tasks
* Select one or more models from the filtered list
* Click **Add to org** to complete
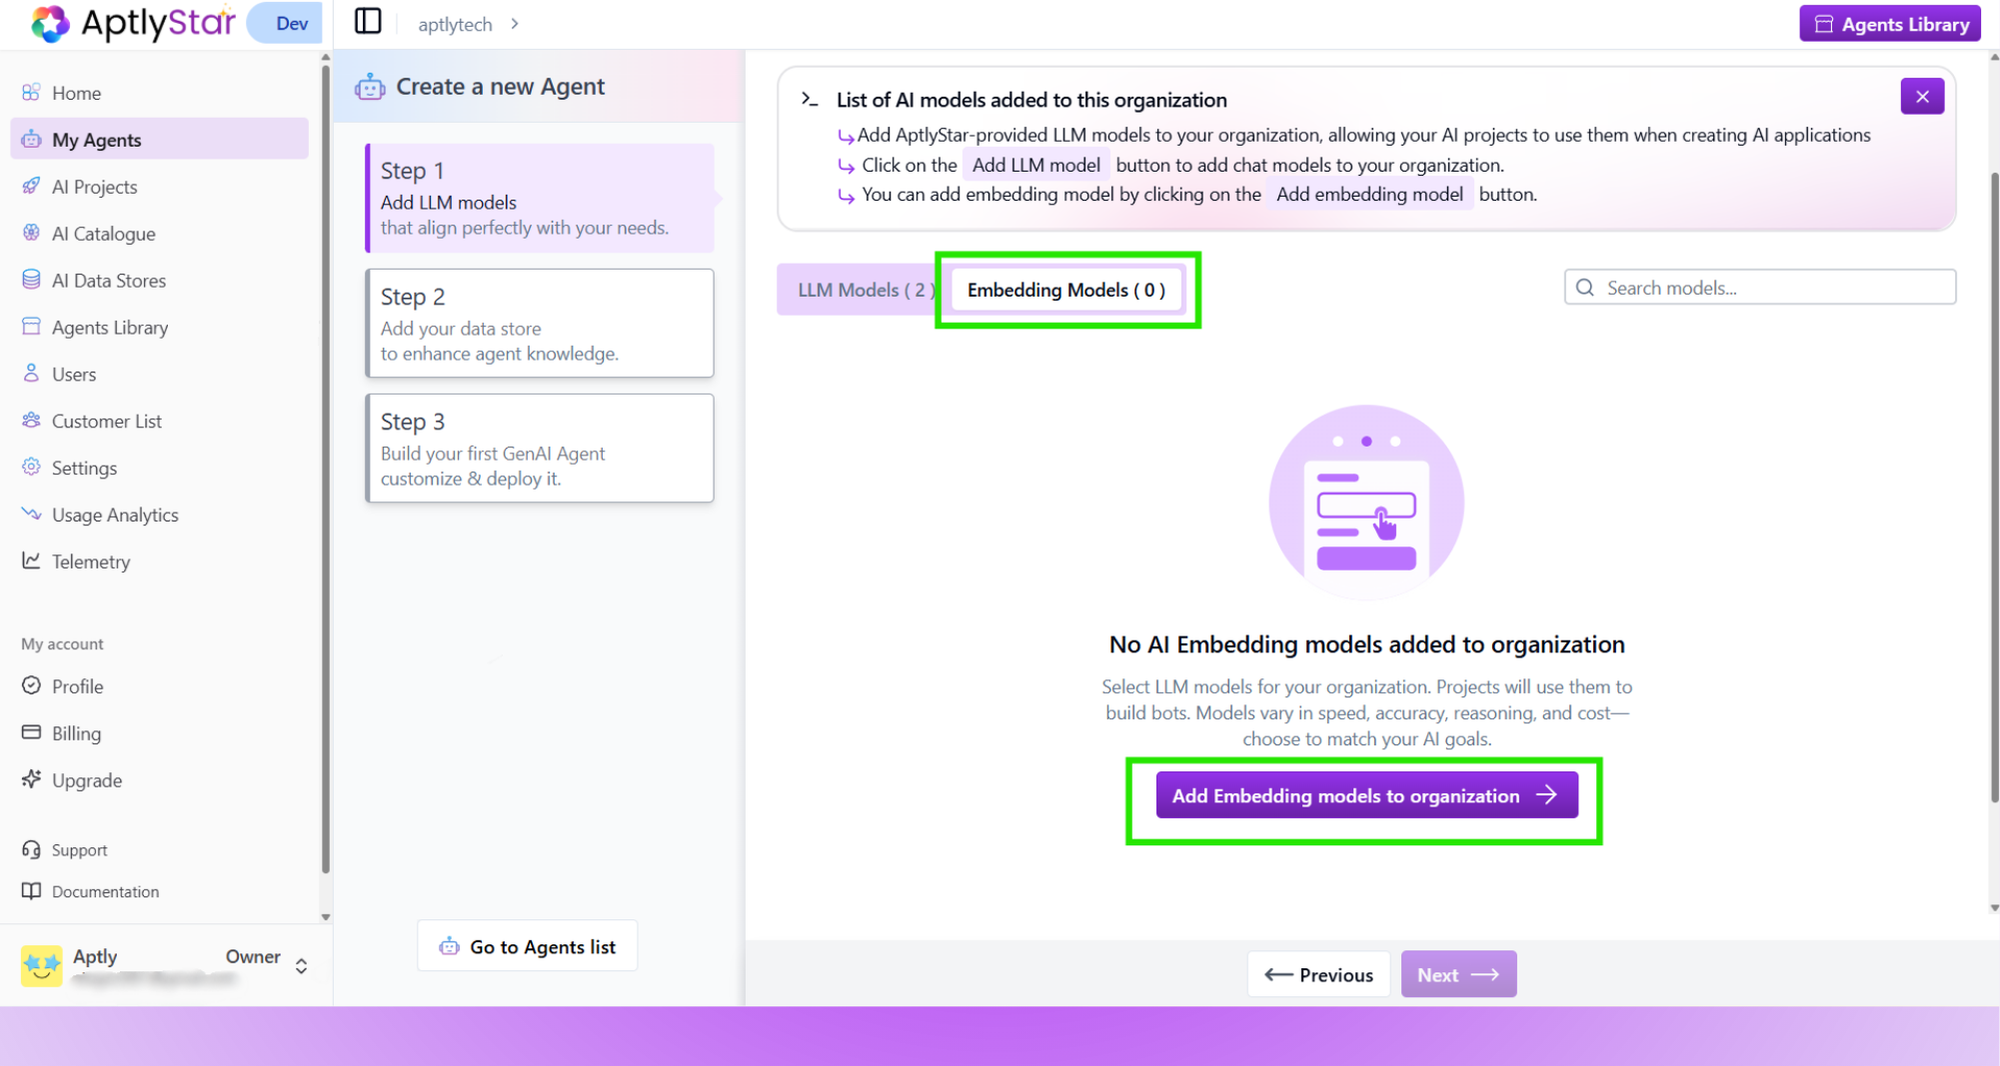
 * Switch to the **Embedding Models** tab and click **Add embedding model**.
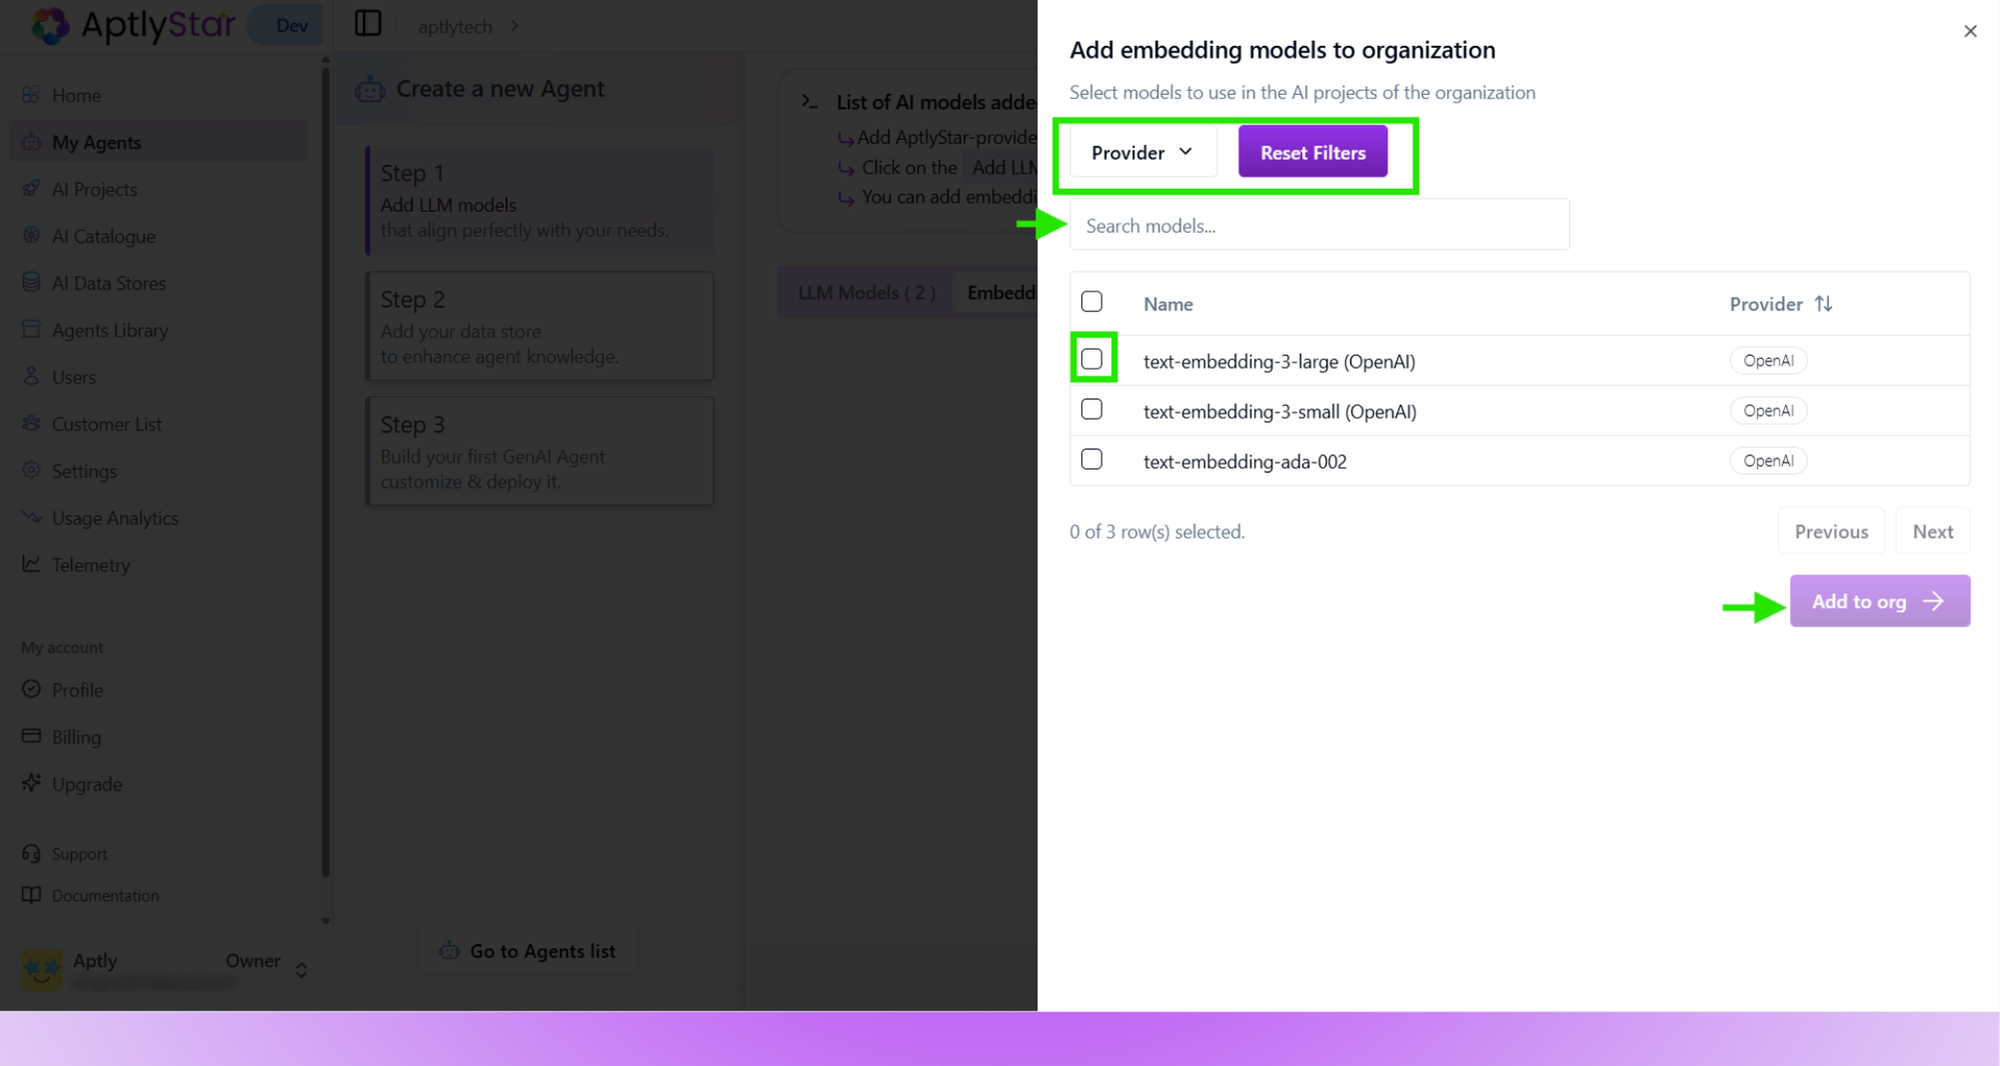
 * Choose a model like `text-embedding-3-large` and add it to your org.
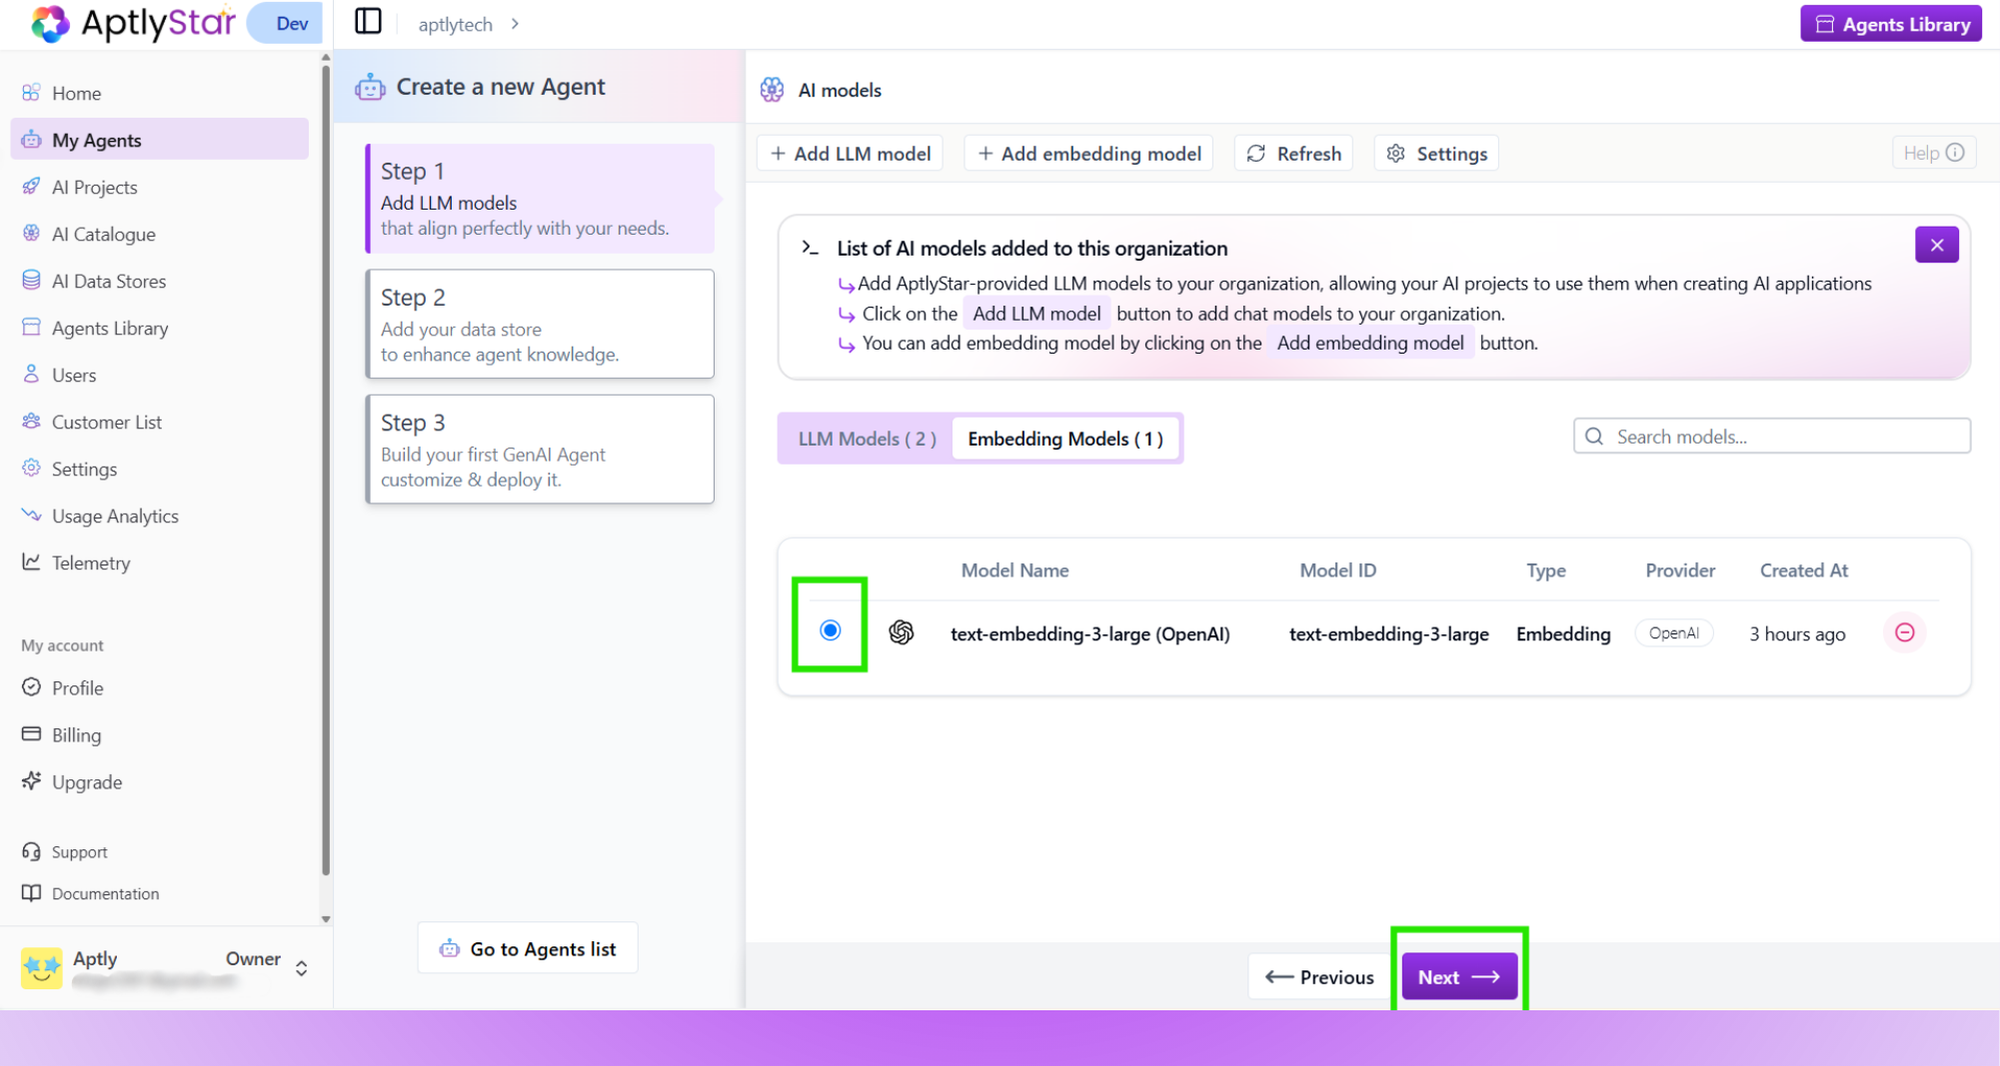
 * Ensure a model is selected before moving to the next step. Click **Next** to proceed to Step 2.
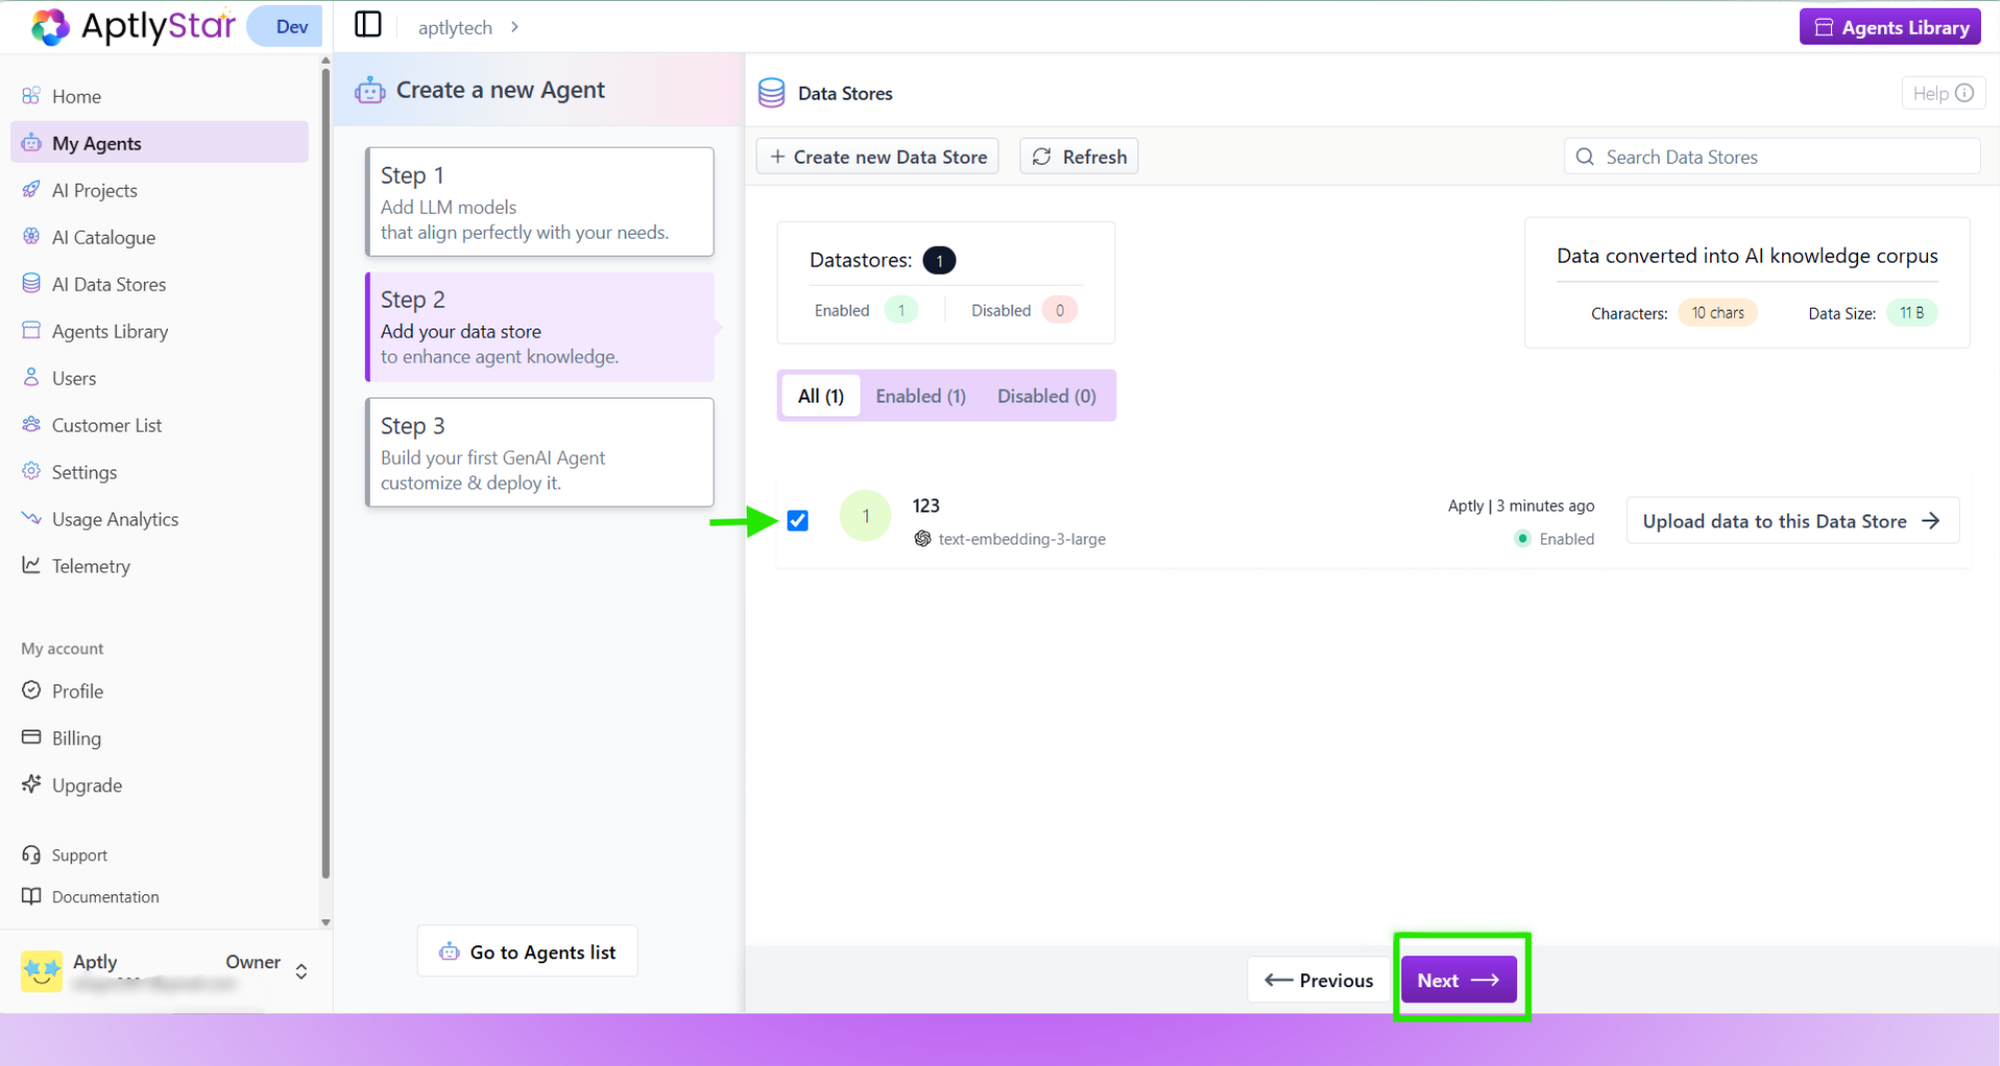
 In this step, you’ll prepare the knowledge base for your agent.
* Click **Go to data store to upload data**.
In this step, you’ll prepare the knowledge base for your agent.
* Click **Go to data store to upload data**.
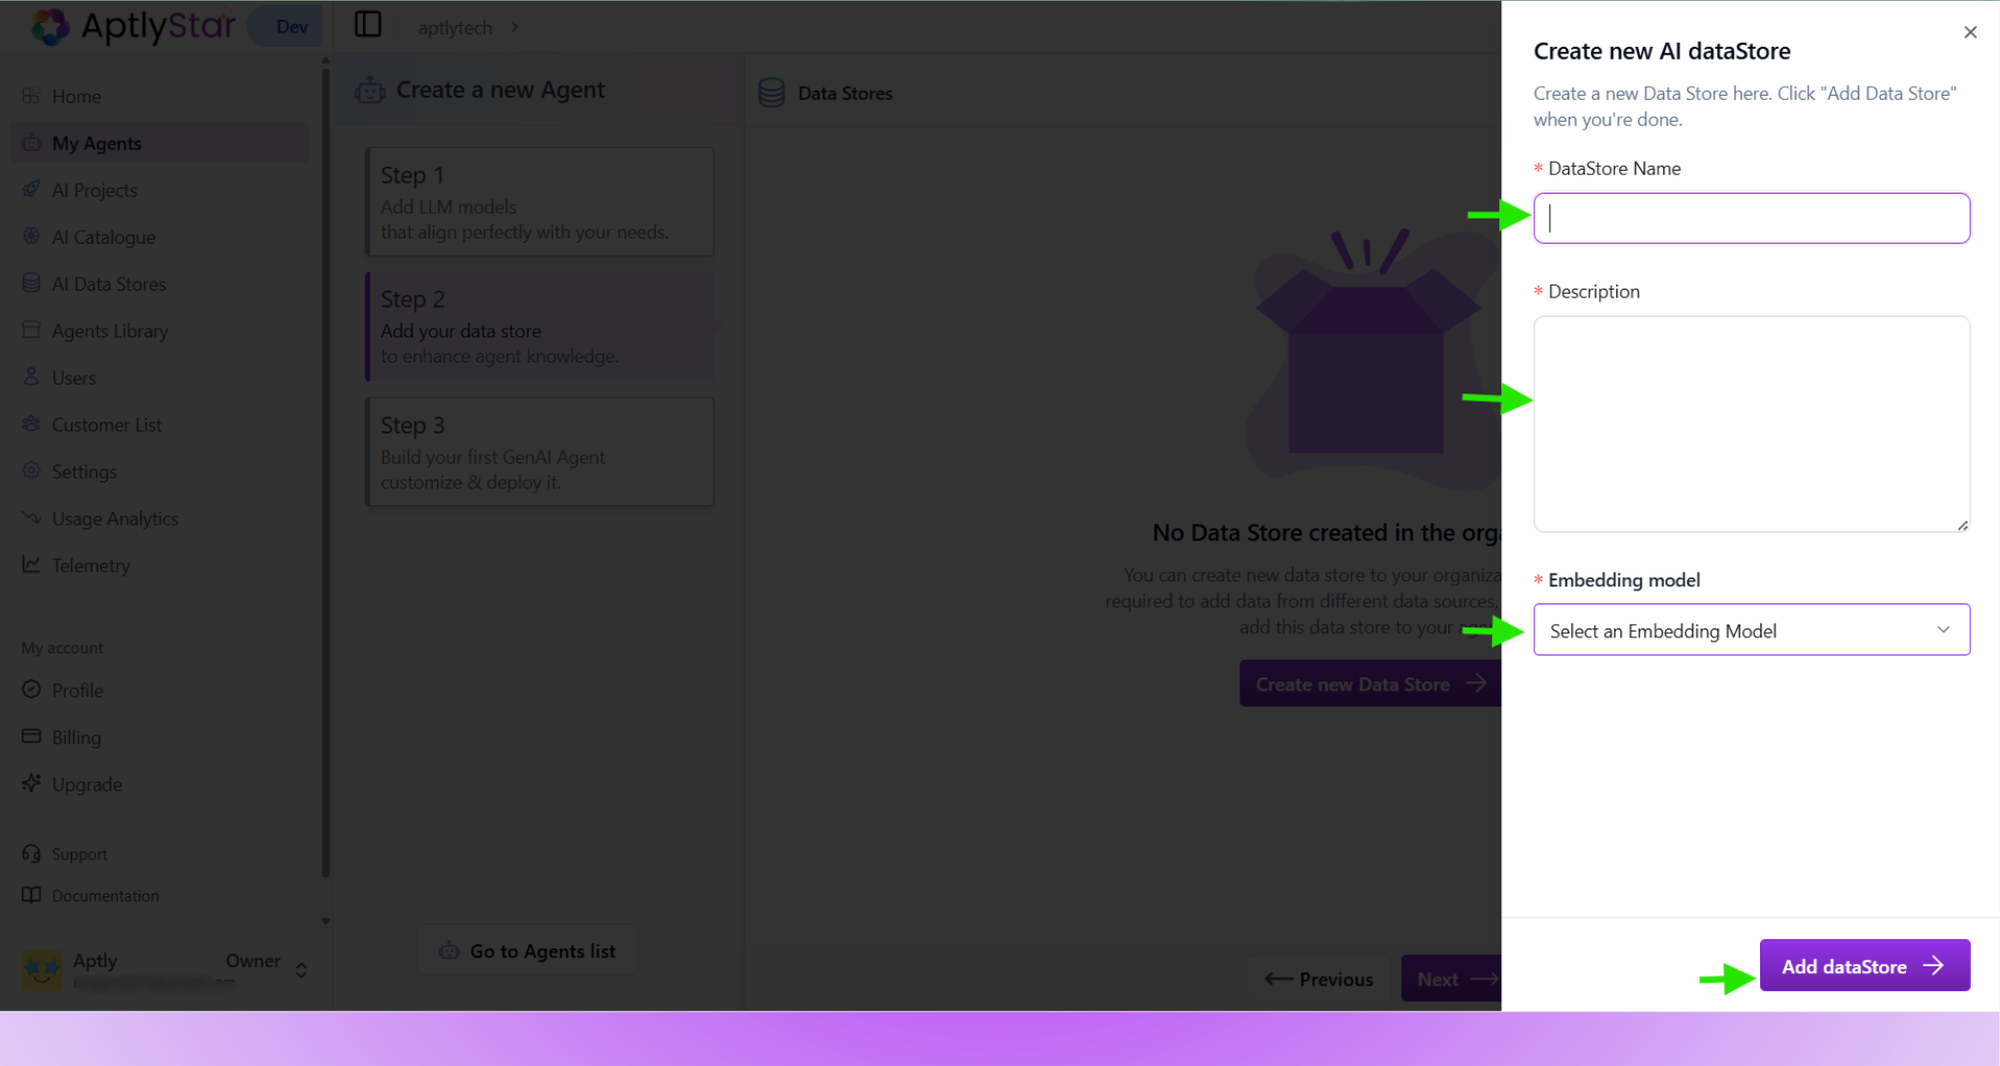
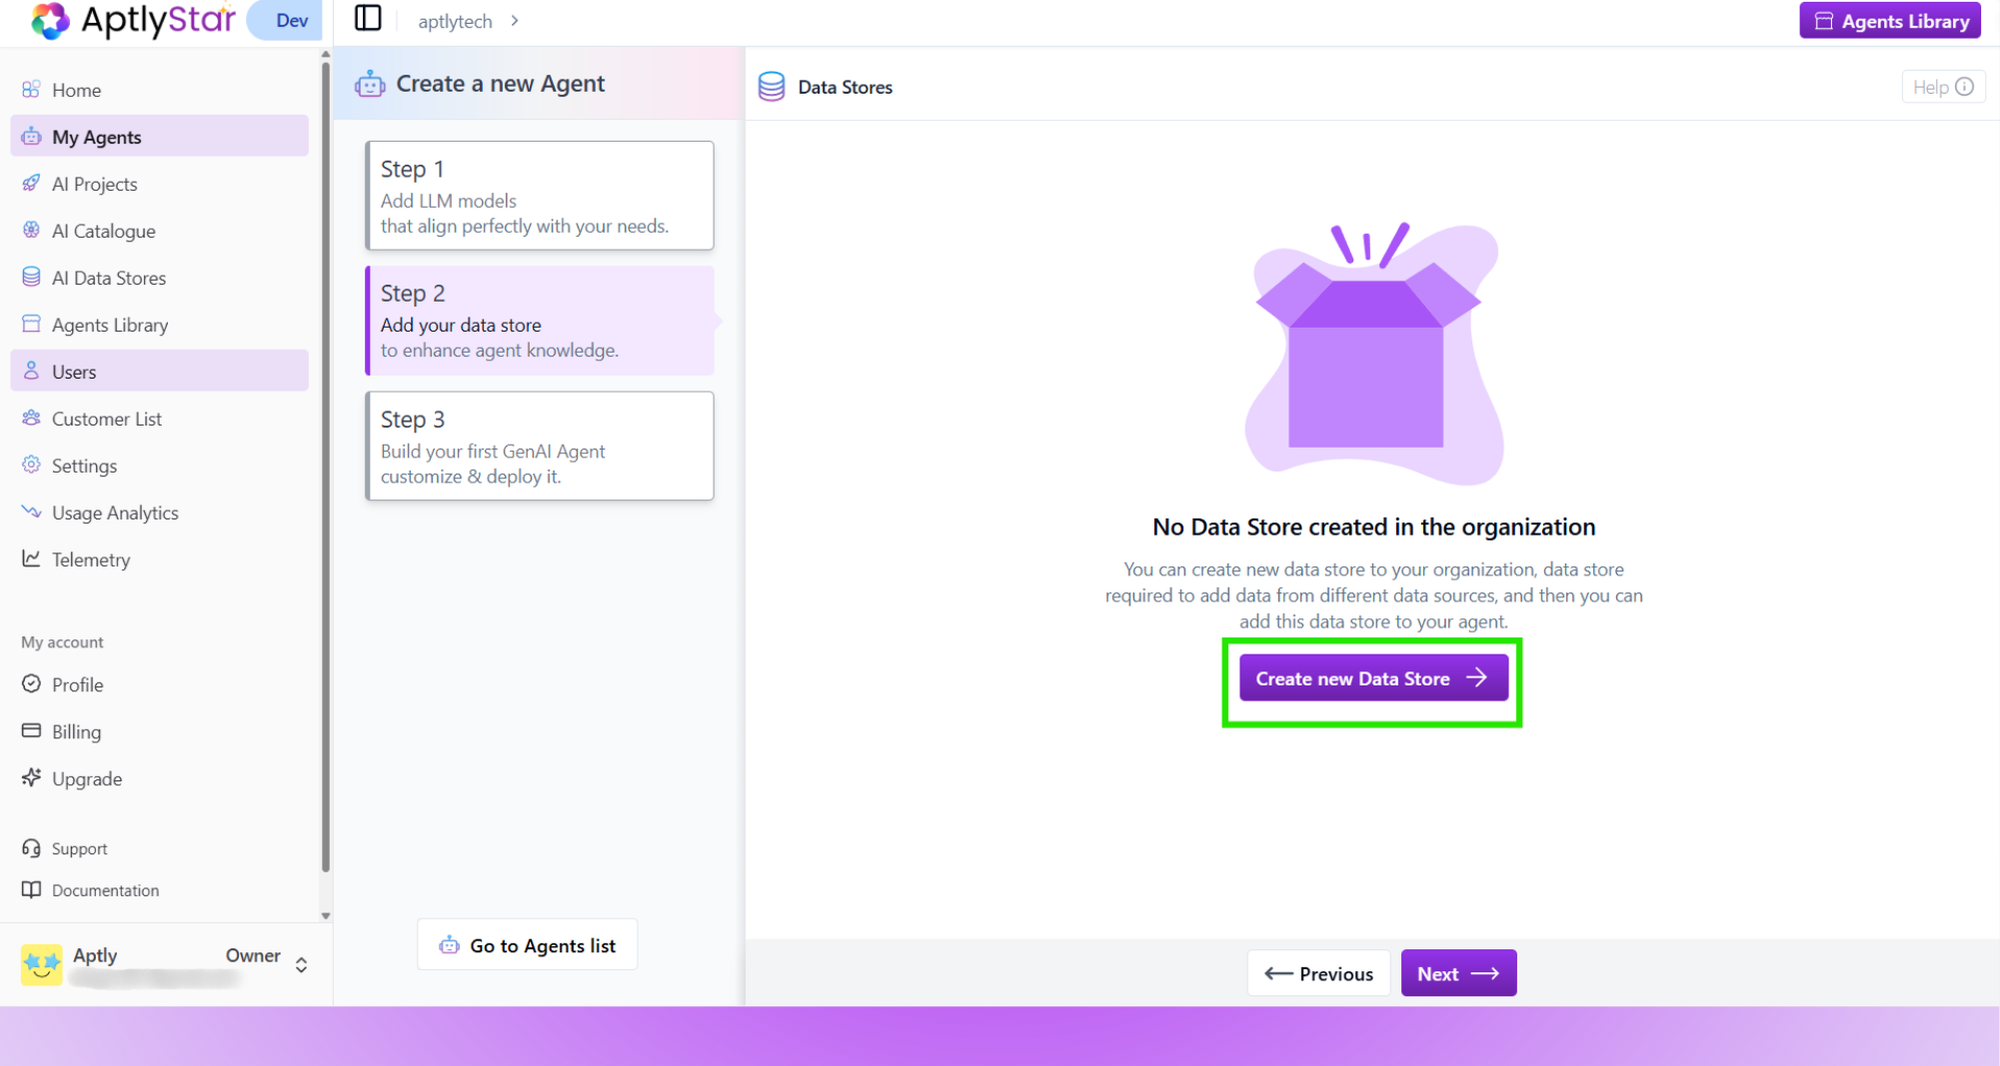 * Click **Create new Data Store** and fill in the details including the embedding model.
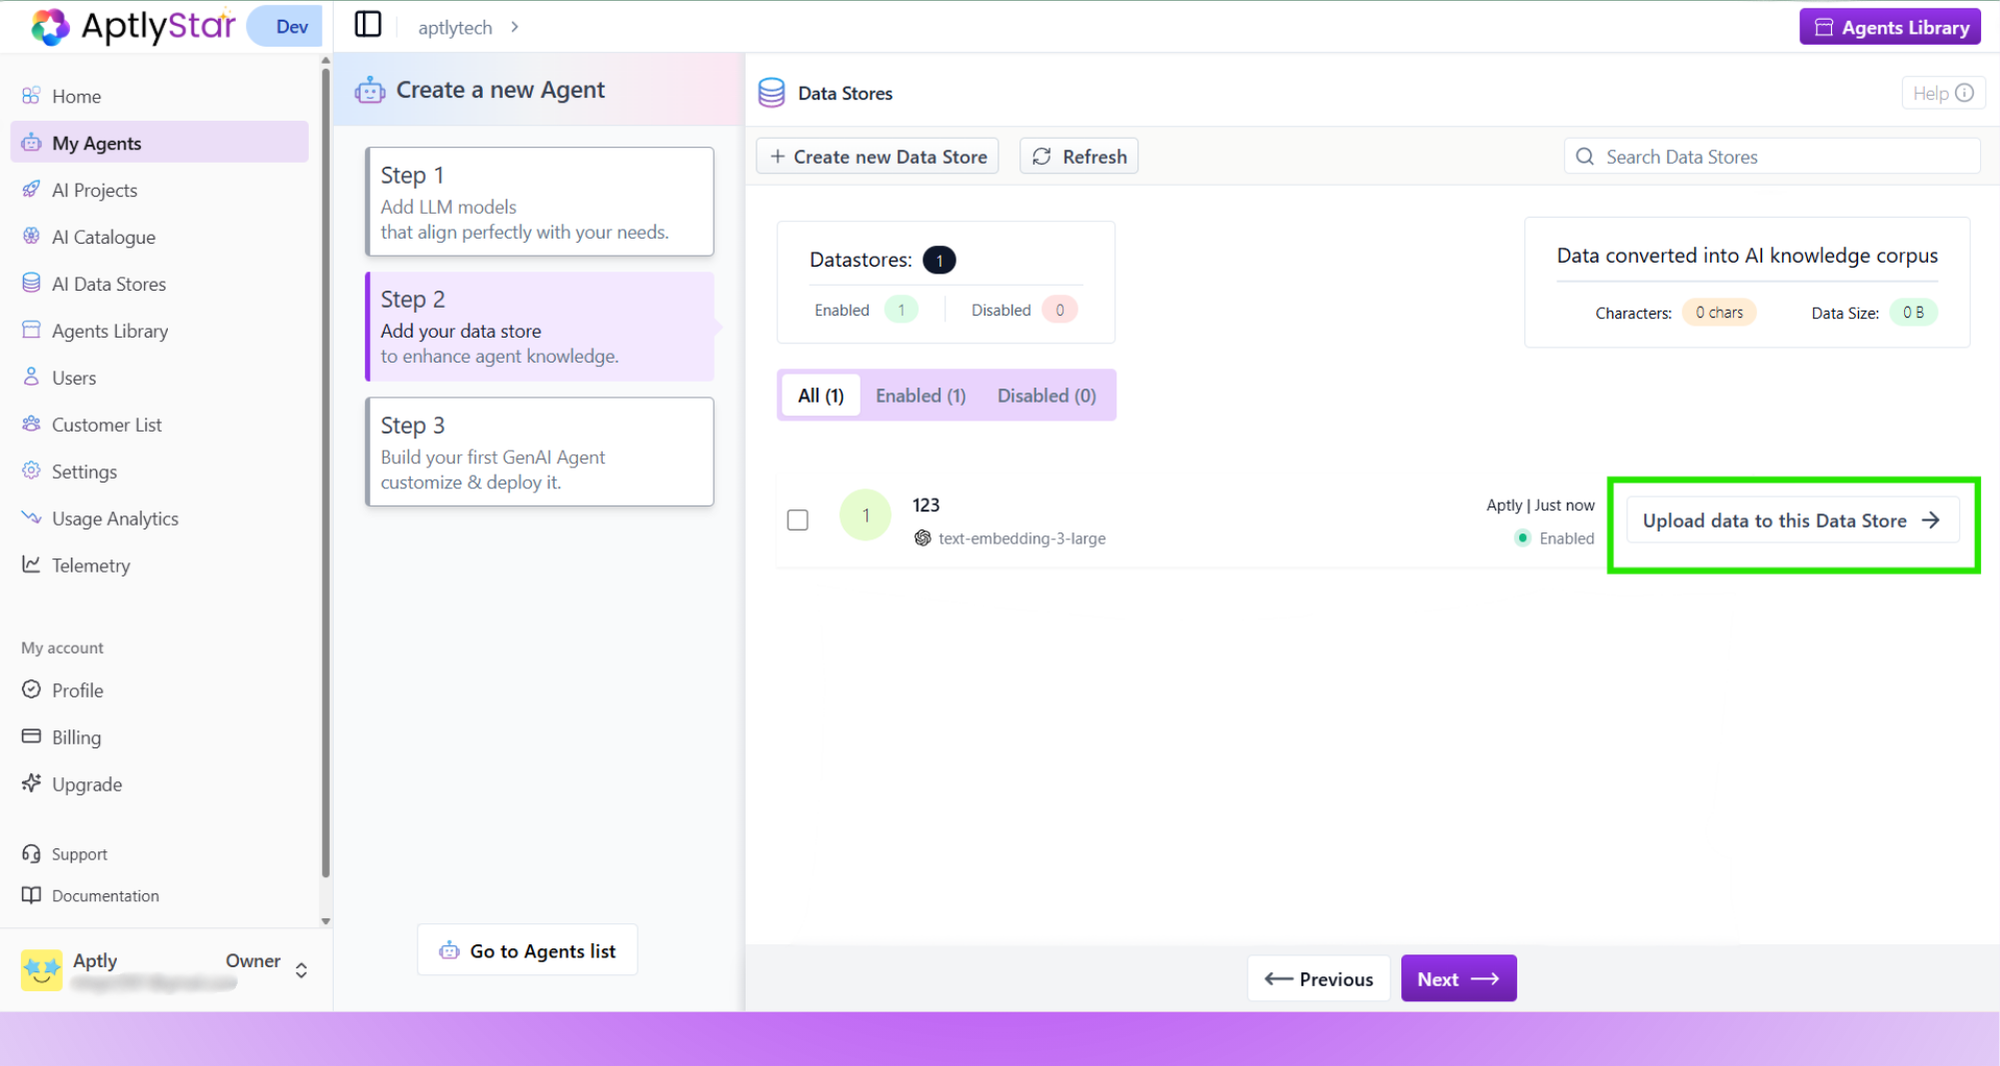
 * Once created, click **Upload data to this Data Store**.
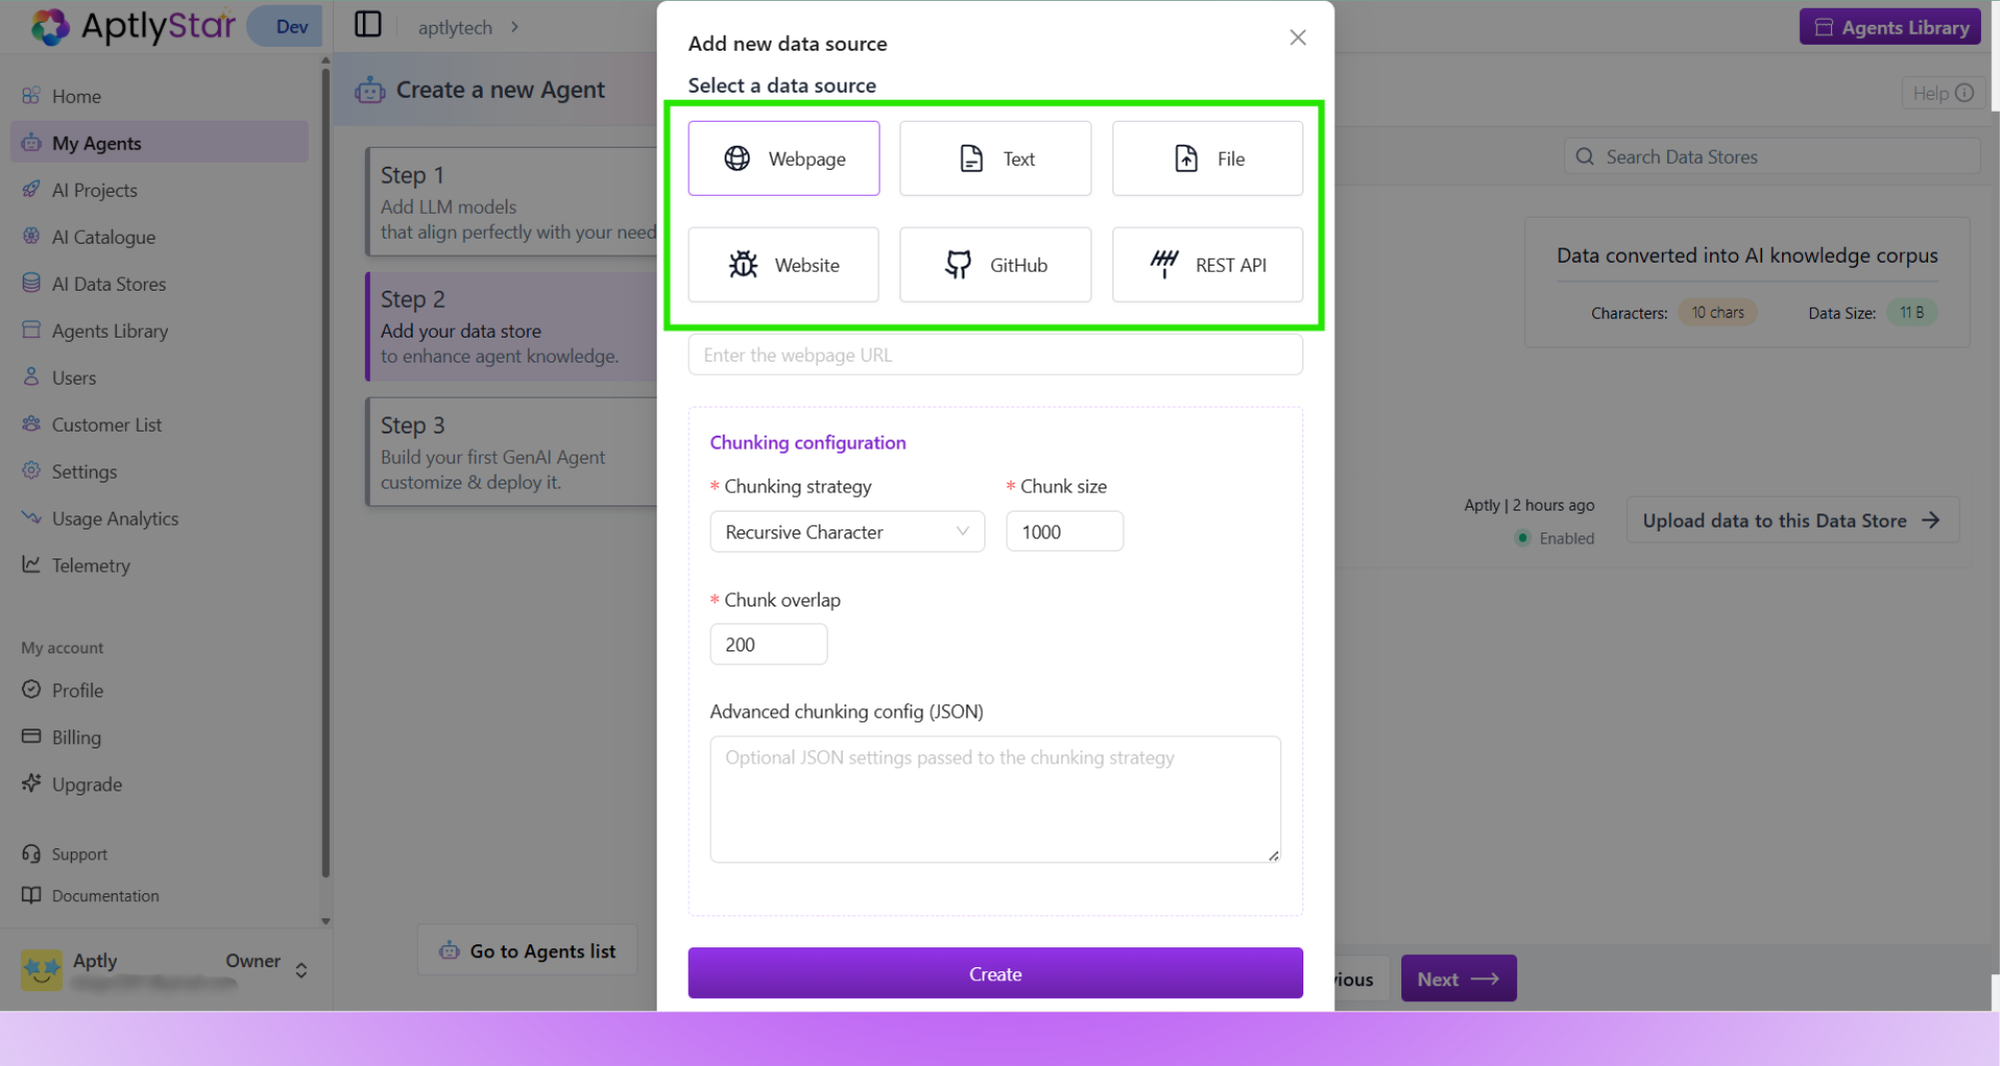
 * Choose the data source (Webpage, Text, File, YouTube, or REST API).
 * After uploading, select the data store to associate with your agent and click **Next**.
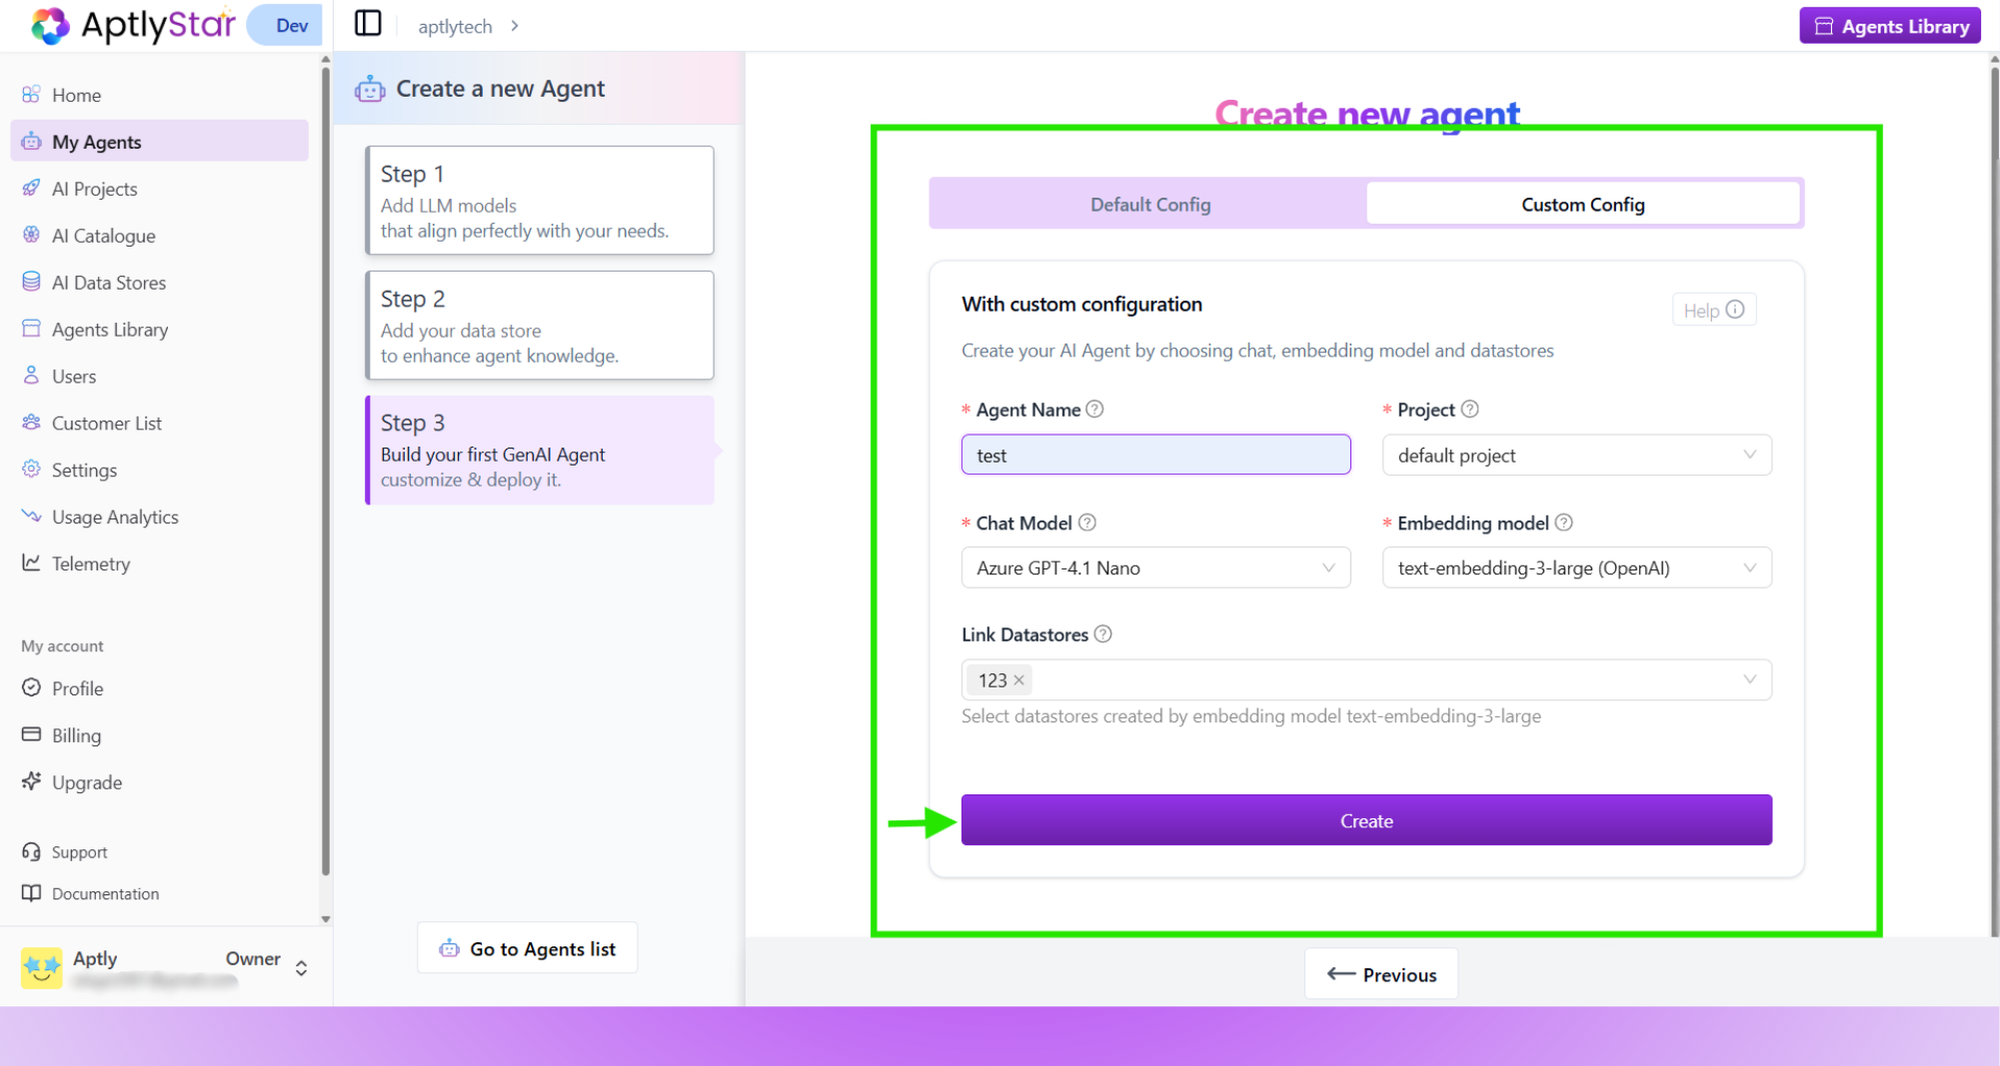
 You can now finalize and deploy your agent using one of two options:
**Custom Configuration**
* Enter a name, choose chat model, embedding model, and link your data store.
* Click **Create** to finish.
You can now finalize and deploy your agent using one of two options:
**Custom Configuration**
* Enter a name, choose chat model, embedding model, and link your data store.
* Click **Create** to finish.
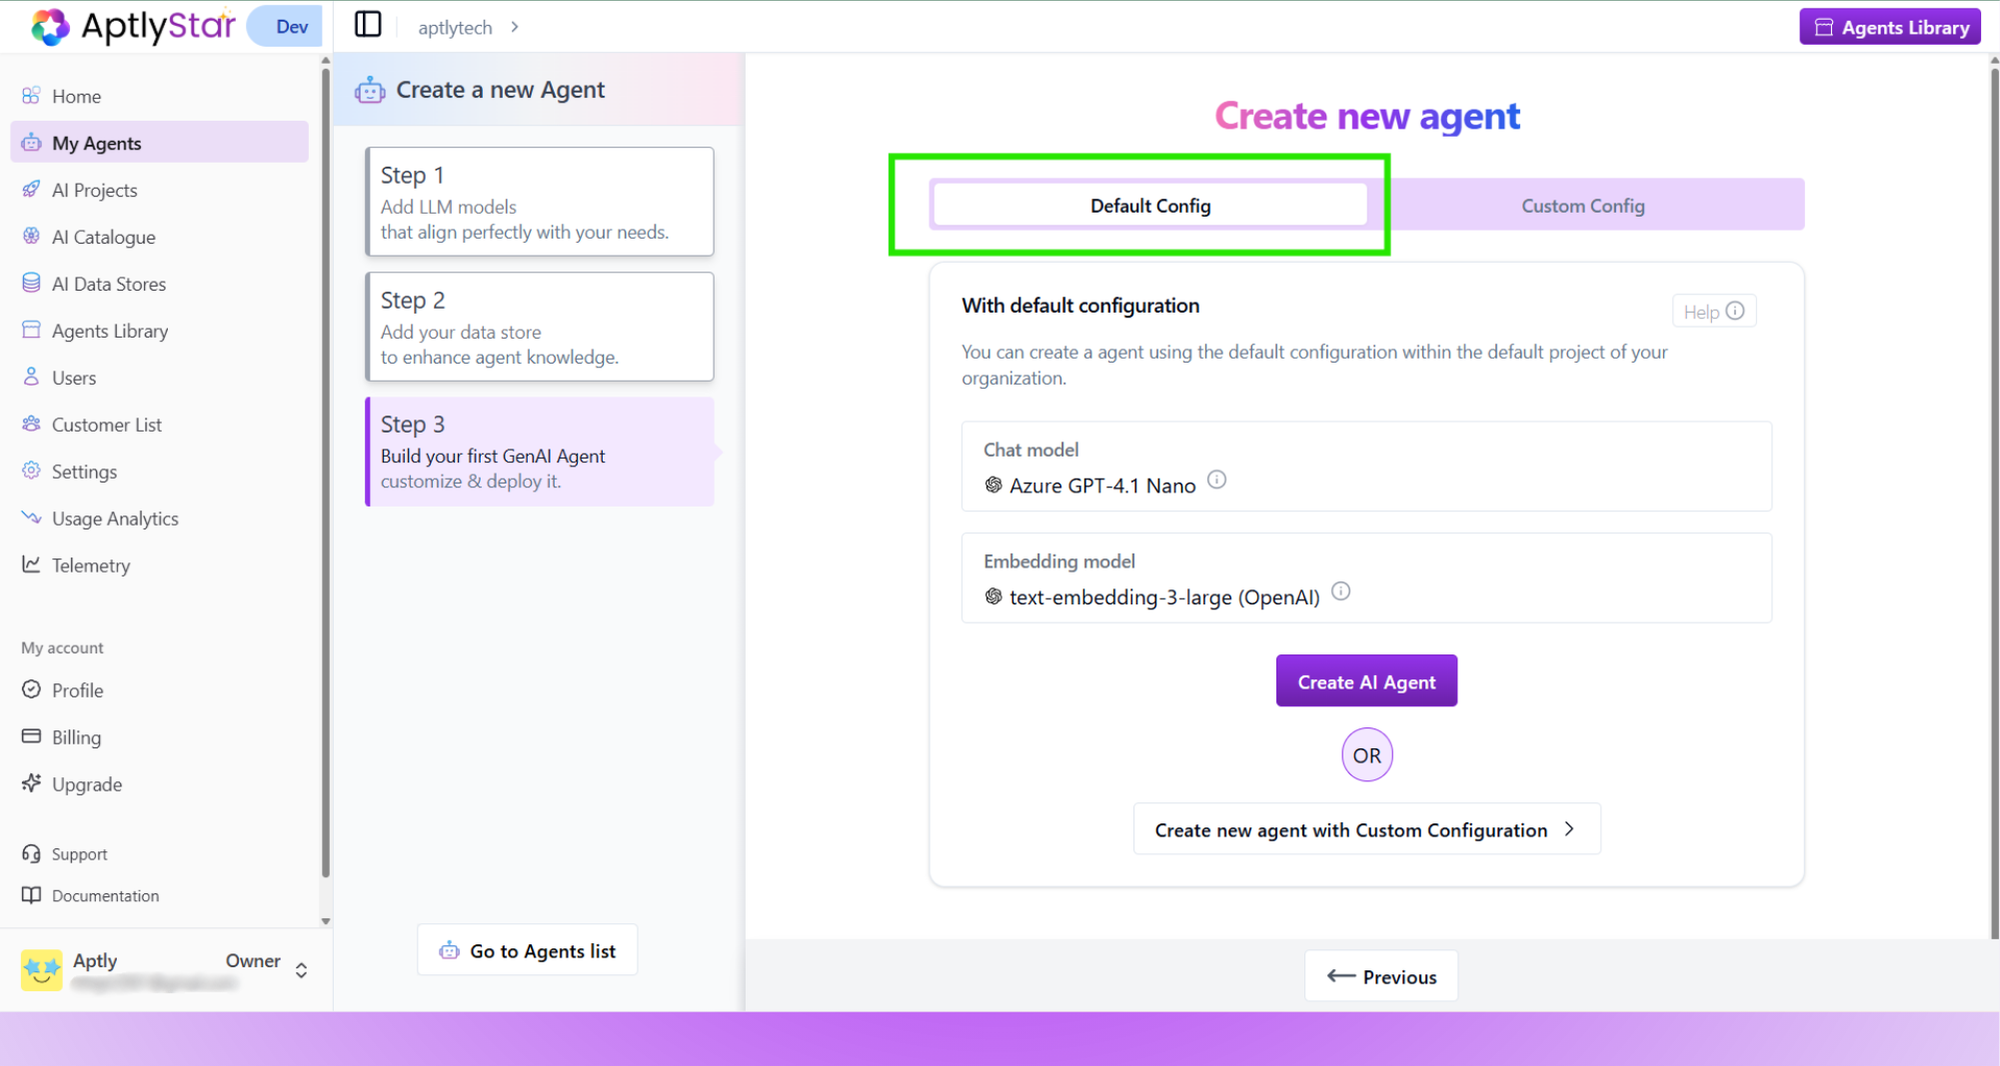
 **Default Configuration**
* Uses preselected models for fast setup.
* Simply click **Create AI Agent**.
**Default Configuration**
* Uses preselected models for fast setup.
* Simply click **Create AI Agent**.
 ***
## Creating Agents with Ask Astra
Ask Astra provides a quick way to build agents using prompt based suggestions.\
Astra generates the agent configuration automatically based on the prompt you choose or write.
Before using Ask Astra, make sure:
* Your project already has at least one LLM model
* And at least one embedding model
Astra uses these existing models to create the new agent.
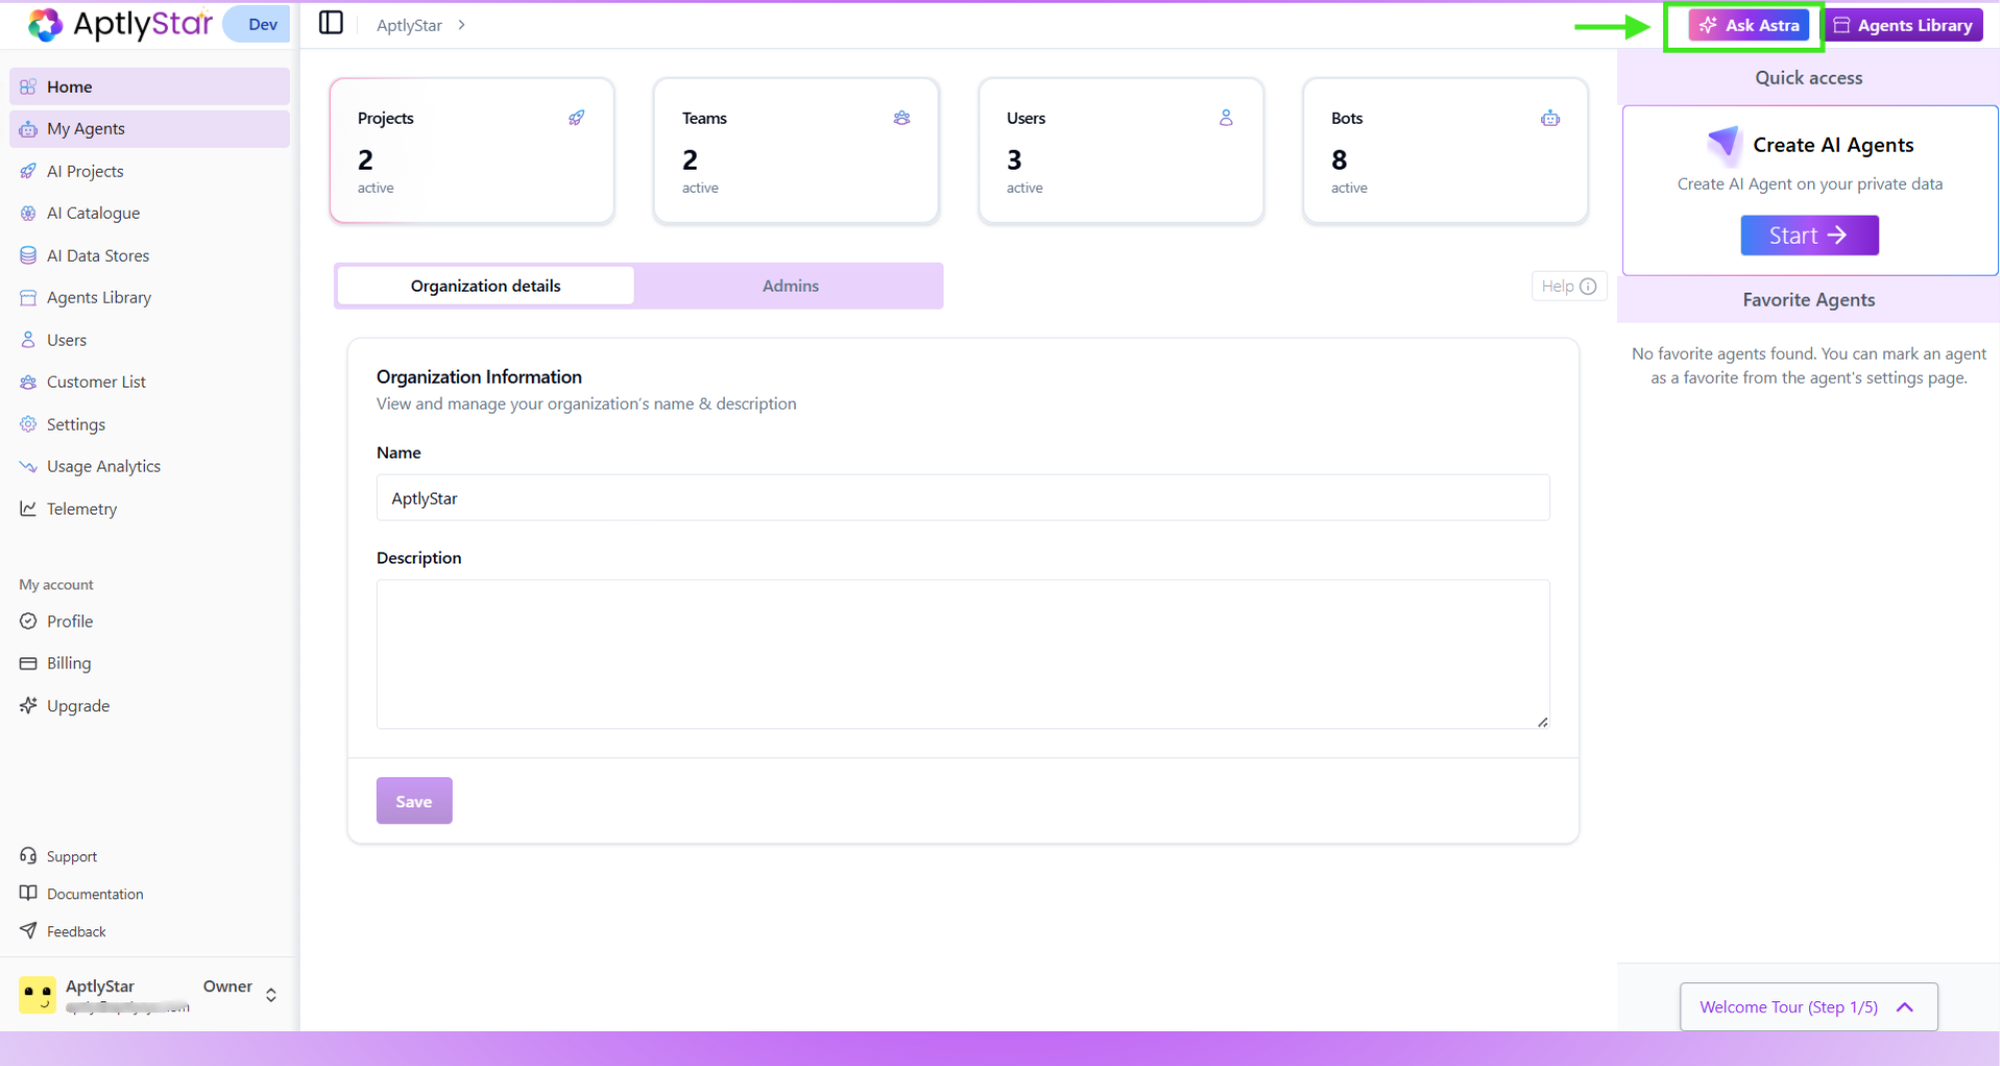
Click the **Ask Astra** button to start the assisted agent creation flow.
***
## Creating Agents with Ask Astra
Ask Astra provides a quick way to build agents using prompt based suggestions.\
Astra generates the agent configuration automatically based on the prompt you choose or write.
Before using Ask Astra, make sure:
* Your project already has at least one LLM model
* And at least one embedding model
Astra uses these existing models to create the new agent.
Click the **Ask Astra** button to start the assisted agent creation flow.
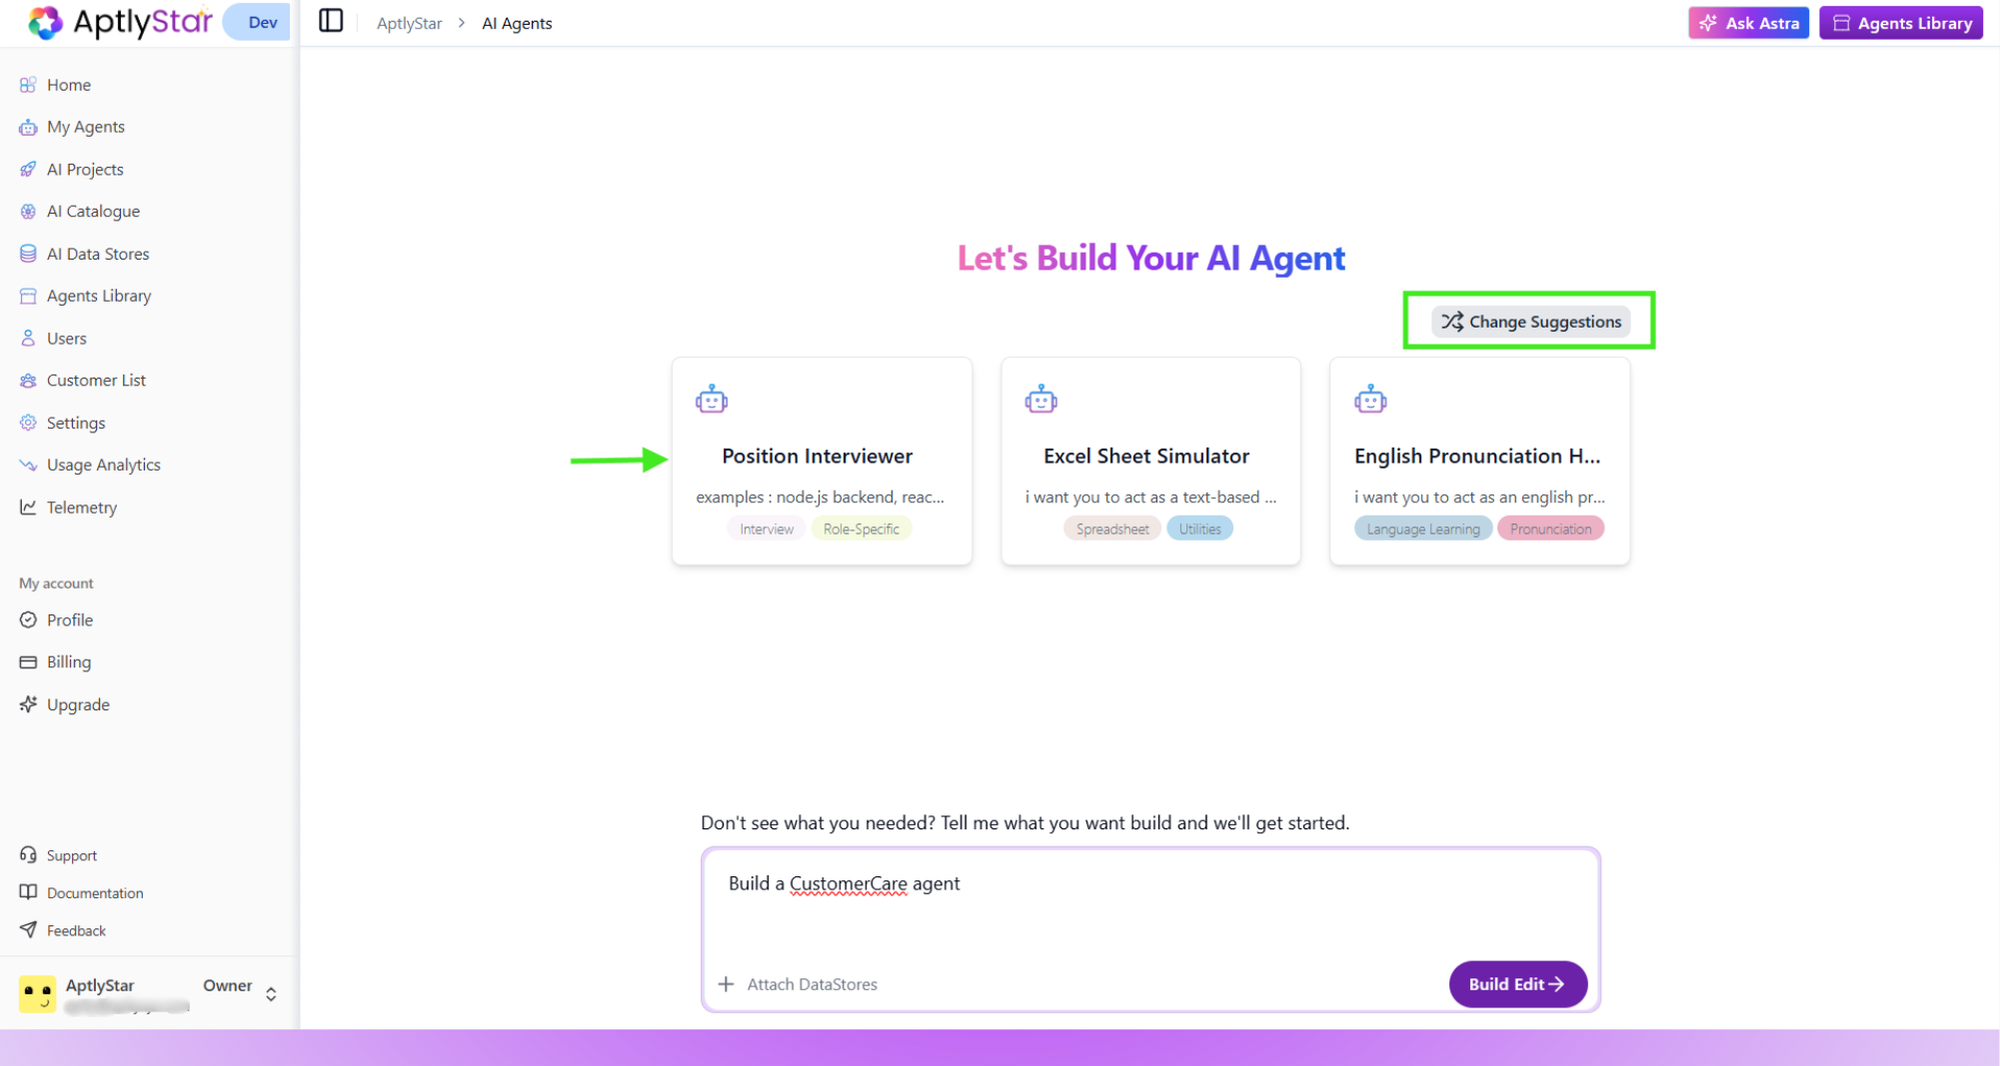
 Astra shows a list of suggested agent ideas you can start from.\
If none of them match what you need, click **Change Suggestions** to shuffle and see new options.
Astra shows a list of suggested agent ideas you can start from.\
If none of them match what you need, click **Change Suggestions** to shuffle and see new options.
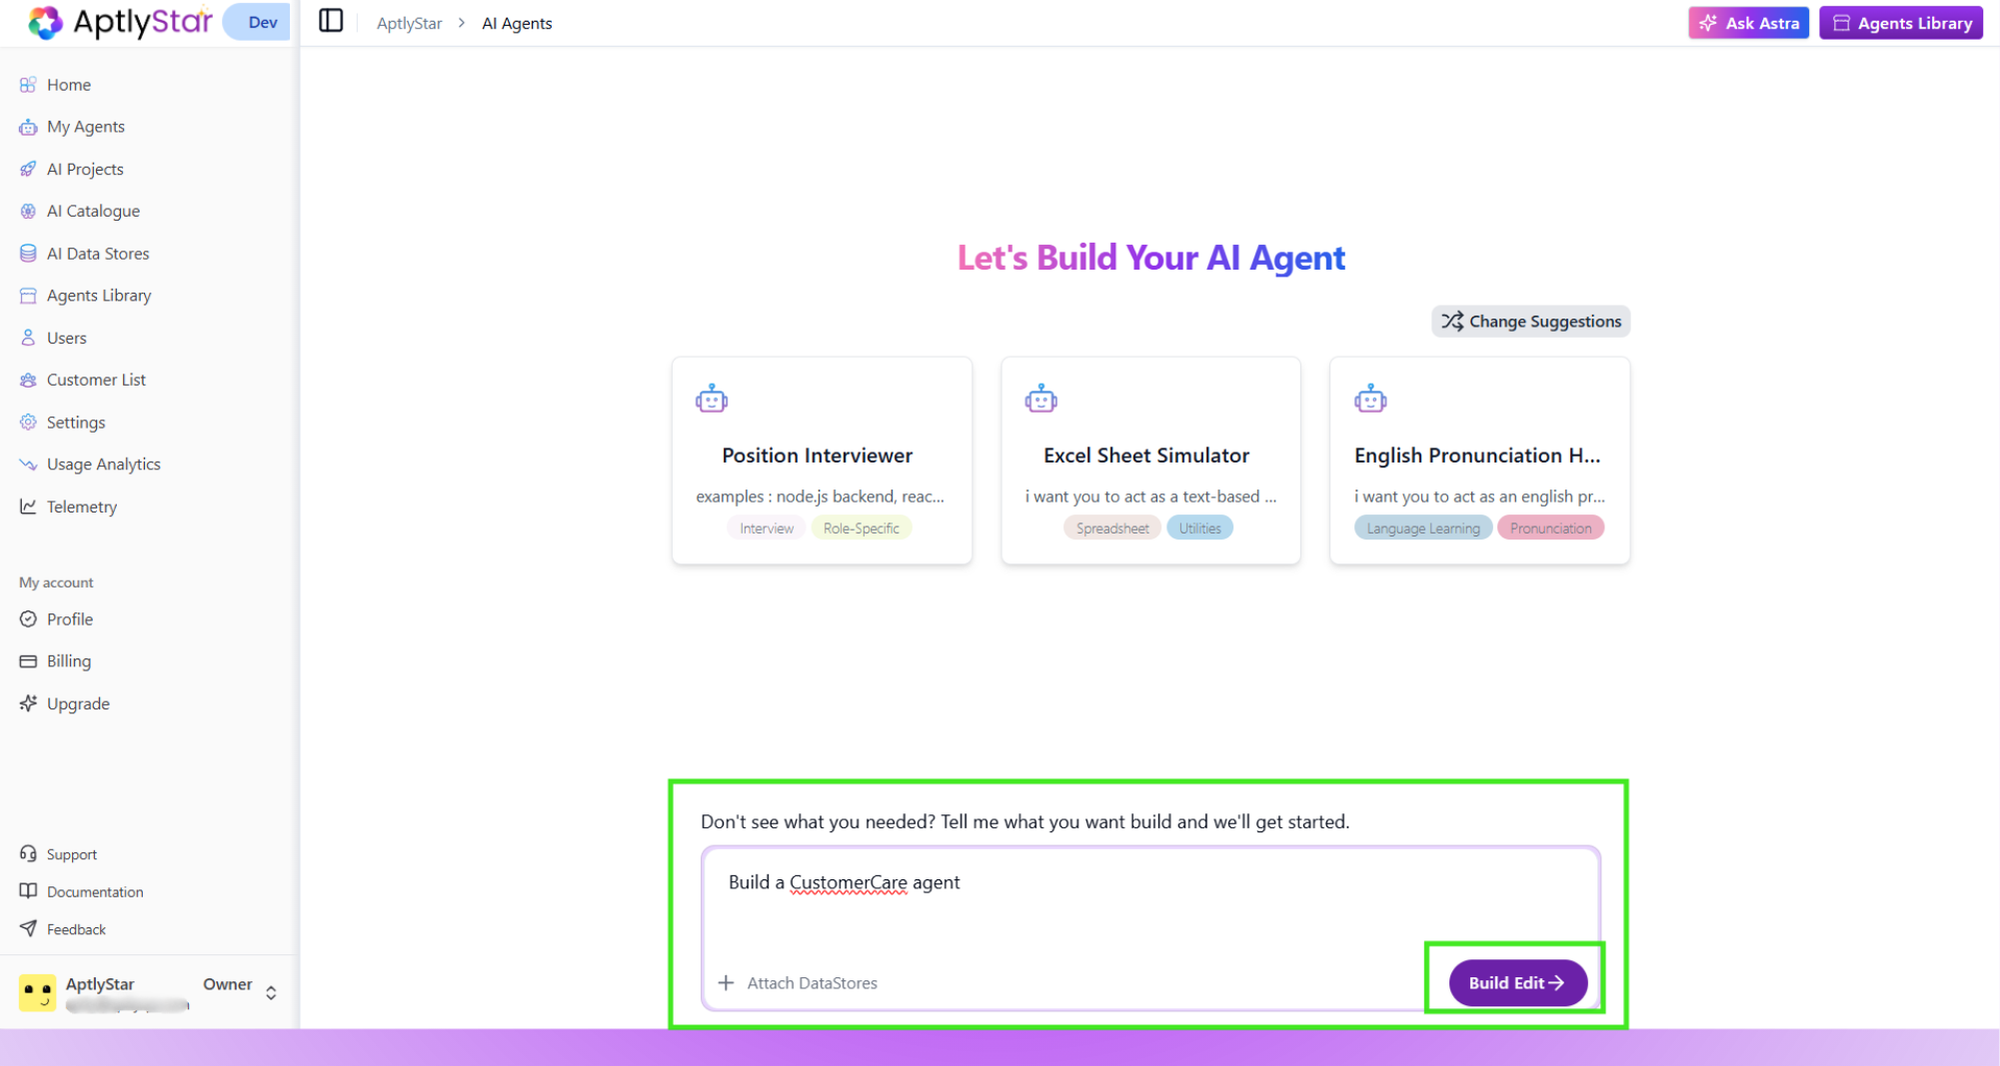
 If you prefer, you can write your own description of the agent you want to build.\
This is useful when your use case is more specific or not covered by the suggestions.
If you prefer, you can write your own description of the agent you want to build.\
This is useful when your use case is more specific or not covered by the suggestions.
 Astra uses your chosen or custom prompt to generate the initial agent setup.\
You can review the configuration and adjust it before creating the agent.
Ask Astra makes agent creation fast by letting you start from guided suggestions or your own custom prompt, without manually configuring each step.
Astra uses your chosen or custom prompt to generate the initial agent setup.\
You can review the configuration and adjust it before creating the agent.
Ask Astra makes agent creation fast by letting you start from guided suggestions or your own custom prompt, without manually configuring each step.