> ## Documentation Index
> Fetch the complete documentation index at: https://docs.aptlystar.ai/llms.txt
> Use this file to discover all available pages before exploring further.
# Data Sources in Data Store Console
AptlyStar.ai enables you to **seamlessly integrate a variety of data sources** into your data stores, enriching your AI agent's knowledge base. Supported source types include:
* **Webpage links**
* **Text files**
* **File uploads (PDFs, DOCs, etc.)**
* **REST APIs**
* **YouTube links**
* **GitHub repositories**
This allows for more powerful and context-aware query responses from your AI agents.
***
## 🧩 Steps to Add Data Sources
From the **AI Data Stores** console, choose your desired data store.
Then:
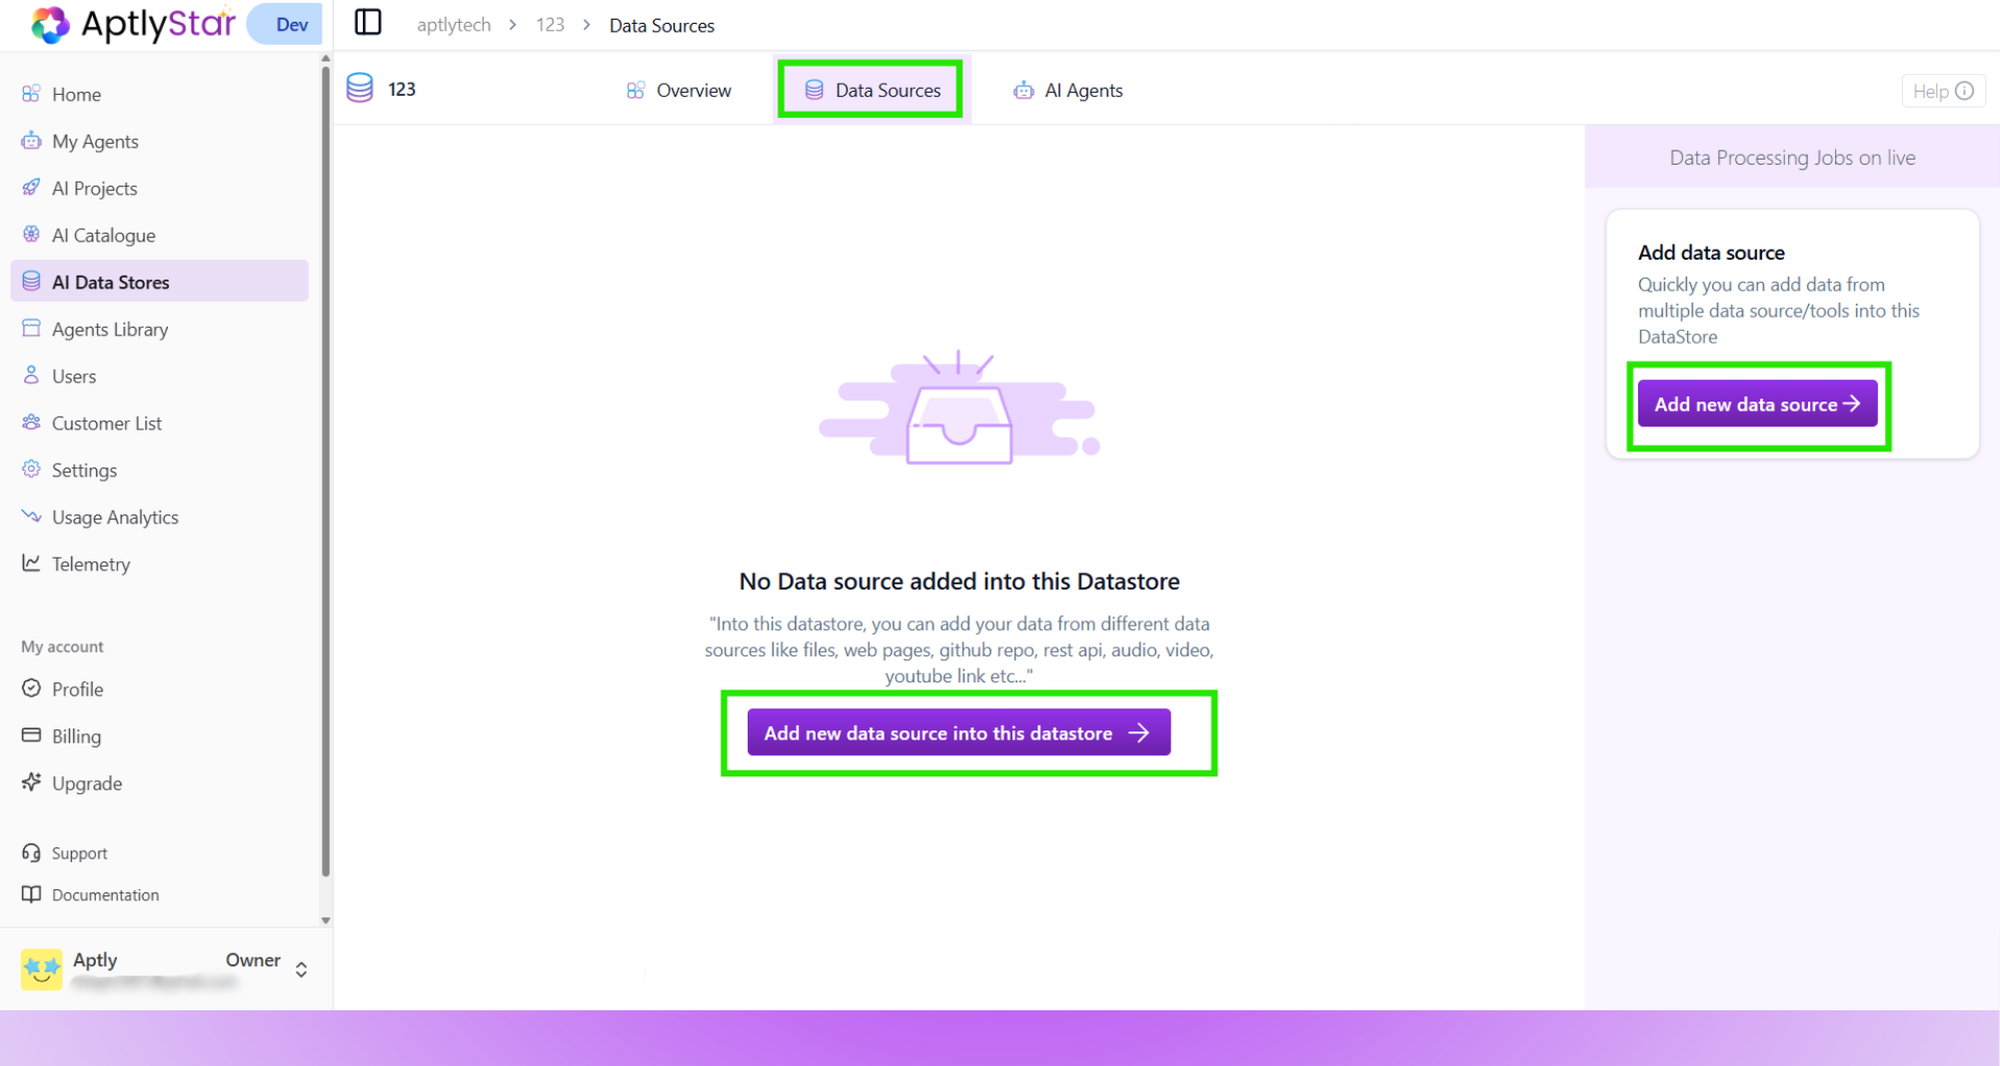
* Click on the **Data Sources** tab (1)
* Click **Add new data source** (2)
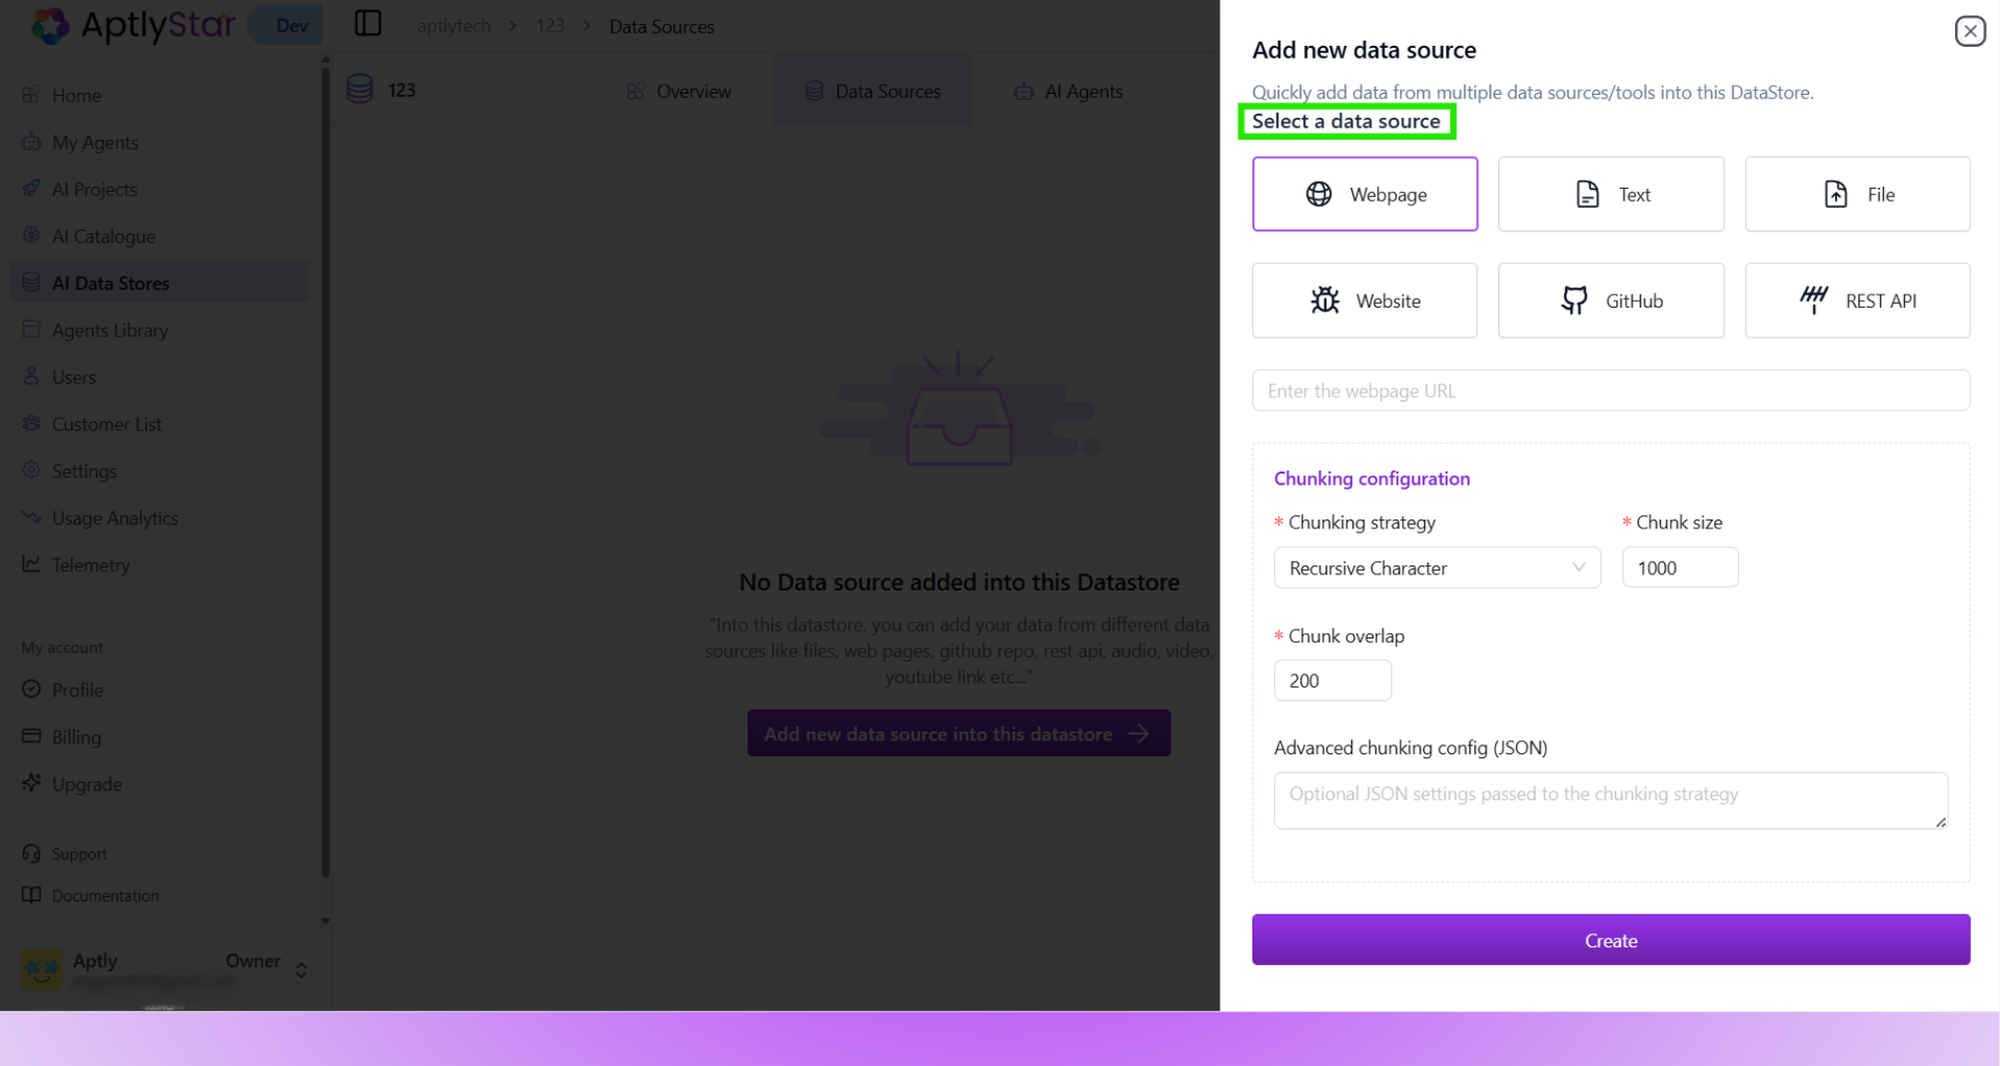
 Now you can import data by:
* Entering a **webpage URL**
* Uploading a **file**
* Adding plain **text**
* Connecting via **REST API**, **YouTube**, or **GitHub**
After selecting and filling the input, click **Create** (4).\
You can add multiple sources to populate your data store.
Now you can import data by:
* Entering a **webpage URL**
* Uploading a **file**
* Adding plain **text**
* Connecting via **REST API**, **YouTube**, or **GitHub**
After selecting and filling the input, click **Create** (4).\
You can add multiple sources to populate your data store.
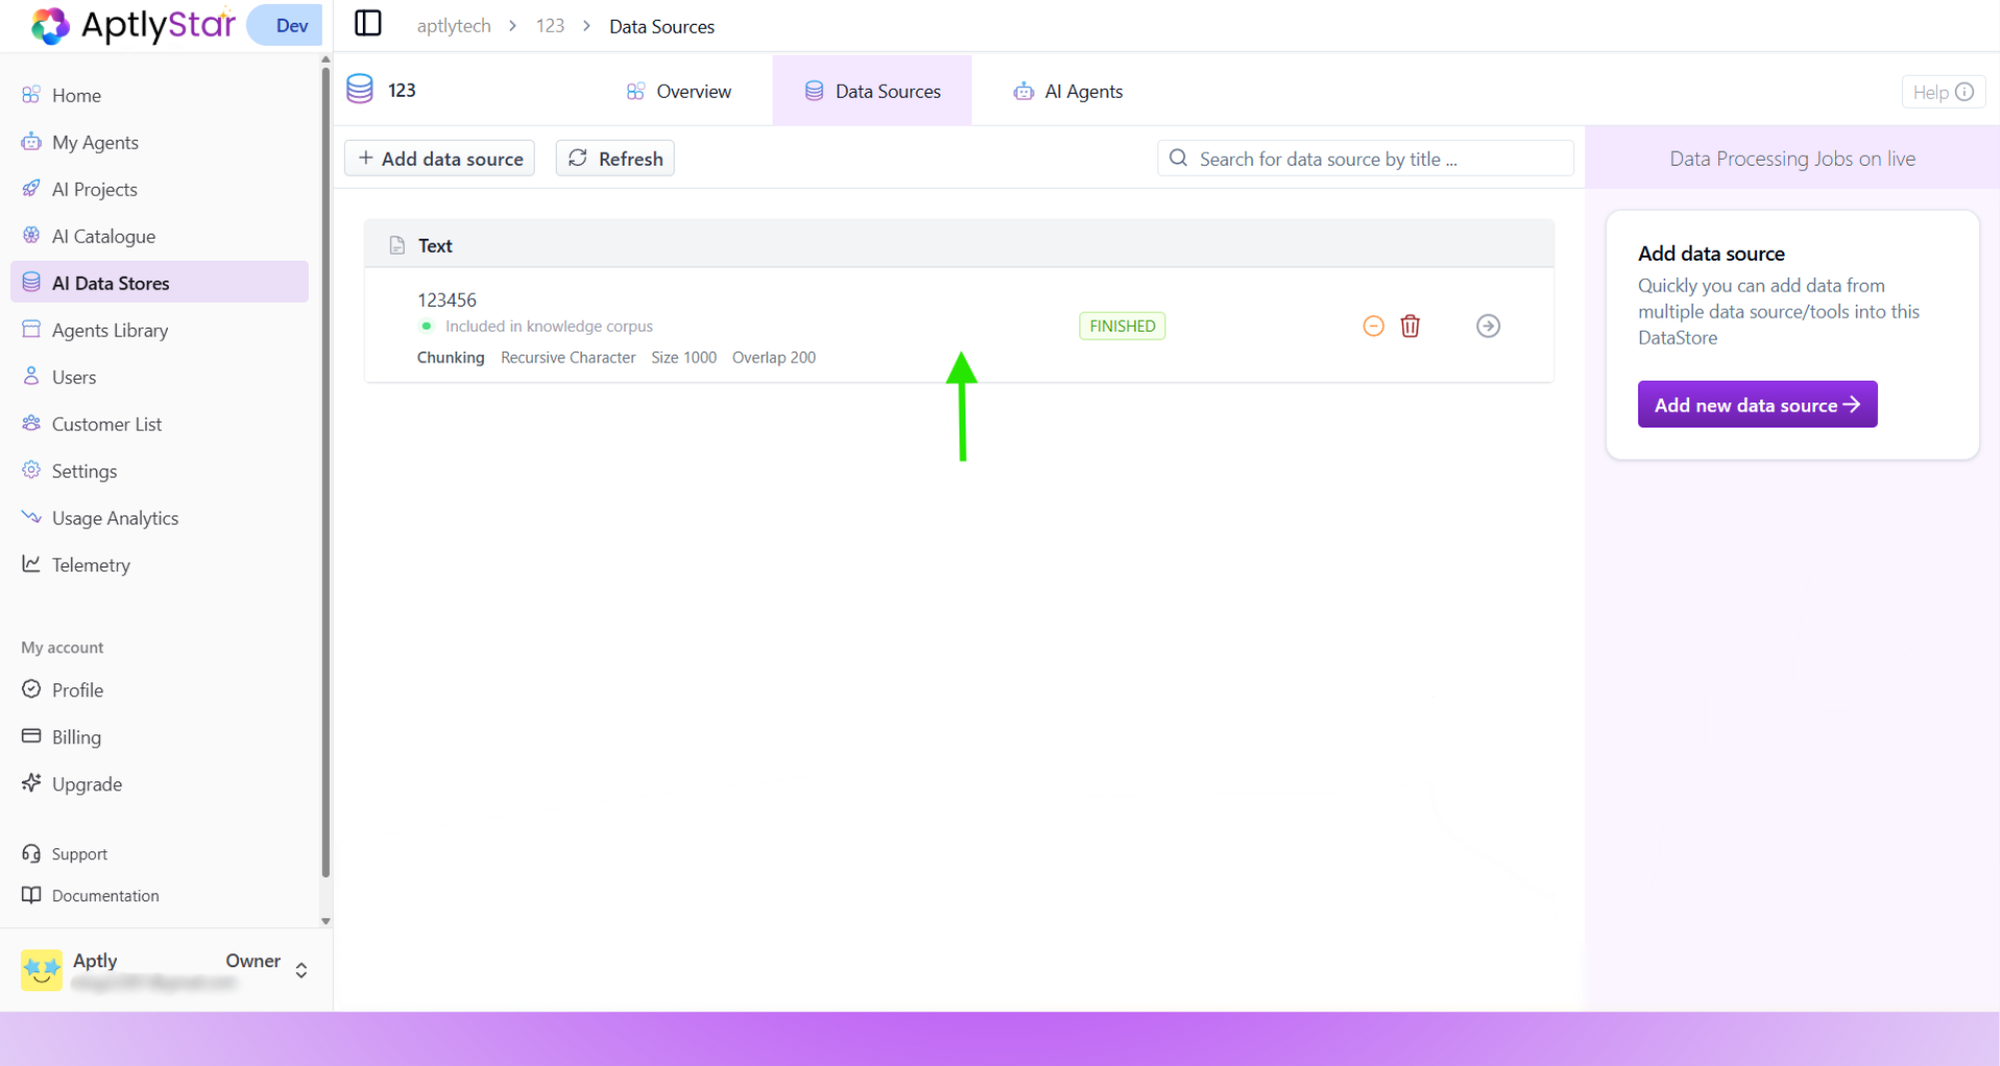
 Once completed, a **“Finished”** success message will appear.\
You can now see all imported sources listed in your datastore under the **Data Sources** section.
Once completed, a **“Finished”** success message will appear.\
You can now see all imported sources listed in your datastore under the **Data Sources** section.
 ***
## Re-finetune the existing data
The edit feature allows you to quickly correct mistakes, update outdated information, or refine the quality of your AI agent's knowledge base — ensuring more accurate and reliable responses.
Navigate to **AI Data Stores**, select your data store, and click on the **Data Sources** tab.
***
## Re-finetune the existing data
The edit feature allows you to quickly correct mistakes, update outdated information, or refine the quality of your AI agent's knowledge base — ensuring more accurate and reliable responses.
Navigate to **AI Data Stores**, select your data store, and click on the **Data Sources** tab.
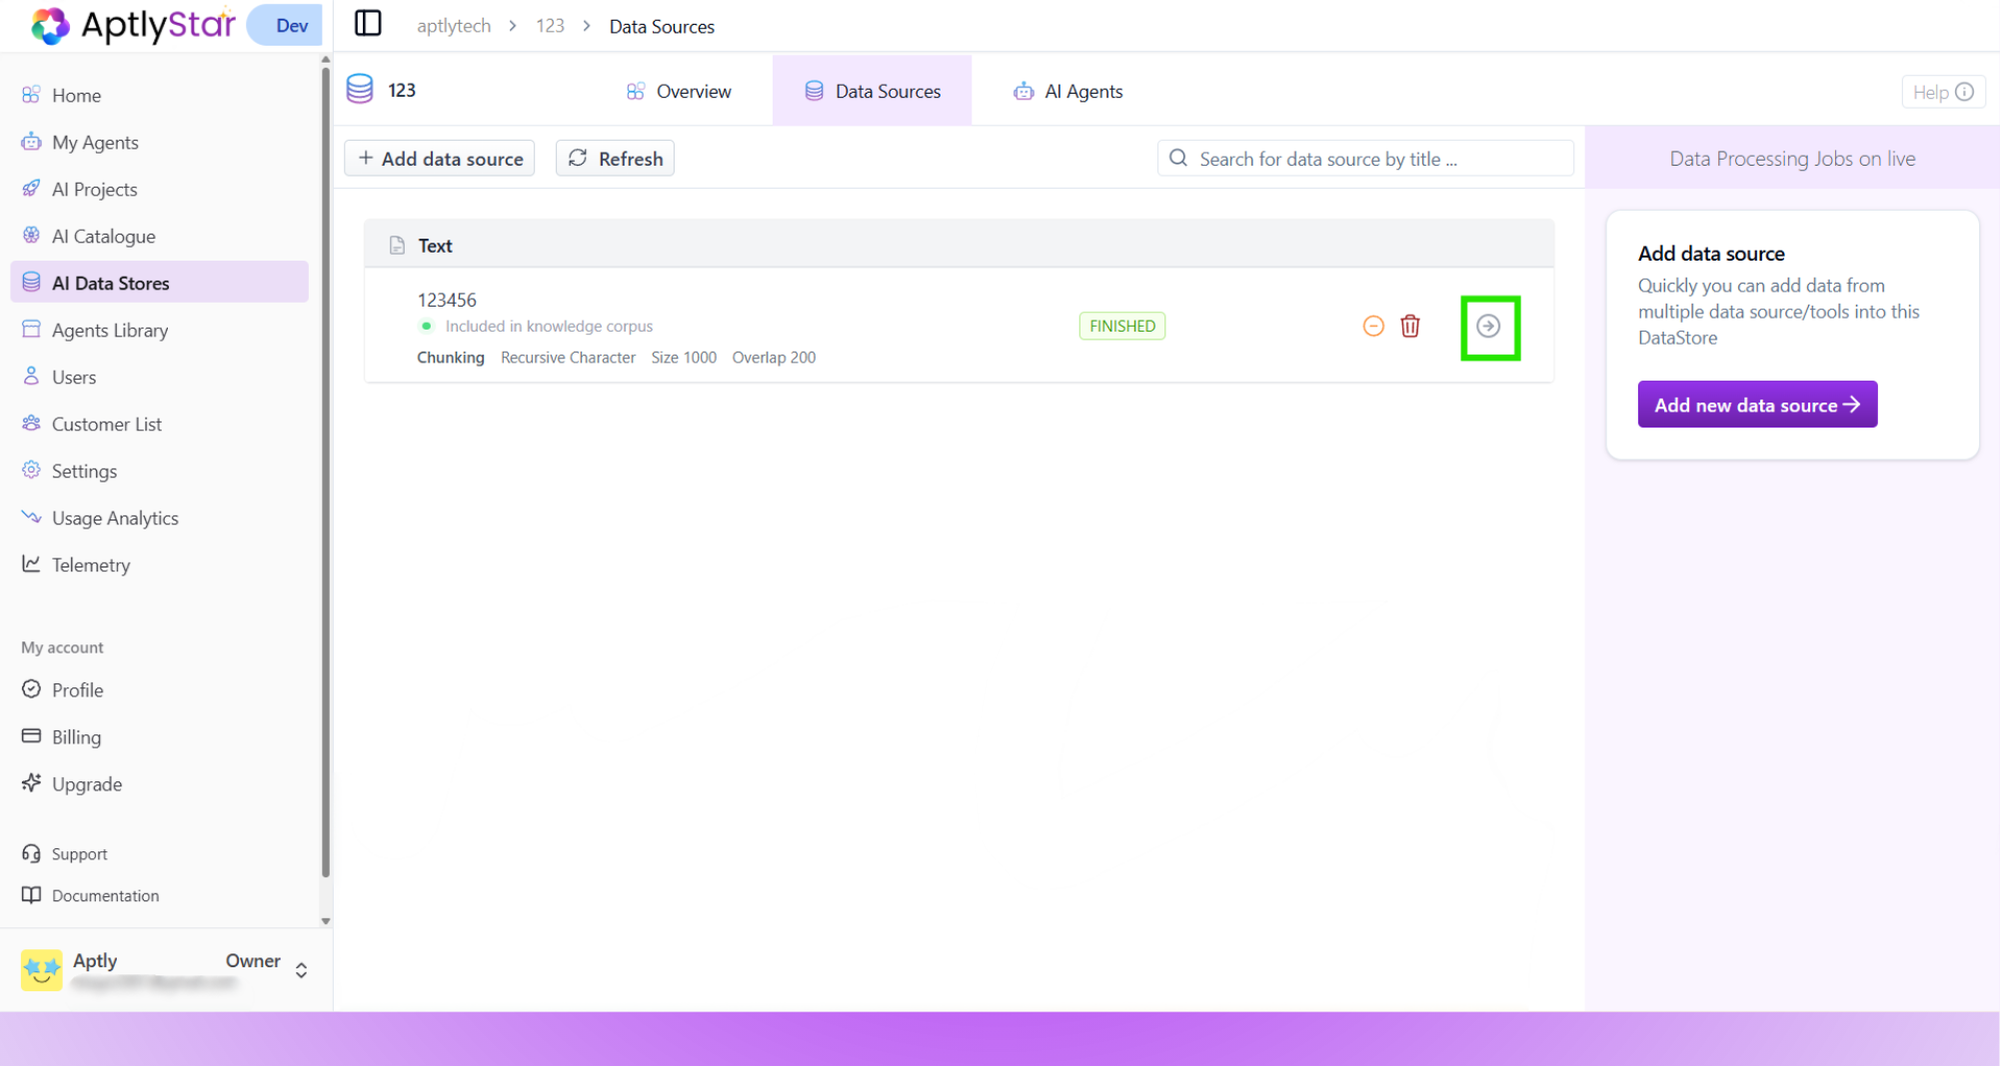
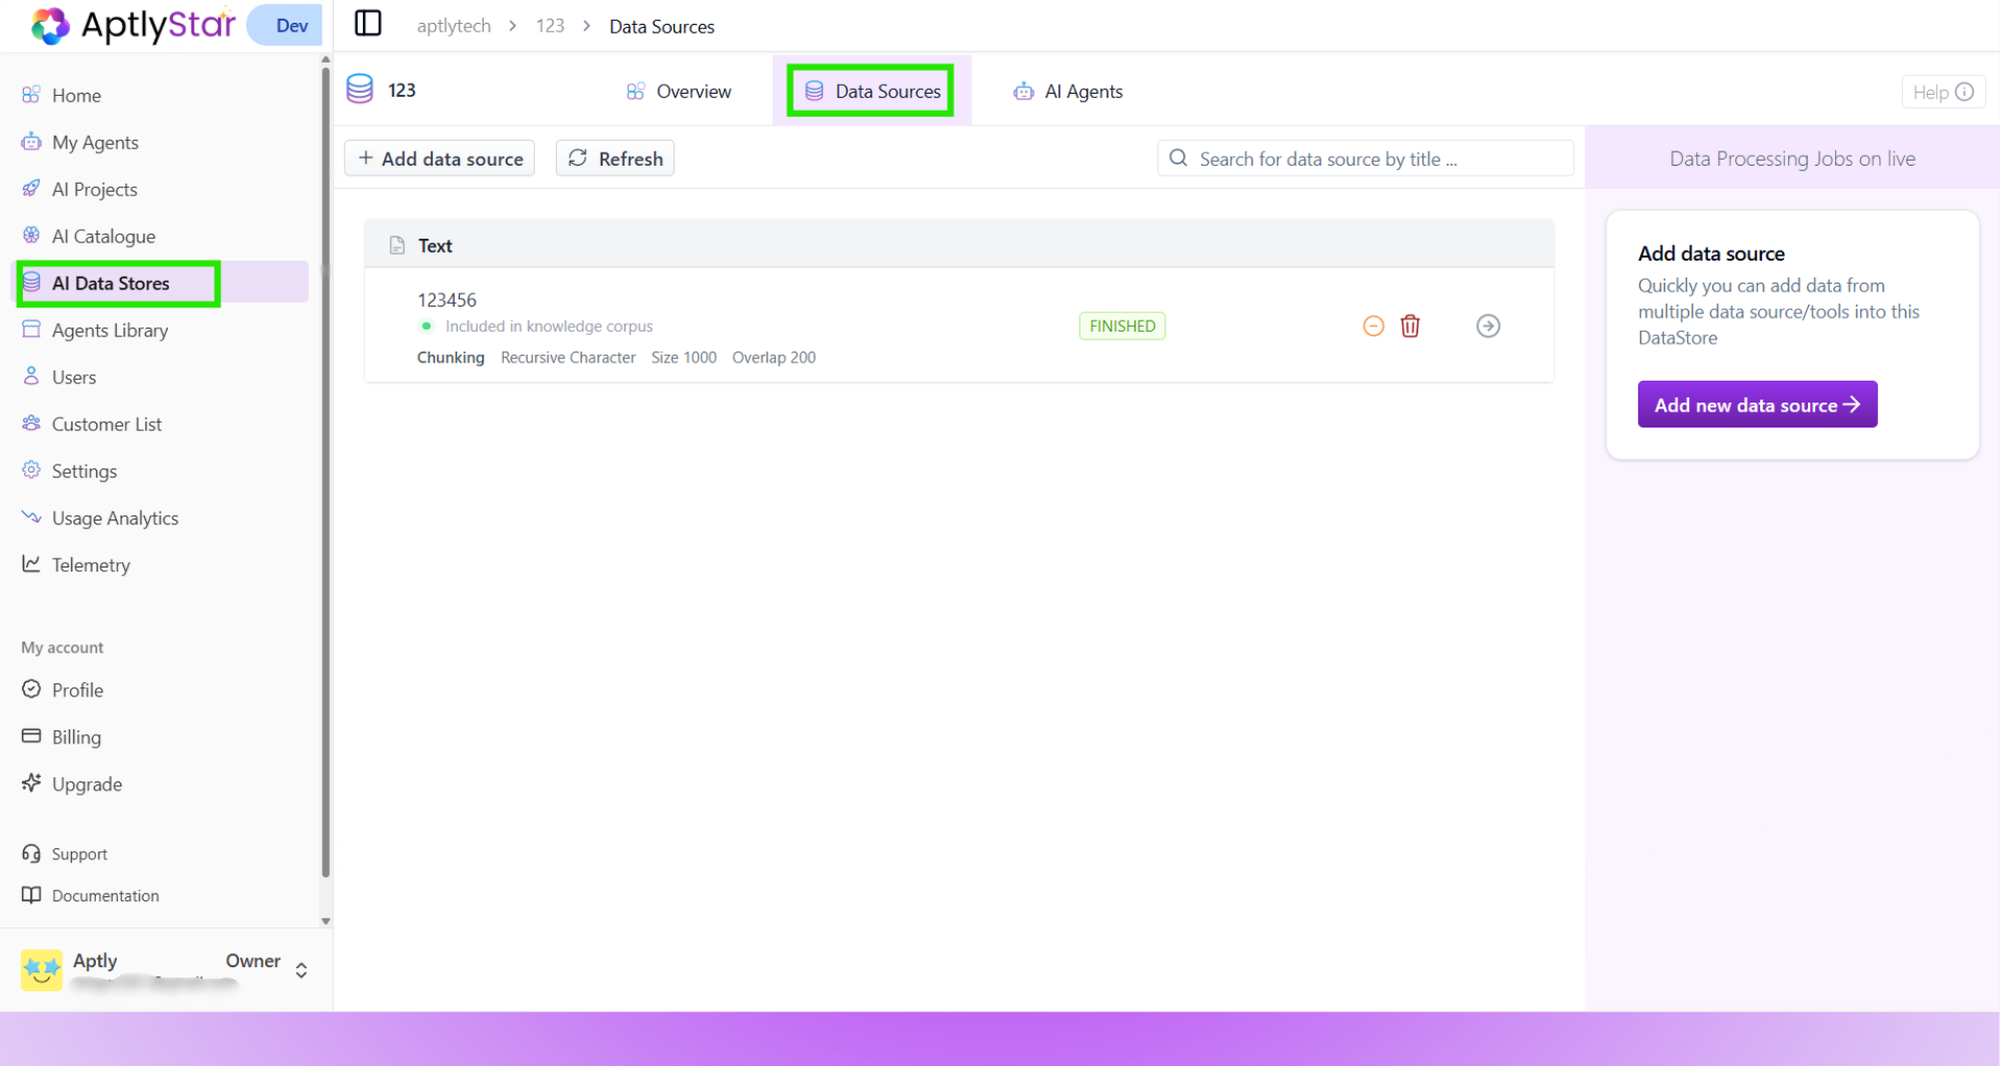 Find the data source you want to edit and click the **arrow icon** next to it to view its details.
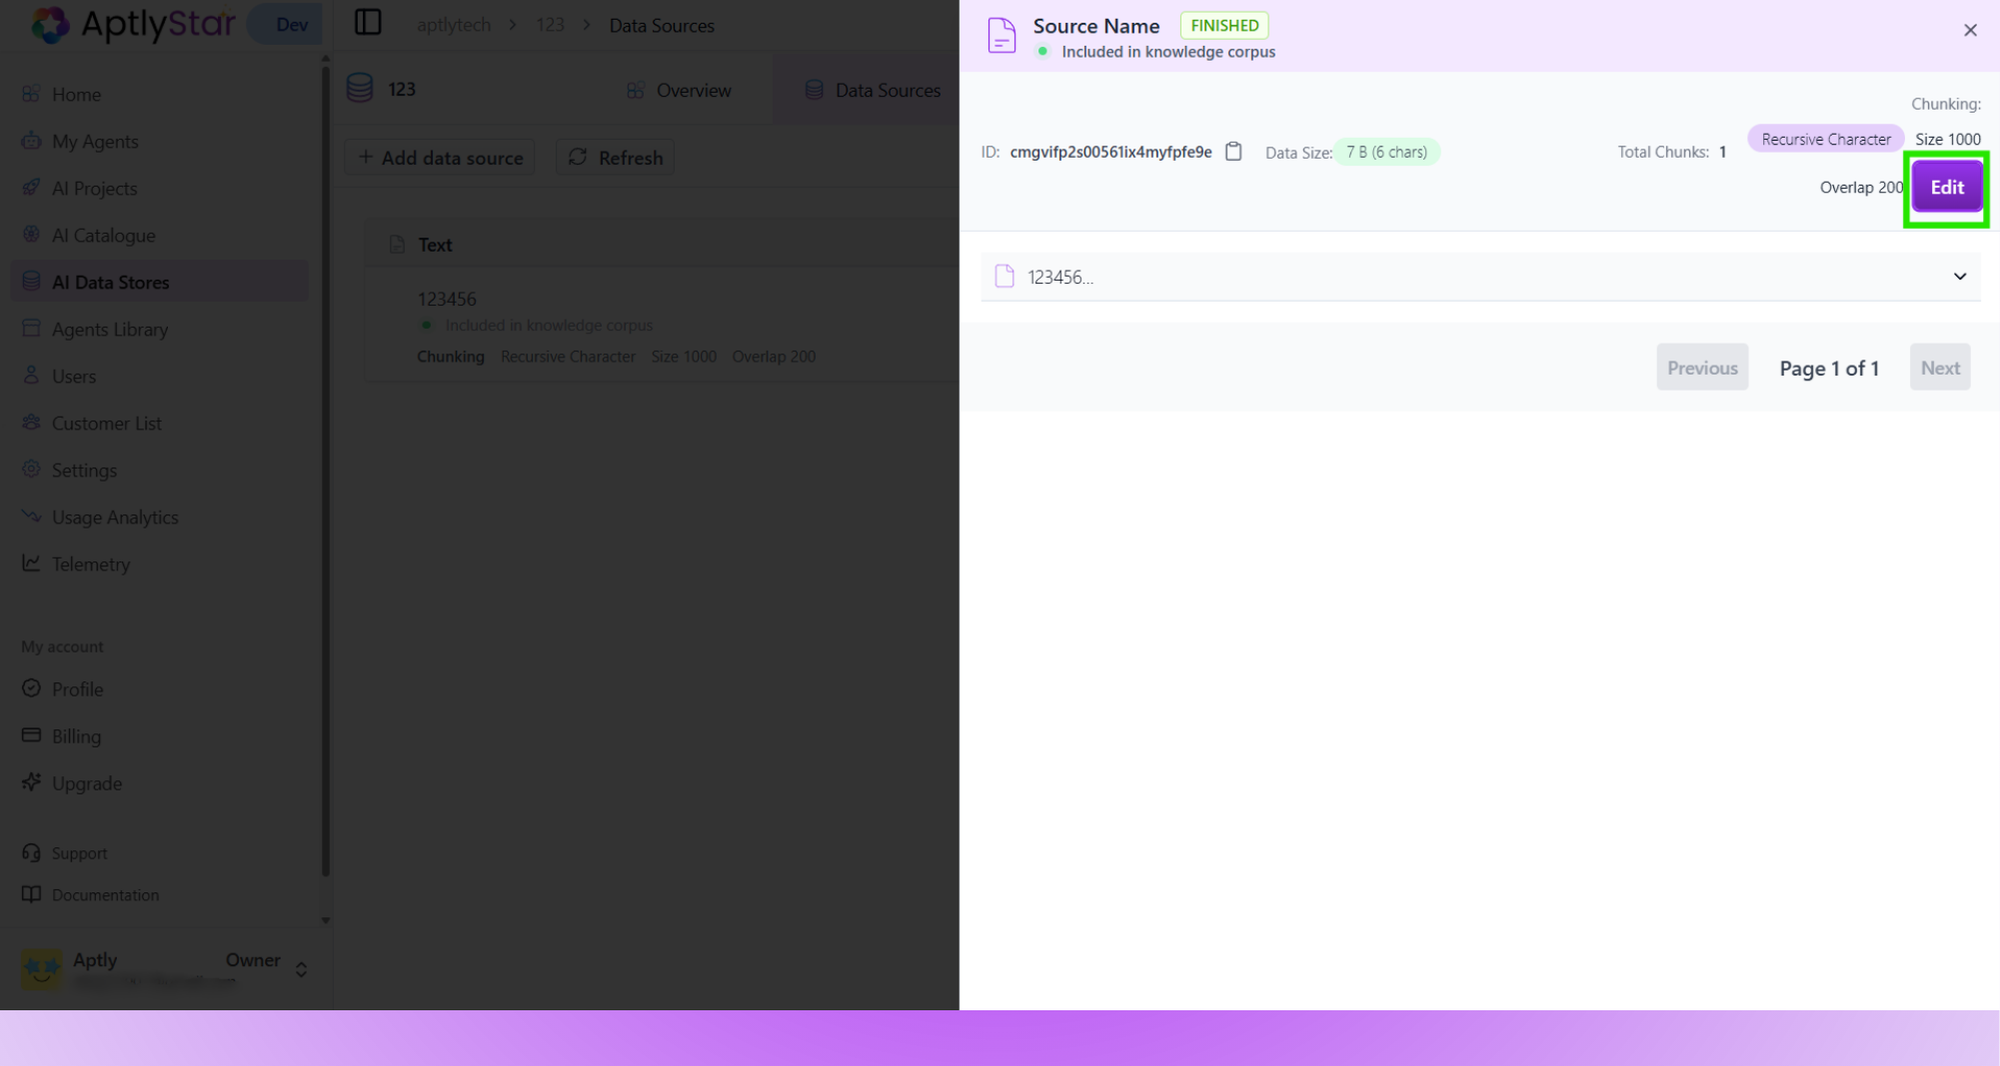
 Inside the detail view, click the **Edit** button to start modifying the content of the data chunk.
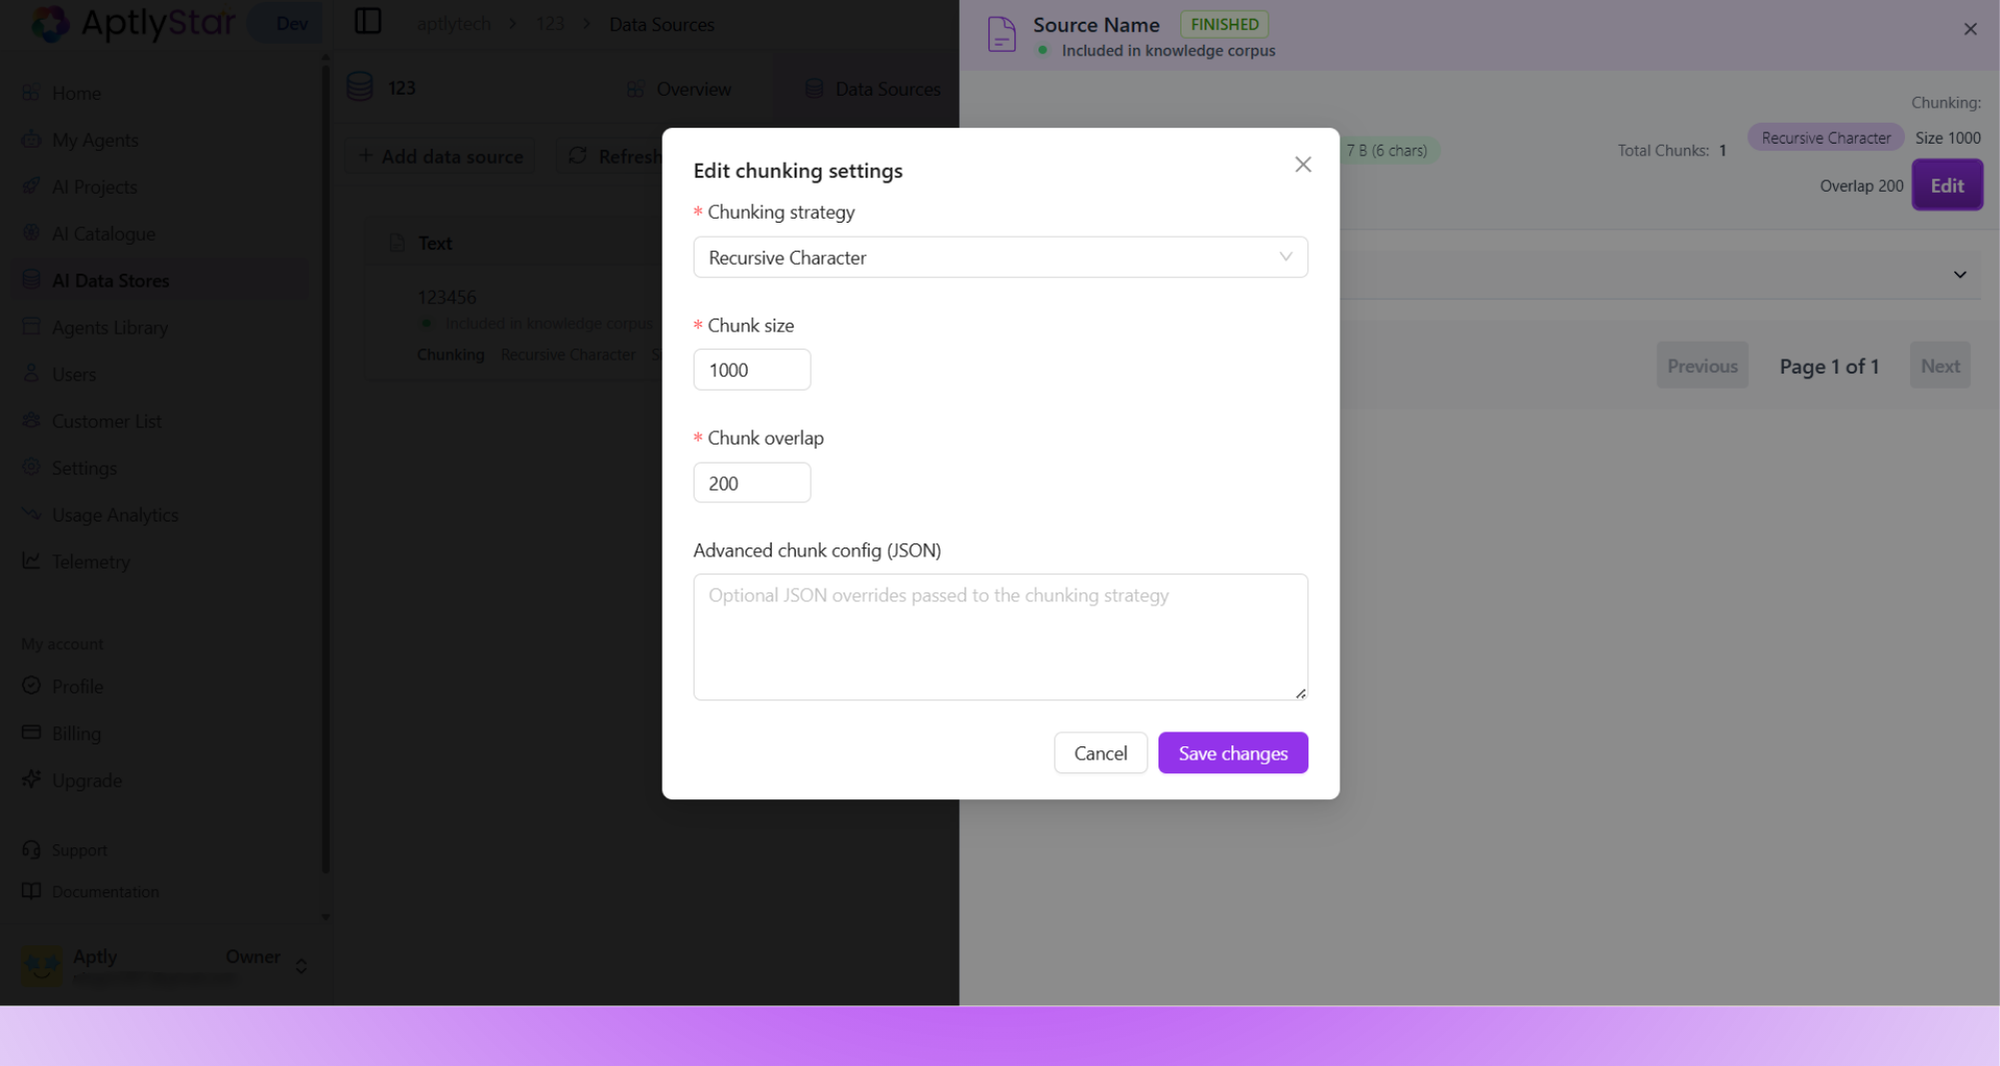
 Make your desired changes to the text and click **Save** to update the data source.
 > Want to link this data to a agent?\
> Head over to the [AI Agents guide](/ai-bots-console/ai-bots) for connecting your agent to data stores.
> Want to link this data to a agent?\
> Head over to the [AI Agents guide](/ai-bots-console/ai-bots) for connecting your agent to data stores.